


EComposer is #1 Drag & Drop Page Builder that helps you create professional Shopify websites without any coding. Provide 100+ design elements and 300+ templates, there’s no limit to what you can build. Install EComposer for free today and start building the store you’ve always wanted.
How to Add & Customize a Shopify FAQ Section in Minutes
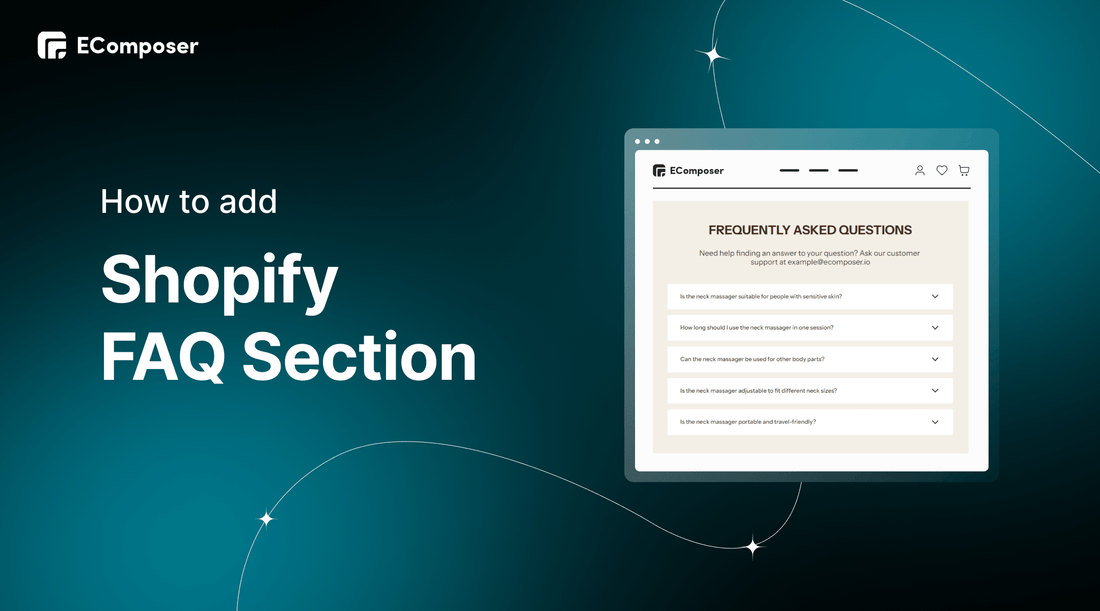
Table Of Contents
In today's competitive e-commerce landscape, providing clear and comprehensive information to your customers is crucial for success. An FAQ section plays a vital role in addressing common inquiries, improving customer experience, and boosting conversions.
In this blog, we are thrilled to share on how to add and customize a Shopify FAQ section in a matter of minutes. Before going into the details, make sure you have built an eCommerce store on Shopify!
What is a Shopify FAQ Section?

A Shopify FAQ (Frequently Asked Questions) section is a dedicated area on your Shopify store where you can provide answers to commonly asked questions about your products, services, shipping, returns, and other relevant topics. It serves as a resource for customers to find instant solutions to their inquiries, saving them time and providing a better shopping experience.
The FAQ section typically consists of a list of questions, followed by concise and helpful answers. It helps address common concerns and eliminates the need for customers to contact support or browse through multiple pages to find information. By including an FAQ section on your Shopify store, you can proactively address customer queries, improve customer satisfaction, and reduce customer support workload.
Benefits of Shopify FAQ Section

1. Enhancing customer experience and satisfaction
A well-designed FAQ section provides customers with quick and easy access to information, improving their overall experience. By addressing common questions and concerns upfront, you eliminate potential frustrations and help customers navigate the purchasing process more smoothly. This streamlined experience leads to higher customer satisfaction and increased likelihood of repeat purchases.
2. Reducing customer inquiries and support requests
An effective FAQ section acts as a self-help resource, empowering customers to find answers to their questions independently. By providing comprehensive and easily accessible information, you can significantly reduce the volume of customer inquiries and support requests. This frees up valuable time for your support team to focus on more complex issues and provide personalized assistance when needed.
[ecom-global-block]ecom-shopify-trial-block[/ecom-global-block]
3. Building trust and credibility with customers
A well-maintained and informative FAQ section demonstrates your expertise and commitment to customer service. When customers see that you have anticipated their questions and provided helpful answers, it instills confidence in your brand. This builds trust and credibility, making customers more likely to choose your products or services over competitors.
When customers see that your Shopify store has a detailed FAQ section covering various aspects of their shopping experience, it instills confidence in your brand. This demonstrates your commitment to transparency and customer satisfaction, which helps build trust and credibility.
4. Improving website navigation and usability
An organized FAQ section improves website navigation and usability by providing a dedicated space for customers to find information quickly. By categorizing questions and using clear headings, customers can easily locate the information they need, enhancing their overall browsing experience.
How To Create Shopify FAQ Sections Using Shopify default
Step 1: Sign up for your Shopify account
- If you don't already own a Shopify store, you need to sign up for Shopify (free)
- Log in to your online store using your registered email and password.

Step 2: Go to Online Store and Themes.

Step 3: In the card of your Shopify theme of choice, click the Actions button and select Edit code.

Step 4: Create a FAQ section by entering the code
- Open the assets folder and create a new asset and name it faq-style and make sure its extension is .CSS.
Once the file is created, copy the following code:
|
.faq-checkbox { position: absolute; opacity: 0; z-index: -1; } .tabs { border-radius: 10px; overflow: hidden; box-shadow: 0px 0px 12px #4141416e; } .tab { width: 100%; color: white; overflow: hidden; } .tab-label { width: 100%; display: flex; justify-content: space-between; padding: 1em; font-weight: bold; color: white; } .tab-content { max-height: 0; padding: 0 1em; background-color: white; transition: all 0.5s ease; color: black; } .tab-content p { margin: 0; } .faq-checkbox:checked ~ .tab-content { max-height: 100vh; padding: 1em; } Code language: CSS (css) |
- Save the file.
- Next, let’s create the sections/faq.liquid.
Open the sections folder and create a new section file and name it faq. Then, copy the following code:
|
<link rel="stylesheet" href="{{ 'faq-style.css' | asset_url }}" media="print" onload="this.media='all'"> <div class="page-width page-width--narrow"> <div class="faq-container"> <div class="tabs"> {% for block in section.blocks %} {% assign item = block.settings %}
<div class="tab"> <input type="checkbox" id="faq_checkbox_{{ forloop.index }}" class="faq-checkbox"> <label for="faq_checkbox_{{ forloop.index }}" class="tab-label button button--primary">{{ item.question }}</label> <div class="tab-content">{{ item.answer }}</div> </div> {% endfor %} </div> </div> </div> {% schema %} { "name": "FAQ", "tag": "section", "class": "spaced-section", "blocks": [ { "name": "FAQ Item", "type": "faq", "settings": [ { "type": "text", "id": "question", "label": "Question", "default": "Do you have a question?" }, { "type": "richtext", "id": "answer", "label": "Answer", "default": "<p>I have an answer</p>" } ] } ], "presets": [ { "name": "FAQ Block" } ] } {% endschema %} |
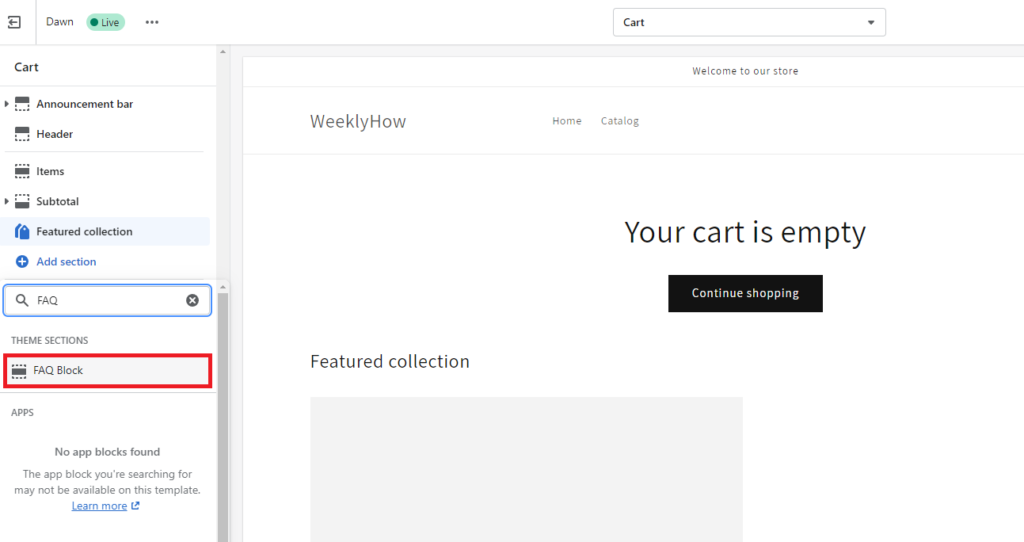
- Now, if you open your theme editor, you should be able to add FAQ blocks by clicking the Add section button like below.
- If you wish to add titles and descriptions to your FAQ blocks, you can update your faq.liquid to the following code.
|
<link rel="stylesheet" href="{{ 'faq-style.css' | asset_url }}" media="print" onload="this.media='all'"> <div class="page-width page-width--narrow"> <h1 class="main-page-title page-title h0"> {{ section.settings.faq_title | escape }} </h1>
{% if section.settings.faq_description %} <div class="rte faq-description"> {{ section.settings.faq_description }} </div> {% endif %}
<div class="faq-container"> <div class="tabs"> {% for block in section.blocks %} {% assign item = block.settings %}
<div class="tab"> <input type="checkbox" id="faq_checkbox_{{ forloop.index }}" class="faq-checkbox"> <label for="faq_checkbox_{{ forloop.index }}" class="tab-label button button--primary">{{ item.question }}</label> <div class="tab-content">{{ item.answer }}</div> </div> {% endfor %} </div> </div> </div> {% schema %} { "name": "FAQ", "tag": "section", "class": "spaced-section", "settings": [ { "type": "text", "id": "faq_title", "default": "Frequently Asked Questions", "label": "Title" }, { "type": "text", "id": "faq_description", "default": "Lorem ipsum dolor sit amet, consectetur adipiscing elit, sed do eiusmod tempor incididunt ut labore et dolore magna aliqua.", "label": "Description" } ], "blocks": [ { "name": "FAQ Item", "type": "faq", "settings": [ { "type": "text", "id": "question", "label": "Question", "default": "Do you have a question?" }, { "type": "richtext", "id": "answer", "label": "Answer", "default": "<p>I have an answer</p>" } ] } ], "presets": [ { "name": "FAQ Block" } ] } {% endschema %} |
Step 5: Save
Save the file to create any custom FAQ block

Add and customize Shopify FAQ Sections without Coding
EComposer - Landing Page Builder is a top-rated Shopify page builder app, one of the best apps available on the Shopify platform. This app helps businesses create stunning web pages that are sure to attract customers.
Using EComposer is incredibly easy, thanks to its intuitive drag-and-drop editor. This means that you don't need to have any coding knowledge to design beautiful pages. Additionally, EComposer comes with a vast library of premade templates and elements, so you can quickly customize a page without starting from scratch.
With EComposer's FAQ section, building an informative and visually appealing FAQ section for your Shopify store has never been easier. In this part, we will guide you on how to add and customize Shopify FAQ Sections using EComposer.
Step 1: Install and open EComposer
- In the Shopify App Store, search EComposer Landing Page Builder then click Add App
- To activate the use of the app, Install the app to your Shopify store.

- In the Dashboard menu, go to Apps, click EComposer Landing Page Builder.

Step 2: Start adding FAQ section
- Click Extra Builder in the right corner of the dashboard and select Section.

- Click Create Section and you are redirected to EComposer's editing page.

- Here, choose a template if you want to use EComposer's built-in template or choose Blank Template to create your own FAQ sections.

- Then, go to Setup page info and select Start Building.

Step 3: Customize FAQ section
Now you can start customizing your FAQ section:
* You can change the image and the text through content, design, and advanced functions by hovering over the section and then clicking the editor pen. You will carry out all the changes on the left sidebar.

* Additionally, you can use EComposer elements to add to your current section with a powerful drag-drop editor.

Step 4: Save and Publish
Once you are satisfied with your customization, in the right corner of the edit page you have options to save and publish.

Here is the result:

Tips for optimizing the FAQ section to improve user experience
1. Writing clear and concise questions and answers
This tip focuses on the importance of providing straightforward and easily understandable questions and answers in the FAQ section. Clear and concise content helps users quickly find the information they're looking for without confusion or frustration. By organizing the FAQ section in a logical manner and using simple language, users can easily navigate through the content and get their questions answered effectively.
2. Including relevant keywords for search engine optimization
Incorporating relevant keywords in the FAQ section can enhance its visibility in search engine results. By identifying and incorporating popular search terms related to your products or services, you can attract organic traffic to your FAQ page. Optimizing the content with appropriate keywords helps search engines understand the relevance of your FAQ section, making it more likely to appear in relevant search queries.
3. Testing the responsiveness and functionality of the FAQ section on different devices
This tip emphasizes the importance of ensuring that the FAQ section is responsive and functional across various devices, including desktops, tablets, and mobile phones. Testing the section's responsiveness ensures that users can easily access and navigate the content regardless of the device they're using. It helps provide a seamless user experience and prevents any issues related to layout, readability, or functionality.
4. Incorporating links or buttons to direct customers to related resources or support channels
Including links or buttons within the FAQ section helps users navigate to additional resources or support channels that can further assist them. By providing quick access to related articles, tutorials, or contact information, users can find comprehensive solutions to their queries. This enhances user experience by offering more options and avenues for obtaining the necessary information or support.
[ecom-global-block]ecom-shopify-trial-block[/ecom-global-block]
In a nutshell
In conclusion, adding and customizing a Shopify FAQ section can bring immense benefits to your store and customers alike. By providing quick and relevant answers to common inquiries, you enhance the overall shopping experience and foster customer satisfaction. Additionally, a well-crafted FAQ section can significantly reduce support requests, freeing up valuable time to focus on other aspects of your business.
We hope this blog helps you create great FAQ sections. If you want more information or want to learn more about EComposer, follow us at ecomposer.io or click on the message icon located in the right corner of the screen.
=================
Add EComposer Next generation page builder Here
Follow Us on Facebook
Join Official Community


1 comment