


The Guide To Customize The Shopify Registration Form
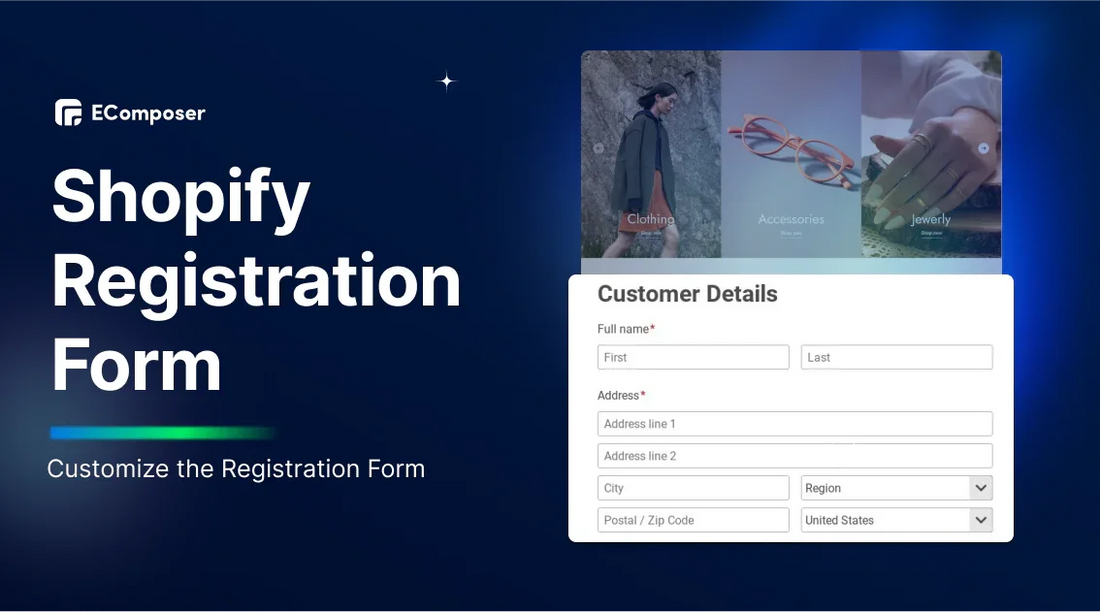
Table Of Contents
Customizing your Shopify registration form can significantly impact user experience, data collection, and conversion rates. This tutorial will show you how to customize your Shopify registration form with and without code.
Keep reading to find out!
How To Customize The Shopify Customer Registration Form? (With Code)
This guide is for users who are comfortable with coding and custom CSS. It offers more control over the form but requires coding knowledge. For beginners, consider the other options mentioned in the section below to avoid complexities.
Here's how to use the code to add more fields to your Shopify store's customer signup form:
Step 1: Access Theme Editor
Firstly, go to Online Store > Themes in your Shopify admin panel.
Then, click the "Customize" button to add fields to your desired theme.

Step 2: Select Customer Registration Template
Choose "Classic customer account" or similar customer-related options from the middle dropdown menu in the theme editor.

Then, select "Customer registration" or similar options.

Step 3: Hide Existing Form (Optional)
Click the eye icon next to "Registration" in the left vertical menu to hide the existing form (valid for clarity).
Step 4: Add Custom Liquid Section
Then select "Add section" to find and add the "Custom Liquid" section.

Next, copy and add the copy below to the custom liquid box. You can also copy it on this Shopify dev page.
|
{% form 'create_customer' %} {{ form.errors | default_errors }} <div class="first-name"> <label for="first-name">First name</label> <input type="text" name="customer[first_name]"> </div> <div class="last-name"> <label for="last-name">Last name</label> <input type="text" name="customer[last_name]"> </div> <div class="email"> <label for="email">Email</label> <input type="email" name="customer[email]"> </div> <div class="password"> <label for="password">Password</label> <input type="password" name="customer[password]"> </div> <div class="submit"> <input type="submit" value="Create"> </div> {% endform %} |
Here are the points that can be changed in this code:
- Class Names: The code uses class names like .first-name and .submit. You can modify these class names to style your form using CSS.
- Field Labels: Change the text within the <label> tags to customize the labels for each field.
- Field Names: Modify the name attribute within the <input> tags to change the data points collected from the form. Remember to keep the format customer[field_name].
- Input Types: While this code snippet shows text and password fields, you can change the type attribute within the <input> tags to other valid HTML input types depending on your needs (e.g., tel for phone number, date for date picker).

Step 5: Locate Code Markers for Adding Fields
Look for the following lines in the custom Liquid code:
|
{% form 'create_customer' %} {% endform %} |
The form fields are located between these lines. An empty line usually separates each field.
Step 6: Add & Customize Field Code
Refer to the next section for code examples of each field type.
Copy the relevant code snippet and paste it between the {% form... %} and {% endform %} lines.
Finally, customize the code snippet with your desired labels, names, and options.
The guide mentions adding a drop-down menu after the "First name" field. Refer to the next part for the code example and customization instructions for drop-down menus and other field types.

4 Categories Of Registration Form Fields (For Edit Code)
Understanding the different types of form fields available is crucial to customizing your Shopify registration form effectively. This section will outline four primary categories of form fields and provide code examples for each.
Text Field

Example of text field customer registration form.
Text fields are ideal for collecting brief, descriptive information where users can enter their responses. You can use them when you don't have predefined options and want users to input relevant text. Examples include:
- First Name
- Last Name
- Middle Name (optional)
- Company Name (optional)
- Address Line 2 (optional) (for apartment number, floor level, etc.)
- City
- Zip Code
- Phone Number (depending on your needs, you might consider a specific phone number format)
Here is the code of the text field example:
|
<label for="CustomerFormPreferredStyle">Preferred Style</label> <input type="text" id="CustomerFormPreferredStyle" name="customer[note][PreferredStyle]" placeholder="e.g., Casual, Sporty, Elegant"> |
Explanation:
- This code creates a text field labeled "Preferred Style" with an ID of CustomerFormPreferredStyle and the name of the customer[note][PreferredStyle].
- The placeholder text suggests examples of styles the customer can enter (e.g., Casual, Sporty, Elegant).
You can adjust the placeholder text to be more specific to your fashion store's offerings (e.g., "Bohemian, Minimalist, Streetwear").
Also, consider adding a character limit to the text field to control the amount of information entered.
Radio Buttons Field

Example of radio buttons field customer registration form.
You can use the radio buttons field when the customer can only select one option from a predefined set. Examples include:
- Gender: Male, Female, Non-binary (if applicable)
- Size Preference: Regular, Petite, Plus Size (assuming these are exclusive categories in your store)
- Subscription Preference: Yes, No
Here is the code of the radio button field example:
|
<label for="customerGender">Gender</label><br> <input type="radio" id="customerGenderMale" name="customer[gender]" value="Male" /> Male<br> <input type="radio" id="customerGenderFemale" name="customer[gender]" value="Female" /> Female<br> |
Explanation:
- The code creates a group of radio buttons labeled "Gender".
- Each radio button has a unique ID (e.g., customerGenderMale, customerGenderFemale) and the same name customer[gender]. This ensures only one option can be selected for gender.
- The value attribute for each radio button defines the data submitted ("Male" or "Female").
- The labels "Male" and "Female" describe the options for the customer.
You can add more options here, such as "Non-binary" or "Prefer not to say." For each additional option, just include a unique ID and the same customer[gender] name.
Checkbox Field

Example of checkboxes field customer registration form.
You can use the Checkboxes field when the customer can choose one or more options from a set. Examples include:
- Mailing list signup: "Yes, I want to receive emails about promotions and new products."
- Terms and Conditions: "I agree to the Terms and Conditions."
- Communication preferences: "Email" "SMS" (if customers can choose both)
Here's the code changed to a customer registration form example using a Checkbox:
|
<label for="customerAcceptsMarketing">Subscribe to our newsletter?</label><br> <input type="checkbox" id="customerAcceptsMarketing" name="customer[accepts_marketing]" value="1" /> Yes |
Explanation:
- This code creates a checkbox labeled "Subscribe to our newsletter?".
- The checkbox has a unique ID (customerAcceptsMarketing) and the name customer[accepts_marketing].
- The value attribute is set to "1" (you can customize this value as needed).
- The label "Yes" describes the customer's option.
You can adjust the label text to be more specific (e.g., "Sign up for exclusive offers and new arrival updates").
Drop-down Menu Field

Example of drop-down menu field customer registration form.
You can use the drop-down menu field when the customer needs to select one option from a limited set of predefined options. It's ideal for situations where you want to:
- Save space compared to listing all options individually (e.g., countries, states).
- Improve data consistency by restricting choices to specific options.
- Enhance the user experience by offering a clear selection method.
Here is the code updated to use a drop-down menu field in an example customer registration form:
|
<label for="customerCountry">Country</label> <select id="customerCountry" name="customer[address][country]"> <option value="">- Please select a country -</option> <option value="US">United States</option> <option value="CA">Canada</option> <option value="UK">United Kingdom</option> </select> |
Explanation:
- This code creates a drop-down menu labeled "Country".
- The <select> tag defines the menu.
- Each <option> tag defines a selectable option within the menu.
- The first option with an empty value (value="") allows the user to choose "Please select a country" as a default selection.
- Subsequent options have specific values ("US", "CA", "UK") that correspond to the chosen country. These values will be submitted with the form.
- The customer can select their country from the drop-down list.
There are choices that can be changed to fit your wants, like choosing a state within a country.
How To Edit The Shopify Customer Registration Form? (Without Code)
You can choose page drag-and-drop editors like EComposer Builder Page to customize fields to customer registration forms without using code. These applications support beautiful templates and many built-in elements.
Here is a step-by-step guide to adding fields to the Shopify customer registration form using the EComposer Builder Page tool:
Step 1: Install the EComposer Builder Page from the Shopify App Store. Currently, this app has 5/5 ⭐ (3,959+).

Step 2: After installing EComposer, launch it and select the "Start building" button to design your Shopify store.

Step 3: Choose the page type you want to build. We selected the "Contact Us" page because it has a built-in field format. Don't worry; we can edit it for a customer registration form later.

Step 4: Click on the contact form in the EComposer Builder Page editor. The "Editing Contact form" menu will appear on the right or left side of the screen. You can edit fields here.

Step 5: You can click "Add item" to select the other types of areas we discussed above.

Step 6: Once you've edited the fields, hit the "Publish" button to publish the new design to your Shopify store. Alternatively, press the "Save" button to save the draft.

Tip For Create The Shopify Customer Registration Form Effective
Based on research by Harvard Business, it's no secret that people are becoming more aware of how their personal information is used online. While they understand that sharing some data is necessary for a smooth shopping experience, they also want to protect their privacy.
That's why people are less likely to fill out the form if you ask for too much information. Find a good balance between getting useful information and ensuring customers have a good experience.
We recommend you should only be asked for these essential information:
- Basic contact information includes their name, email address, and a strong password.
- Shipping and billing details are necessary for processing orders.
- A phone number for order updates and customer support.
If you think extra information would genuinely benefit your business and customers, consider asking for the following:
- Demographic data such as age, gender, and location can help tailor your marketing.
- Preferences: Information about their style or product interests can help you offer personalized recommendations.
- Lifestyle details: Hobbies or special occasions can inspire targeted promotions.
The key is to find the right balance. By carefully choosing what information to collect, you can create a registration process that's helpful for your business and easy for your customers.
FAQs
How Do I Validate The Data Entered Into Shopify Custom Fields?
Validating data entered into Shopify custom fields is crucial for maintaining data quality and ensuring accurate customer information. Here are some common methods:
- HTML5 input types: Use appropriate input types (email, number, date) for basic validation.
- Shopify Liquid: Perform additional checks on the server side to ensure data integrity.
- Custom apps: Build custom logic to validate data using Shopify's API.
- Shopify Scripts: Utilize Shopify Scripts for advanced validation scenarios.
- Leverage built-in validation features: Many Shopify apps offer validation capabilities for custom fields.
- Simplify development: Offload validation logic to the app, reducing custom code.
By implementing effective data validation, you can maintain high-quality customer information and improve overall data management within your Shopify store.
What Happens To The Information If A Customer Deletes Their Account?
When a customer deletes their account, the associated information is typically removed from the platform. This includes:
- Customer profile: Name, email, contact information, and other details.
- Order history: Past purchases and related data.
- Shipping and billing addresses: Stored addresses associated with the account.
- Custom fields: Any additional information collected through custom registration fields.
It's important to know Shopify's data-keeping rules and how your business handles customer data to comply with data security laws like GDPR.
Can I Conditionally Show Or Hide Fields Based On User Input?
Yes, you can conditionally show or hide fields based on user input in your Shopify registration form. This enhances the user experience by making the form more relevant and efficient.
Key Takeaway
By customizing your Shopify login form to fit your business's needs, you can improve the customer experience, obtain useful information, and eventually increase sales. Using the guide and tips in this guide, you can create a registration form that is both useful and easy for people to fill out.
Remember that a well-made registration form is only one part of the puzzle. Read our other blog on design, customization, and marketing best practices to maximize your Shopify store.
Build your highest-converting page in 15 minutes


Blog Categories


0 comments