How To Apply The Discount Code To Your Shopify Cart Page?

Table Of Contents
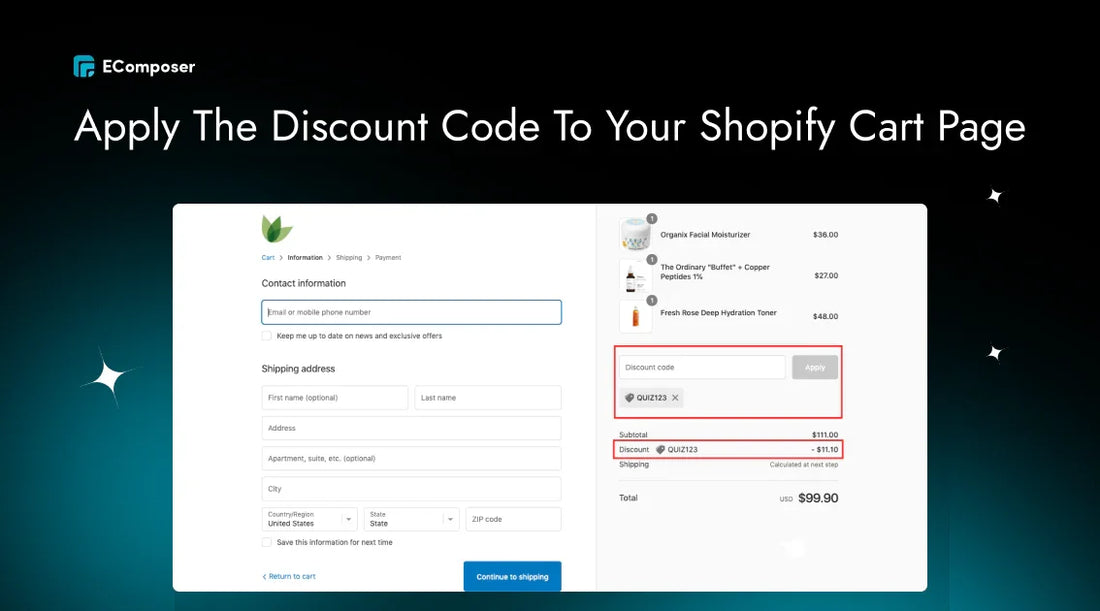
Applying a discount code directly to your Shopify cart page is a powerful strategy. By clearly displaying available discounts and their impact on the total order, you can encourage customers to complete their purchase.
This guide will talk about two ways to apply discount codes on the cart page, such as using third-party apps and doing it by hand.
Does Shopify Have A Built-In Feature To Add Discount Code To The Cart Page?
No, Shopify doesn't have a built-in way to add discount codes straight to the cart page because the checkout process is more important to the platform than cart features. But don't worry-we'll show you how to use a discount code on the Shopify cart page next.
Related posts:
- Top 14 Shopify App Discount Codes for Your Campaign
- How to Apply Shopify Discounts for Multiple Items?
How To Add A Discount Code To The Shopify Cart Page?
In this guide, we'll explore two effective methods to install this feature:
- Method 1: Using Third-Party Apps. The easiest way to add discount code functionality to your Shopify cart page is by using a third-party app.
- Method 2: Manual implementation (Advanced). If you'd rather do things yourself, we'll walk you through the steps of making discount links that can be shared and setting up an AJAX cart. This way takes more technical know-how, but it gives you more freedom and options.
Let's start!
Option 1: Using Third-Party Apps
The best way to use discount codes on Shopify's cart pages is to use third-party apps. We'll show you how to use the Dcart ‑ Discount in Cart app in this case. Scroll down to see our list of the best apps we think you should try.
Step 1: Open the Shopify App Store and install the Dcart ‑ Discount in Cart app.
Step 2: Then, you can select a theme to start the installation process. Their installation robot will activate the theme extension automatically.

Don't worry, and our app doesn't leave any garbage in your template files. All changes will be reverted on app uninstall.
Step 3: Then you can customize the discount block styles, including:
- Discount block style.
- Position.
- Discount block width.
- Submit button styles.
- Loading styles.
- Input field styles.
- Discount information block.
You can see the edit preview on the right.

Step 4: It's easy to add discount code features to the shopping cart page if you follow these steps and use third-party apps. Customers will enjoy shopping more, which will result in more sales.
Step 5: Click the Save button when you're done making changes. It might take twenty to thirty seconds to notice that a shop has been changed.
Here is an example of applying a discount code on the Shopify cart page using Dcart app

#1. Dr. Stacked Discounts On Cart
Most of the time, Dr. Stacked Discounts on Cart offers a stronger and more complete answer. It's great at handling complicated discount situations, automating discounts, and getting more sales through free shipping and discount code offers.
Rating in 2024: 4.9 / 5.0 ⭐ (252+).

Dr Stacked Discounts on Cart app on the Shopify App Store.
Key features:
- Accept discount codes on cart feature allows customers to apply discount codes directly on the cart page, saving them time and effort.
- Stack discounts allow customers to combine multiple discount codes or offers, maximizing their savings.
- Automatically apply multiple discounts, simplifying the checkout process.
- The discount code promotion widget displays available discount codes sitewide, increasing visibility and usage.
Pricing: Contact them for details.
#2. Dcode ‑ Discount Codes In Cart
Customers will buy more if you offer discounts and special deals. Customers can easily use these deals with the Dcode app, which leads to more sales and results.
Rating in 2024: 4.5 / 5.0 ⭐ (218+).

Dcode app on the Shopify App Store.
Key features:
- Customizable discount box to create a visually appealing and customizable discount box on your cart page, making it easy for customers to find and apply coupon codes.
- Easy installation and setup, requiring minimal technical expertise.
- Multiple discount box support on various pages of your store, tailoring your offers to different customer segments.
- Reduced cart abandonment to apply coupon codes, the app can help reduce cart abandonment rates.
Pricing: Pro plan with $4.99/ month.
#3. Dcart ‑ Discount In Cart
If you've noticed a significant number of customers leaving their carts without completing the purchase, the Dcart app can help. By providing a clear and easy-to-use coupon code input field, it encourages customers to apply for discounts and complete their purchases.
Rating in 2024: 4.8 / 5.0 ⭐ (152+).

Dcart app on the Shopify App Store.
Key features:
- Simplifies the process of applying coupon codes or discount combinations directly on the cart page.
- The coupon code input field is prominently displayed, making it easy for customers to find.
- Allows customers to use multiple discount codes or offers simultaneously, maximizing savings.
- Offers flexibility by allowing coupon code application on both the full cart page and the mobile-friendly cart drawer.
- Discount share links allow customers to share discount codes with friends and family through unique share links.
Pricing: Pro plan with $5.99/ month.
Option 2: Shareable Discount Links & Create Ajax Call To Checkout Page
A discount code that people can share can be used on landing pages, in emails, and on social media. People can use the default shared link to go to the home page of your store, to a certain collection, or to a specific product page. The link's discount code will be immediately applied to your customer's next checkout cart or any open carts they may have.
Step 1: From your Shopify admin, click Discounts.
Step 2: Click the name of the discount that you want to promote. Or, click the "Create discount" button if you don't have one.

Step 3: Click Promote, then select Get a Shareable link.

Step 4: Choose the page, product, or collection you want the link to open.
The choices you can link to depend on the goods or sets that are discounted for you at the moment.
Step 5: Click the Copy link to copy the shareable link to your clipboard. Finally, click Close.

Step 6: Then you can add a get cart (via AJAX) to the side cart (prior to checkout).
Ajax cart, also known as Ajax add-to-car, lets people put things in their buying cart without having to reload the page. Using AJAX calls, you can set up your own discount rules, like tiered discounts or deals for certain products.
We have a detailed tutorial on how to easily add a Shopify Ajax cart to your store.
NOTE: Sharing discount links only works for current deals. You must generate and store a discount code for the goods or collections you wish to connect to before creating a shared discount link. If you provide numerous discounts on a product, your shared discount links use the latest discount.
Tips For Showing Discounts On Your Shopify Cart Page
A strong approach is to show deals right on your Shopify cart page. You can get people to finish their buy by making it clear which deals are offered and how they will affect the total amount.
This part will talk about some useful tips to make your discount show work better and get more sales.
Real-Time Discount Calculation
It's no secret that getting new customers can be tough. Most people who visit your site for the first time won't buy anything. And let's face it: people only look at your site for 13 milliseconds before they decide what they think about it. This means that making a good first impression is more important than ever.
So, how can you make a good first impression? One way is to offer a little something extra: a discount. It's like a warm welcome to your store.
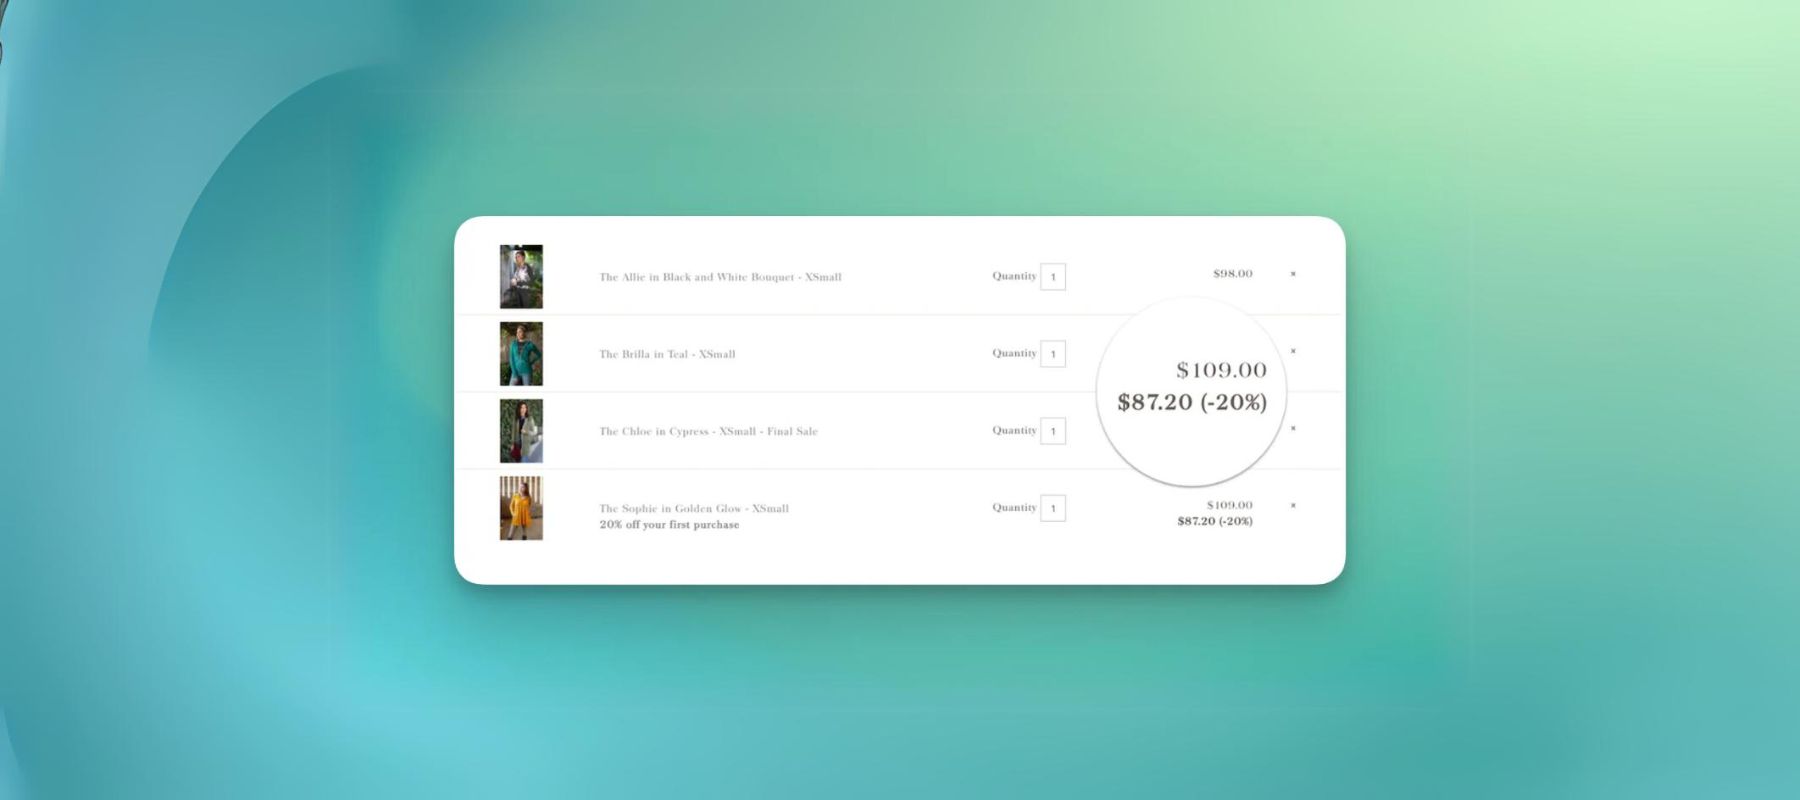
Look at the well-known jacket brand Evy's Tree. They use Shopify Scripts to figure out savings right away, leaving out sale things automatically and showing the customer the lowest price.

NOTE: Stores with the Shopify Plus plan are the only ones that can use Shopify Scripts and the Script Editor app. The Shopify App Store no longer has the Script Editor app that you can download.
The Shopify Scripts will be taken away on August 28, 2025, and they will no longer work. Before this date, you should move your current scripts to Shopify functions.
Add Discount Progress Bar
A discount progress bar is a visual reward that makes people want to spend more so they can get free shipping or savings. This tool can have a big effect on your sales and how happy your customers are.
Here are how to add it:
Step 1: Set Up A Discount
The first step is to create a discount that will be used in conjunction with the progress bar. If you don't know how to do it, read our guide to create a discount on Shopify.
Step 2: Add Progress Bar Code To Your Cart Page
Next, you need to incorporate the discount progress bar into your theme's cart page. Navigate to Admin > Online Store > Themes > Edit Code.
Then, open the main-cart-footer.liquid file within your theme.
Insert the following code to create the progress bar:
|
{% when 'progress_bar' %} {% assign discount_label_color = block.settings.border_color | cart_color_accent %} {% assign discount_label_background = block.settings.discount_label_background %} {% assign total = cart.total_price | divided_by: 100.00 %} {% assign difference = 1600 | minus: total %} <div class="progress-bar"> {% if difference <= 8 %} <div>Applicable for <b>free shipping.</b></div> {% else %} <div>Add <b>{{ difference }}</b> More for <b>Get Discount.</b></div> {% endif %} <div class="progress-bar_wrapper"> <progress id="progress-bar" value="{{ total }}" max="{{ 1600 }}"></progress> </div> </div> |
This code snippet is likely part of a Shopify theme template, specifically for displaying a progress bar and related messages based on the cart total.
Step 3: Add Schema For Customization Settings
Add the following to the same file to make it flexible:
|
{ "type": "progress_bar", "name": "progress_bar", "settings": [ { "type": "color", "id": "border_cart_color_accent", "label": "Progress bar fill color", "default": "#188043" }, { "type": "color", "id": "discount_label_background", "label": "Progress bar background color", "default": "#e6f2ec" } ] } |
This code appears to be a JSON object representing a "progress bar" element with specific settings.
Type and Name:
- type: "progress_bar" - Indicates that this is a progress bar element.
- name: "progress_bar" - The name of the element.
Settings:
This section contains two color settings:
- border_cart_color_accent: Sets the fill color of the progress bar.
- discount_label_background: Sets the background color of the progress bar label.
This JSON object is likely used within a larger configuration file or system to define the appearance and behavior of a progress bar element in a specific context, such as a web application or a design tool.
Step 4: Styling Your Progress Bar
You need to use CSS to change the progress bar's color, height, and width. You can add CSS to base..css or the same file:
|
.progress-bar_wrapper { position: relative; } .progress { width: 100%; height: 20px; border-radius: 25px; background-color: discount_label_background; transition: width 300ms ease; } progress[value]::-webkit-progress-bar { border-radius: 25px; background-color: discount_label_background; } progress[value]::-webkit-progress-value { border-radius: 25px; background-color: discount_label_color; } /* Firefox specific styling */ progress[value]::-moz-progress-bar { border-radius: 25px; background-color: discount_label_color; } |
Step 5: Add Block On Cart Page
Then, navigate to Admin > Online Store > Themes.
After that, pick a theme and click Customize. Add the block to the cart structure.

Finally, save and preview your Shopify cart page.

Key Takeaway
It's easy to add discount code features to the shopping cart page if you follow these steps and use third-party apps. It will be easier for your customers to shop, which will result in more sales.
To learn more about Shopify tips and tricks, visit our blog.


0 comments