


How to Build & Customize Shopify Password Page
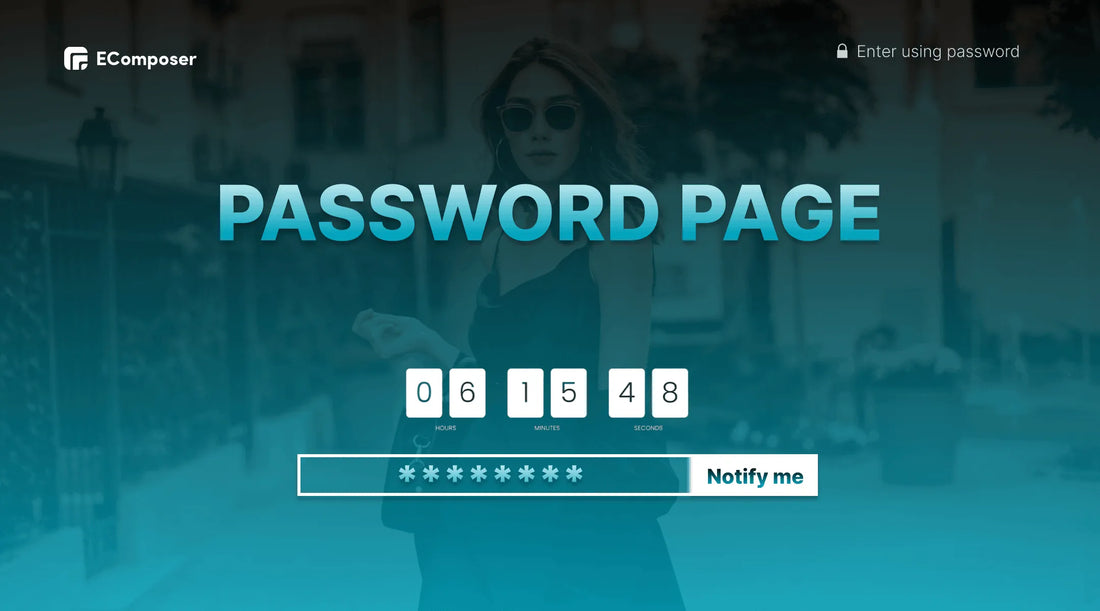
Table Of Contents
You should not skip this blog if you have a product coming soon, your online store is under maintenance, or you want to create a Password Page for your Shopify stores but you don't know how to start with no coding knowledge. This article will provide you with complete information on how to quickly and easily create, customize, and edit Password Page. Let's get started.
What is a Password Page?

(image source: EComposer Password Page layout)
Password page is a page where everyone visiting your online store must enter a password. You can give your consumers the password to your online store if you want them to be able to access it.
[ecom-global-block]ecom-shopify-trial-block[/ecom-global-block]
When do you use a Password Page for your online Shopify store?
Launching

(image source: EComposer Password Page layout)
Generally, before publishing or launching a new product or store opening, you have to prepare special promotions for customers. The priority customers will use a password to enter the store before others visit the online store first.
Besides, you also can use it for testing and checking the operations of the online stores before launching such as product images, loading speed, special programs, etc.
Maintenance

You can use the Password Page to momentarily suspend your business during the maintenance period. This is only a temporary solution though, as keeping this feature active for an extended period of time will harm your Shopify online store's SEO.
Why should you use Password Page?
Promote your brand image
Your Password Page gives potential customers a sneak peek at what is coming from your company or product. This is a fantastic chance for promotion. Visitors can immediately learn about your website or product before purchasing by including a distinctive brand logo, image, product statement, or description of added value on your page.
Attract enquiring buyers
Your Shopify Password Page will pique customers' interest and lead them to want to know more about your stores.
This is another method of generating leads from them. Once your store is open, customers who are curious about your brand or product are more likely to come back.
Accumulate consumer data
It may be possible to leverage the Shopify Password Page as a lead generation tool. As soon as your Shopify store is up and running, it can help you start gathering and building your client email or phone number list. This information is crucial if you want to sell your new brands and items because it can convert potential visitors to future buyers.
Get users’ feedback

Designers occasionally include a straightforward form on the Password Page to collect user feedback for improving the product or service. This enables you to fine-tune and accelerate your goods while assisting you in gathering market input before launching your product.
How to create Password Page on Shopify
There are two ways to make a completed Password Page for your online store:
Using Shopify’s function
Step 1: Activate Password Page
- From the Dashboard menu, click on “Online Store”, choose Preferences, scrolling to the Password protection section.
- Enter the password you'll use to grant customers access to your online store in the Password field. Use a different password to access your admin account
- Enter the message you want to appear on the Password Page under Message to your visitors. Leave this area empty if you don't want to display a message.
- Click Save.

Step 2: Customize Password Page
- From Online Store Menu, choose Themes, in Current Themes section, click Customize

- At the top center, choose Password Page in drop-down menu, Others section

Now you can adjust the information on the Password Page by yourself through the editing section with Password header, Email sign-up banner and Password footer.

- Password header: You can add your logo image and custom logo width here.

- Email sign-up banner: You can change the welcome words or message to your customers in this section. Moreover, you also can change the background image to suit the store’s image.

This is the final part of Password Page, you will custom the color scheme in this section.

Step 3: Save and publish - click Save in the top left corner.

Using EComposer Page Builder
EComposer is a landing page builder which provides optimal website solutions for merchants who own an online store on Shopify. However, the merchants have limited coding knowledge. Thus, EComposer helps them build perfect online stores easily just by drag and drop.
In this blog, before starting to create a unique Password Page with more functions, let’s install EComposer - Landing Page Builder for your Shopify stores here.
Click Add app, in Shopify admin, click Install apps to authorize the use of the app.

Step 1: Open EComposer
In the Dashboard menu, go to Apps, click EComposer Landing Page Builder.

Step 2: Start building Password Page
- In the EComposer Interface, choose the Password Page in the drop-down of Actions section.

- Click Build Password Page

- Select Password Page template
In EComposer, the Password Page is called Coming Soon Page. Hence, go to Coming Soon section and choose your suitable free template from EComposer
You also can Preview the layout before starting to build one.

- Choose start building

Step 3: Set up Page info and customize Password Page
Now you can start designing your Coming Soon Page. EComposer will offer a lot of components you'll need to add to the Coming Soon Page while you're developing it in the “Elements” section like Heading, Countdown, Text, Newsletter, Social, etc.

You also can adjust others components like background color or image for your Password Page.

Additionally, EComposer with a lot of features allows you to edit content as well as images of each part in the editing section via layout, design, and advanced categories.

Step 4: Save and Publish
Click Publish at the top right corner, choose Save and Publish and then you will see the result.

Please look for detailed guides in How to create a Password/Coming soon page here.
How to edit Password Page on Shopify
Add Email Subscription to Shopify Password Page
The email form for updates about your stores and items will be quickly filled out by customers who are interested in your stuff. Discounts and pre-launch offers will also entice and draw in new clients for your business.
By using EComposer Password Page layout, it has already had a sign-up email banner on the page. You just need to click on this part and change the information and customize as you like.

Add logo to Password Page Shopify
A fantastic method to individualize your store and increase brand recognition is to include your logo on your Password Page. This is how you do it:
In your Password Page, click Password Header, select logo image and custom logo width.
![]()
Your logo will be located at the top left corner like in the picture below.
![]()
Click save to complete the process.
Change Shopify Password Page Background Image
A wonderful method to give your store some flair is to add a background image to the Shopify Password Page. Although any image is acceptable, you should pick one that is pertinent to your business or product.
- Background image size: 1600x1000 (recommended by expert)- How to change/ add Password Page background image
In the Password Page editing interface, click the email sign-up banner, choose change or edit to add/change or adjust any features of the background image here.

Click Save and see the new background image.
Using EComposer Page BuilderIn the editing section, design category, you can see background options, click on the current background image, select a new one and choose “select” to apply the new image.

Remember after changing the background image, save click at the top right corner to update the new change.
Add Shopify Countdown Timer on Password Page using EComposer
By using a countdown timer, you may make a product appear more urgent to potential customers by letting the clock run down. The fact that time is of the essence will in some way influence their purchase choice.
You should advise customers that they must make a decision in more than one or two hours if they want to receive greater rewards when using countdown timers and urgency.
Most EComposer Password Page templates set up a countdown timer already.
To change the time, you can go to the Password Page editing, click the Countdown section, then the editing countdown window will appear. You will adjust the time, information in the content or customize in the design category. Click Save to apply successfully.

Remove “Powered By Shopify” from Password Page footer
What does “Powered By Shopify” mean?
The "Powered by Shopify" tagline will appear in the footer of any online store you create on the Shopify platform. This informs visitors that the Shopify platform was used to create and power the website. It indicates that Shopify owns the system that powers the website.
This tagline does not affect your store; however, it is like a company brand logo that appears on every store page. Hence, in the long term, if you want to personalize all the information on your online store in Shopify, you will need to remove this tagline from your pages. In this section, there is an extremely simple without coding knowledge that you can apply quickly, it only takes about 1 minute. Follow the detailed instructions below.
How to remove “Power by Shopify” on Password Page
Step 1: Access your Online Store
The first step in this process is very simple. From your Shopify admin, go to the themes of your online store, and then select addition from the drop-down menu beside the customize button of the current theme.

Step 2: Click to choose “edit language” option

Step 3: Scroll down until you see the section “powered by shopify html”.
In this one, you delete the information in the box.

Step 4: Click save to complete and see your result.

Remove Password Page on Shopify
Although Password Page brings benefits to your store especially when you launch a new product, grand opening or maintenance, you still have to consider its drawbacks in customer experience. If you want to remove it on normal days, this part is for you.
Step 1: From your Shopify admin, go to the Preference of your online store
Step 2: Scroll down to the Password Protection section, disable “Restrict access to visitors with the password” by ticking the box.
Step 3: Click Save in the top right corner to change the status.

Note: If you cannot remove the Password Page, it is likely that you are on Shopify Trial plan or Development stores. You can only remove the Password Page in Shopify paid plans or transfer the store to a merchant.
[ecom-global-block]ecom-shopify-commerce-coach-block[/ecom-global-block]
Final Takeaways
Password Page is a marketing tool in your campaign because this is the first customer touchpoint in your online platforms. Hence, all of the information and images are designed to optimize the customer experience. The things below are some tips that you can apply to get a stunning and effective Password Page for your Shopify stores.
Password
There is no restriction on Passwords on Shopify Password Page, you can set it whatever you want. To utilize the effectiveness of the password, remember that:
- Stick it with your brand and product
- Keep it short and easy to remember
- Be creative to impress your customers and attract them
Background Image
Upload high-quality background images, use your brand image and brand color.
Call To Action (CTA)
The CTA button must always be visible to the user and accessible without being blocked by other elements.
Build your highest-converting page in 15 minutes


Blog Categories


0 comments