


How to Add a Slider to Shopify Store FREE
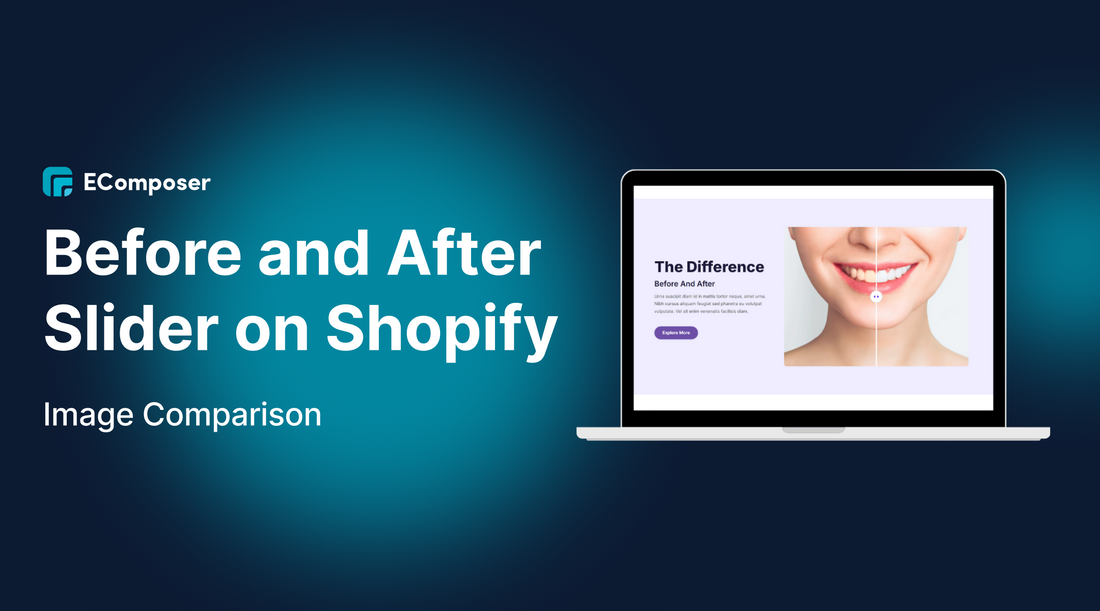
Table Of Contents
You can add a slider to your Shopify store for free, either by coding it yourself (using Shopify Liquid + CSS + JavaScript) or by using a free app / page-builder (such as EComposer), balancing flexibility vs ease of use.
Customers always want to search for reviews, view products from every conceivable angle, and discover new offers and discounts before they even think to click the “Add to Cart” button.
However, that is not why businesses try to cram all the information without arrangement. This not only does not provide a good customer experience but also puts your website at risk of information overload and reduced loading speed. That's why the sliders come in handy, you can hit a conversion trigger without creating a long page filled with images and content.
In this blog, we will show How to add a slider to your Shopify store for FREE. Before going into the details, make sure you have built an eCommerce store on Shopify!
What is Shopify Slider?

A slider is a web page element that presents any type of information (images, videos, text...). The sliders show only one thing at a time and can be configured to move automatically or when prompted by user input.
It helps you add multiple images or text without page scroll. You can click on left-right arrows to navigate between multiple images/text in the slider. You will probably see a Slider on the homepage of most websites, so it is really important.
Why Should You Use a Shopify Slider?

* Slider shows attractive content
Slider condenses a lot of attractive information into a limited space. Consumers can only view compressed content when they find it useful during their browsing activity. You can compress content within a specified area.
* Slider captures the user's attention
From the moment they visit your homepage, customers will be attracted to your slider and they will click on it to view. As a result, Slider can help you improve visitor engagement, understanding, and retention.
* Slider increases user experience
Sliders give users greater power by allowing them to choose whether to focus on a slide's information. They help visitors focus on what matters and allow them to receive relevant information whenever they choose.
* Slider is a great shortcut
Once you've determined building a website for the long term, sliders will be an important part of what you should be using. This can provide customers with any content you want to share. When used properly, Sliders can also be used to take visitors from the homepage to other pages to see more of what you have to offer on your site.
* Slider makes the website more beautiful
Sliders have a beautiful aesthetic look. They are visually appealing and typically the first thing visitors notice when they arrive at a website. Because of this, they work well to maintain users' attention and make your website more enjoyable to view.
* Slider makes content easy to highlight
Sometimes, you want to highlight content or a very useful element, sliders are the ideal choice for you to showcase them to customers. You can use the slider feature to make a list of suggested blogs, a list of featured customer comments, etc...
* Slider is great for storytelling
Sliders are useful for product tours. You can offer multiple perspectives on the same product in an engaging and interesting way.
How to add a Slider in Shopify using liquid code
Adding a custom image slider in Shopify using Liquid code gives you full control over design, functionality, and performance, without relying on third-party apps. Below is a complete guide to help you build one from scratch.
Prerequisites & Best Practices when adding custom sliders with Shopify Liquid Code
- Back Up Your Theme First: Always duplicate your theme before editing to prevent breaking your live store.
- Know the Basics: You should understand HTML, CSS, JavaScript, and Liquid to follow along confidently.
- Why Go Manual Instead of Using an App? Manual coding gives you full control over design and behavior, improves performance, and eliminates third-party app reliance.
- When It Makes Sense to Use an App: If you're short on time, uncomfortable with code, or need advanced features fast, consider using apps instead of custom Liquid coding.
Step-by-Step Guide for a Basic Image Slider
Step 1: Create a New Section File
Create a new section file, e.g., [sections/custom-image-slider.liquid]. In this file, add full Liquid code for a basic slider. Include a schema for image selection and settings like autoplay and speed.
<!-- sections/custom-slider.liquid -->
<section class="custom-slider">
  <div class="slider-wrapper">
    {% for block in section.blocks %}
      <div class="slide">
        <img src="{{ block.settings.image | img_url: 'master' }}" alt="Slide image">
      </div>
    {% endfor %}
  </div>

  <div class="slider-controls">
    <button class="prev">❮</button>
    <button class="next">❯</button>
  </div>
</section>

{% schema %}
{
  "name": "Custom Slider",
  "settings": [],
  "blocks": [
    {
      "type": "image",
      "name": "Slide Image",
      "settings": [
        {
          "type": "image_picker",
          "id": "image",
          "label": "Upload slide image"
        }
      ]
    }
  ],
  "max_blocks": 5,
  "presets": [
    {
      "name": "Image Slider"
    }
  ]
}
{% endschema %}
Step 2: Add CSS
- Create a CSS file, e.g., [assets/custom-slider.css].
- Add styling rules to make the slider visually appealing and responsive.
- Ensure it works well across different screen sizes.
.custom-slider {
  position: relative;
  overflow: hidden;
  max-width: 100%;
}

.slider-wrapper {
  display: flex;
  transition: transform 0.5s ease-in-out;
}

.slide {
  min-width: 100%;
}

.slide img {
  width: 100%;
  display: block;
  border-radius: 8px;
}

.slider-controls {
  position: absolute;
  top: 50%;
  width: 100%;
  display: flex;
  justify-content: space-between;
}

.slider-controls button {
  background: rgba(0,0,0,0.5);
  color: #fff;
  border: none;
  padding: 10px;
  cursor: pointer;
}
Step 3: Add JavaScript
Create a JavaScript file, e.g., [assets/custom-slider.js].
- Add functionality for navigation, autoplay, slide transitions, etc.
- Use vanilla JS or jQuery for basic needs.
- Optionally, use a lightweight slider library like Swiper.js and include integration instructions.
document.addEventListener("DOMContentLoaded", function() {
  const slider = document.querySelector(".slider-wrapper");
  const slides = document.querySelectorAll(".slide");
  const prevBtn = document.querySelector(".prev");
  const nextBtn = document.querySelector(".next");
  let index = 0;

  function showSlide(i) {
    index = (i + slides.length) % slides.length;
    slider.style.transform = `translateX(${-index * 100}%)`;
  }

  prevBtn.addEventListener("click", () => showSlide(index - 1));
  nextBtn.addEventListener("click", () => showSlide(index + 1));
});
Step 4: Include the Section in Your Theme
Edit templates/index.json or theme.liquid to include the new section.
- Use the Theme Customizer to add the section to your homepage or desired template.
- Ensure it's rendering correctly and testing works.
Step 5: Check your live site
Adapting for Product, Collection, or Brand Sliders
You can customize the slider further to dynamically show content like products, brand logos, or testimonials.
- Use Liquid objects like collection.products to show products.
- Use metafields or asset files for brand logos.
- Adjust Liquid loops and conditions accordingly.
For a brand-specific slider, create a schema setting allowing users to choose images or pull them from a block type. For example, "shopify liquid brand slider code" might let you display brand images based on user input via the Theme Editor.
Add Shopify Slider without coding (Using app)

EComposer Page Builder is a top Shopify app that lets you create professional stores without coding. It offers a live drag-and-drop editor, AI-powered tools, and a vast library of templates and sections. With built-in sales extensions, SEO optimization, and 24/7 support, EComposer makes building and growing your store faster and easier.
Slider is an outstanding element of EComposer that helps you create. You can add everything to the slider, like text, images, or buttonsand you can design each slider with a style. In addition, you can also make the entire background image of the slider clickable (this is a very useful function).
Follow the steps below to create the right Slider for you:
Step 1: Open EComposer Page Builder
- In the Shopify App Store, search EComposer Landing Page Builder then click Add App.
- To activate the use of the app, Install the app to your Shopify store.
- In the Dashboard menu, go to Apps, click EComposer Landing Page Builder.

Step 2: Start building Shopify Slider
- Click Start Building in the right corner of the dashboard and select a page where you want to place Shopify Slider.

- Choose any EComposer template you want by clicking Select a template or create your own by clicking Setup page info. Then, select Start Building.

- In EComposer's editor, go to Elements, select Basic, and look for Slider. Here, EComposer has suggested some slider templates that you can select one that suit your needs.

Step 3: Customize Shopify Slider
Now use EComposer's live drag and drop to drag the Slider anywhere you want. Then start customizing the Shopify Slider to your liking.
The Content section is divided into three tabs: Slides, Settings, and Animation.
- Slides: You can add new slides, duplicate (clone), remove, or move slides as you like.
- Settings: In this tab, there are many options to configure your slider; the option names are easy to understand, so you don't need to worry about them.
- Animation: Here you can set the animation for the content block in the slider that will appear when the slide advances to the next one.

In the Design section, there are 3 sections: Size, Slide, and Navigation. These are where you can customize the Width, Rotate, Slider Animation, Background, Border, Spacing, Background, Box Shadow,... of the slider at your disposal.

Finally, in the Advanced section, you can customize everything related to visible settings like code, background, animation, and so on.

Step 4: Save and publish
Once you are satisfied with your customization, in the right corner of the edit page you have options to save and publish.
Best Practices for Shopify Sliders (Performance & Mobile Tips)
Shopify sliders (or slideshows) can be effective tools for showcasing key products, promotions, and brand messages. However, they need to be implemented carefully to avoid slowing down your site or confusing visitors.
Here are the best practices for Shopify sliders, covering content, design, and technical optimization:
Content and Conversion Optimization
- Limit the Number of Slides: Aim for 3 to 5 slides maximum. Too many slides can overwhelm visitors and dilute your message, as users rarely see beyond the first few.
- Strong Value Proposition: Each slide should communicate a clear, compelling benefit or feature (your value proposition).
- Clear Calls to Action (CTAs): Every slide should have a distinct and visually prominent "Call to Action" (e.g., "Shop Now," "Discover the Collection," "Learn More") that guides the user on the next step.
- Prioritize Important Content: Place your most important information, promotions, or best-sellers in the first one or two slides, as engagement drops off quickly.
- Keep Text Minimal: Use concise, powerful headlines and a minimal amount of body text. The image should do most of the work.
User Experience and Design
- Disable Auto-Rotate by Default (Recommended): Auto-rotating sliders can distract or annoy users who are trying to read the content. If you use it, allow the user to pause rotation on hover and make the controls (arrows/dots) visible.
- Provide Clear Navigation: Ensure users can easily navigate manually using highly visible "Next/Previous" arrows and "dot" indicators.
- Mobile-First Design: A significant portion of traffic comes from mobile. Your slider must be fully responsive, meaning images resize, and text is legible and well-positioned on all screen sizes.
- Avoid Video Content (in Auto-Play): Videos in a slideshow can drastically slow load times and create a poor user experience, especially with auto-play. If you use video, consider a dedicated hero video section instead of a slider slot.
- Ensure Contrast: If you overlay text on an image, ensure high contrast so the text is easily legible.
Image Optimization and Site Speed
Poorly optimized sliders are a primary cause of slow site speed. Speed is crucial for SEO and conversion.
- Image Dimensions: The exact size depends on your theme, but general recommendations for a landscape slideshow banner are:
- Desktop Width: 1200px to 2000px (often 1920px is recommended for full-width).
- Height: 400px to 600px is a common range.
- Aspect Ratio: A 3:1 or 16:9 ratio is typical for banners.
- Crucial: Use the same dimensions and aspect ratio for all slides to prevent "jumping" or inconsistent cropping.
- File Size Compression: Compress all slider images using tools like TinyPNG or online image optimizers to reduce file size without sacrificing visual quality. Aim for the smallest file size possible (ideally under 500KB per image).
- Use the Right Format: Use JPEG for photographs and PNG for logos, graphics, or images with transparent backgrounds. Shopify automatically converts images to modern formats like WebP on supported browsers, but starting with an optimized JPEG is a good practice.
- Enable Lazy Loading: This is a crucial optimization. Lazy loading ensures that images outside the user's initial view (below the fold or subsequent slides) only load when the user scrolls down or reaches that slide, significantly improving the initial page load time. Most modern Shopify themes support this.
Shopify Slider Code vs Apps: Which Should You Choose?
The choice between using a dedicated Shopify slider app and custom code for a carousel or slideshow on your store involves a trade-off between convenience and control. There is no single "right" answer; the best option depends on your technical ability, budget, and specific needs.
Shopify Slider Apps
Shopify apps are the plug-and-play solution, designed for merchants who want a professional result without touching any code.
Advantages of Using an App
- Ease of Use: This is the biggest draw. You don't need any coding knowledge. Apps are installed with a few clicks and usually come with intuitive, drag-and-drop editors.
- Immediate Availability: You can have an advanced, feature-rich slider (like product carousels, video slides, or specific animation effects) live on your store in minutes.
- Ongoing Support and Updates: The app developer handles bug fixes, maintenance, and updates to ensure compatibility with new Shopify theme versions.
- Advanced Functionality: Many premium apps offer features that would be complex to code from scratch, such as specific layout options, lazy loading, and deep integration with product data.
Disadvantages of Using an App
- Recurring Costs: Most robust slider apps require a monthly subscription fee, which can add up quickly if you rely on many paid apps.
- Potential for Store Slowdown: If an app is poorly coded or you install too many, it can inject unnecessary code into your storefront, negatively impacting your website's loading speed (and SEO).
- Limited Customization: You are restricted to the options and styles the app developer provides. Achieving a truly unique, pixel-perfect design may be impossible.
Custom Code
Custom code involves editing your theme's Liquid, HTML, CSS, and JavaScript files to build the slider yourself, or hiring a developer to do it for you.
Advantages of Custom Code
- Complete Customization and Control: You have total freedom over the design, functionality, speed, and responsiveness of the slider. You can create a unique solution tailored exactly to your brand.
- Optimized Performance: A well-coded slider will be perfectly streamlined, loading only the necessary code and assets. This can result in much faster page speeds compared to a bloated third-party app.
- One-Time Cost: While the initial cost of development (time or hiring a developer) is high, there are no recurring subscription fees for the functionality itself.
Disadvantages of Custom Code
- High Barrier to Entry: This option requires strong technical skills in web development. If you try to do it without expertise, you risk breaking your theme.
- Time and Expense: The initial development time is much longer than installing an app. Hiring a skilled developer can also be a significant upfront expense.
- Responsibility for Maintenance: You or your developer are responsible for all updates, bug fixes, and ensuring the code remains compatible whenever Shopify updates its platform or theme architecture.
Frequently Asked Questions
1. How do I add a slider in Shopify?
You can add a slider in Shopify either by using a third-party app, a page builder like EComposer, or by coding directly with Shopify Liquid. Apps and builders are faster, while coding gives you more customization and control.
2. Can I create a brand logo slider with Shopify Liquid?
Yes! Using Liquid loops, you can display logos dynamically from theme settings or metafields. This makes it easy to create a simple, responsive slider to showcase your brand partners or certifications.
3. Do I need coding skills to add a slider in Shopify?
Not necessarily. If you use apps or page builders, you don’t need to touch any code. But if you want a fully customized slider via Liquid, you’ll need basic knowledge of HTML, CSS, JavaScript, and Shopify’s Liquid syntax.
4. Will adding sliders slow down my Shopify store?
It depends on how the slider is built. A lightweight, custom-coded slider or optimized app won’t noticeably impact speed. However, using heavy apps or too many sliders with large images can slow down load times.
5. How to add an image slider in Shopify?
You can create an image slider by adding a custom Liquid section, uploading images through the theme customizer, and styling it with CSS/JavaScript. For beginners, apps or drag-and-drop builders offer a faster, no-code solution
In a nutshell
Sliders are very versatile and can be one of the most effective ways to showcase your message or product as they will capture the attention of your viewers.
We hope this blog will help you create the right Carousel Sliders for Shopify store. If you want more information or want to learn more about EComposer, follow us at ecomposer.io or click on the message icon located in the right corner of the screen.
Build your highest-converting page in 15 minutes


Blog Categories


0 comments