How to Add a Table of Contents to Shopify Blog?

Table Of Contents
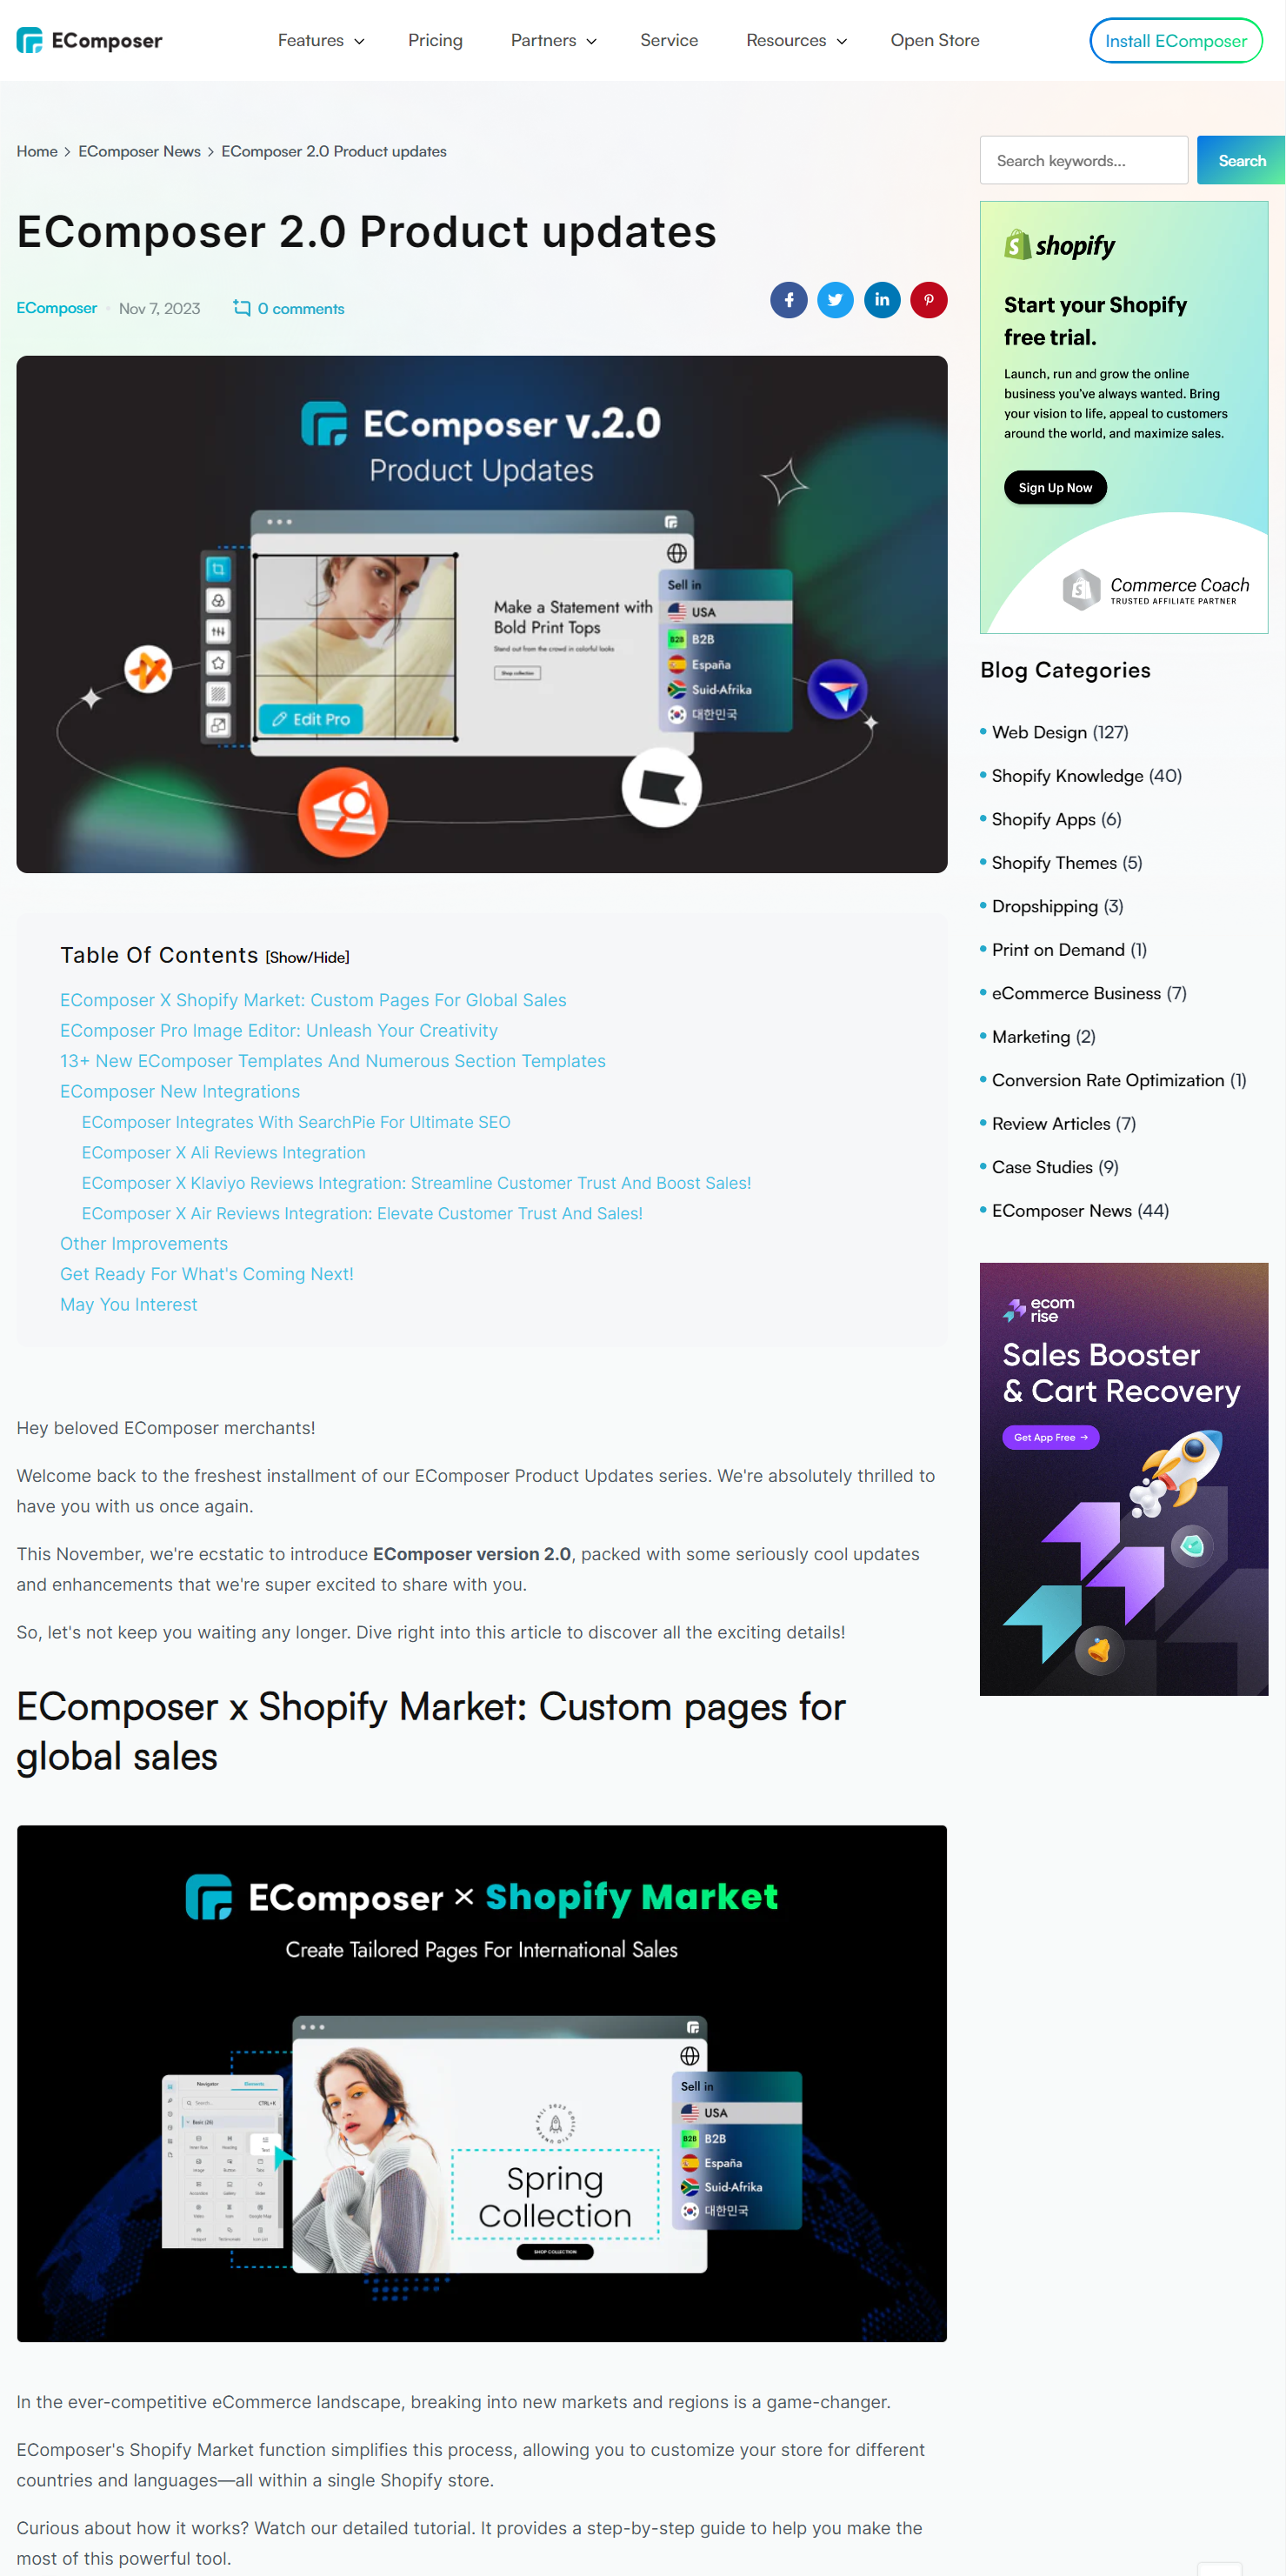
A Table of Contents makes long Shopify content easier to navigate by letting readers jump quickly to specific sections, improving user experience and engagement. You can add a TOC using a third‑party app, a page builder like EComposer for visual control, or manually with anchor links, helping both visitors and search engines better understand and interact with your content.
Do you know?
People love skimming on the website. They only spend time reading no more than 28% of the words in your content.
So if you are building your blog page, besides considering your blog's ideas, illustrative images, and blog navigation,..., Table of Content (TOC) is such thing every blog needs.
In this article, we will help you better understand what Table of Content is exactly, its importance, and how to add it to your Shopify store.
Let's get started right now.
What is Table of Contents?
Table of Contents (TOC) is a fairly popular and commonly used feature in blog posts.
As you see in Wikipedia’s example below, a Table of Content allows readers to browse through the main headings of the blog post, so they can skip over the unimportant points and focus on the parts they really care about. The TOC is really useful and saves customers time by reading unnecessary content.

No matter how great your blog is, readers won't be satisfied if they can't find the information you've discussed in your blog article. This indicates that your Table of Content (TOC) is crucial to the success of your blog.
Hence, there are numerous benefits of a Table of Content let you need to have in your store.
Benefits of Table of Contents on Shopify blogging?
More than just highlighting the subject of an article, having a list available does more. When it comes to attracting people, it has many advantages.
So why would you want a table of contents within the posts on your website?
Presents a Nice Layout
Tables frequently provide a good, tidy layout of what content is covered in the article, so that people can see and seek exactly what information you’re sharing.
And if you create one using a plugin, you may also stylize the appearance to make it stand out or match your theme’s visual scheme.
Of course, this also depends on what plugin you choose.
Makes it Easier to Find Specific Information
As mentioned above, users aren’t patient enough with long content. And you have only 15 seconds to pique a reader's interest. They will quickly leave if you don't have a compelling hook or make it simple for them to find the solution.
A table of contents allows users to see exactly how you’ve laid out the post content, and "jump" to any part of your blog and read the information that they want to explore instantly.
Climbing On-Page Time

Speaking of 15 seconds, on-page time is one of the most significant indicators in Google Analytics. This indicates whether the typical reader is finishing the article or whether you need to rewrite it.
When adding a Table of Contents to your blog page, the visitor can see that one of your article sections does, indeed, contain what he or she is looking for, then it will improve how long the visitor stays on your site. As a result, this contributes to appearing higher in Google search results.
Eliminate Bounce Rates
Your on-page time isn’t the only metric being impacted by a table. Bounce rate is also an aspect that you need to consider.
Frankly, you have a concise amount of time to persuade someone to stay on your website. And a list of headers can prevent some people from “bouncing” out.
You can see the bounce rate of each types of page below:
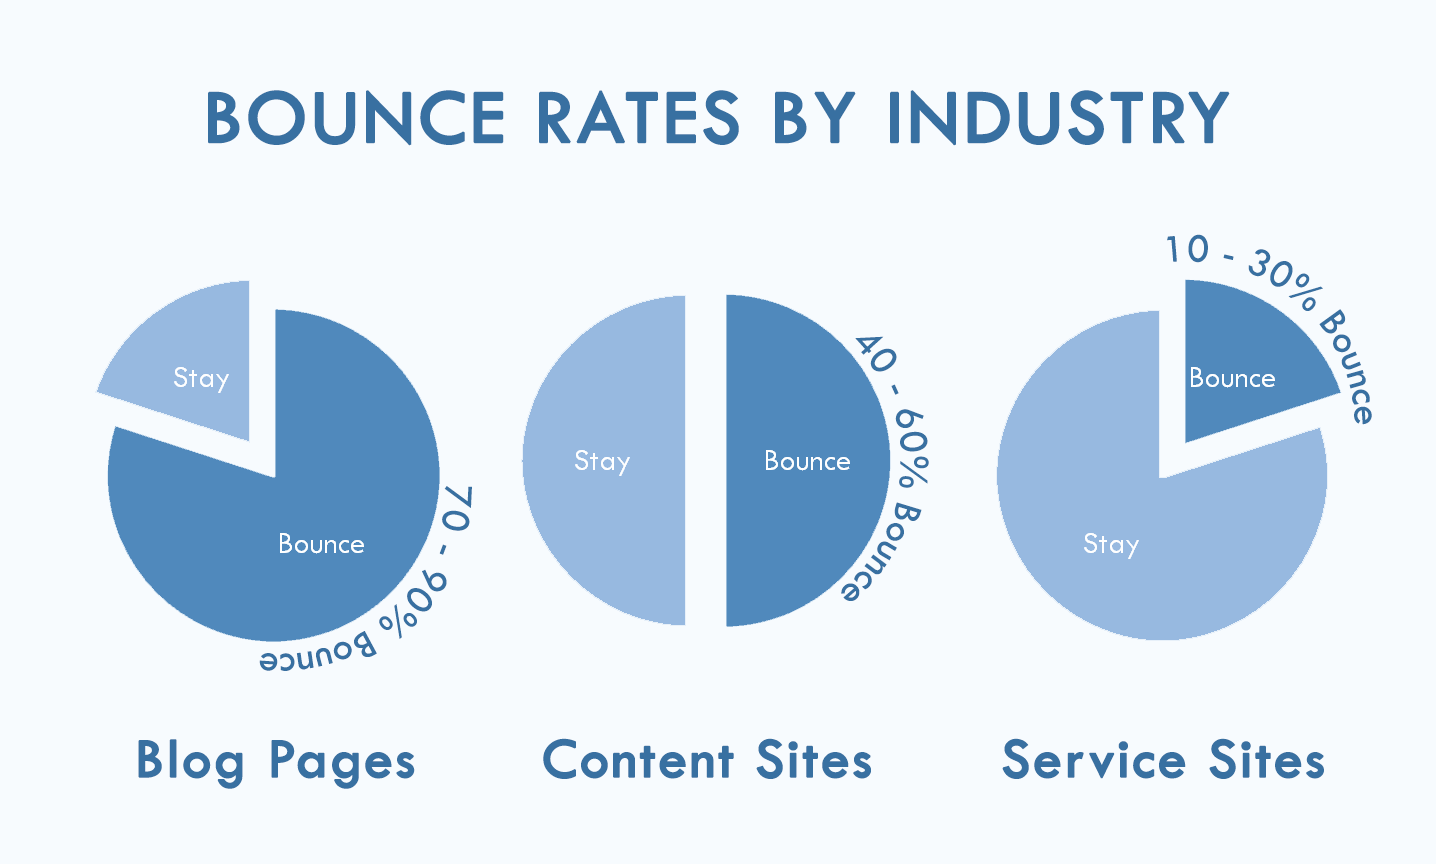
So it can be said that table of contents is regarded as one of the key elements to reduce the bounce rate for blog pages. Customers just access the information they need by clicking the link in the table instead of skimming from top to bottom of the page.
Better on-page SEO
Google makes use of blog posts’ table of contents and bookmark links (such as jump links or anchor links). They have begun to display rich snippets in place of regular search engine results for these links.
For instance, the "table of content" search below was looking for a search answer. In addition to the correct response, Google also provided a direct link to that part of the post in case the visitor wished to read more.

So now, let’s dive into methods to apply the in-blog Table of contents.
How to add Table of Content to Shopify blog
TOC is a commonly used feature on websites built on WordPress. There are many free Wordpress plugins that allow you to create a Table Of Content easily.
With the Shopify platform, this function is handy but not many developers pay attention to it. Especially for businesses that want to seriously focus on blog content to bring useful sharing and value to users, TOC is an indispensable feature for each of your blog posts.
So we would love to show you the 2 easiest ways to get the Table Of Content feature for your blog post.
Use Shopify Table of Content App=
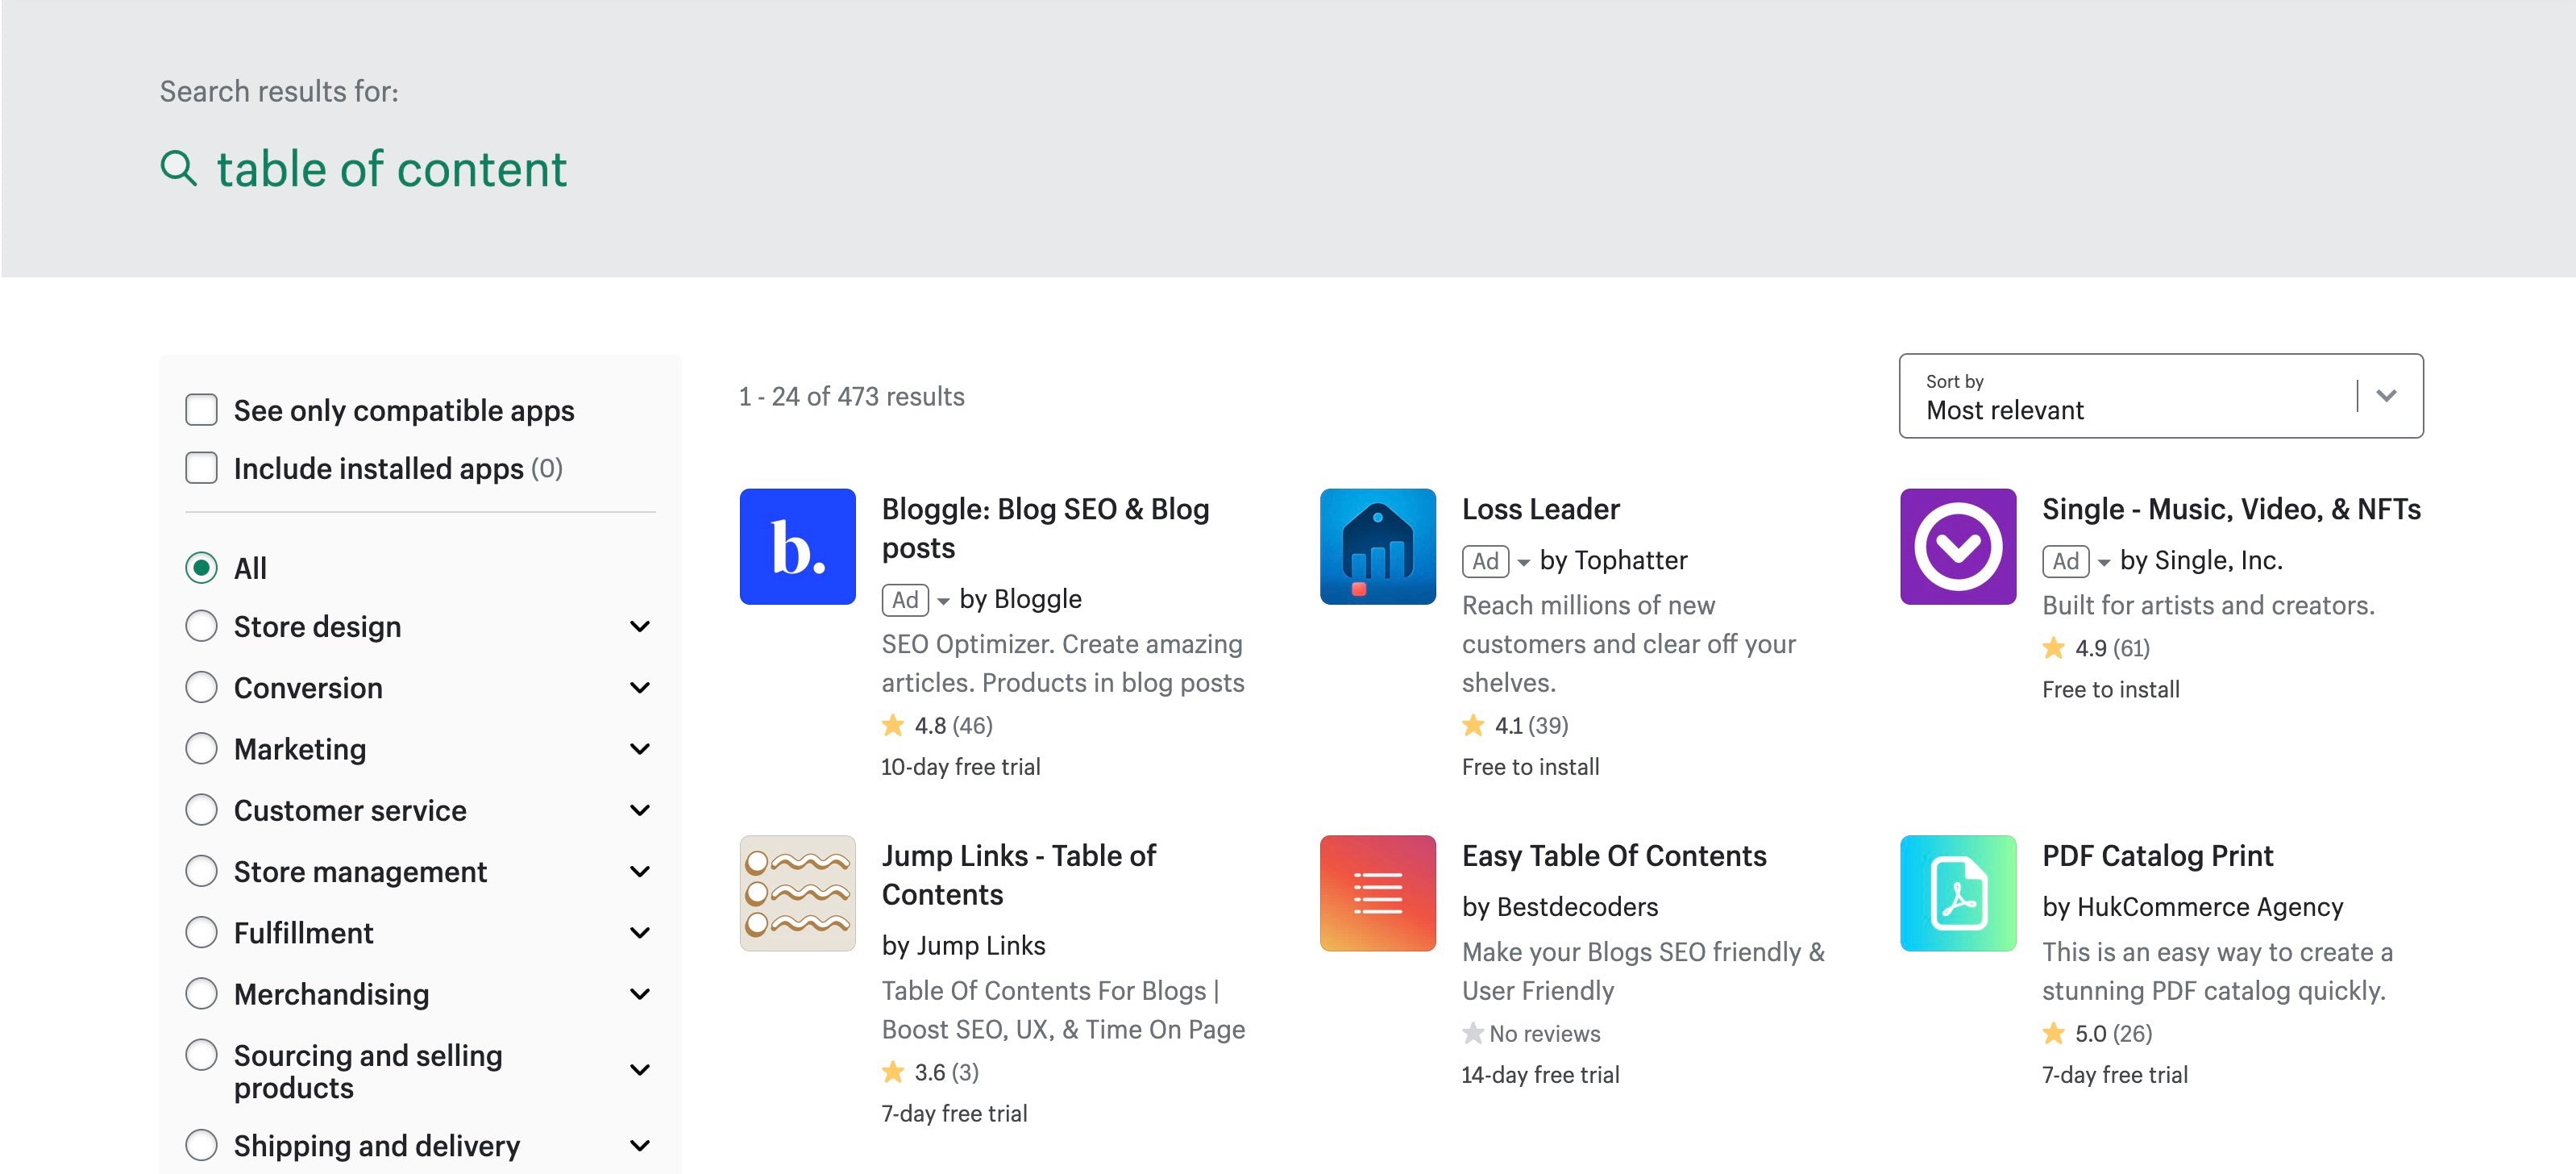
Go to Shopify App Store and search for "table of content" keyword and you can see apps that can help you with Table Of Content feature. However, there are some caveats that you need to know before you decide to install these apps.
- These apps are paid apps, you have to pay about $1.99/month for this feature.
- Excessive use of third-party applications can affect the loading speed of the website
The application has a fairly simple function and configuration, but it would not a cost-effective choice for you. Try EComposer to see how to go beyond basic function.
Shopify Table of Contents by EComposer Extension

When adding EComposer - Landing Page Builder to your store, you definitely will own a huge range of templates and functional elements to build full of needed pages for an eCommerce store.
Especially, to support you in creating blog pages effectively, EComposer would love to provide you Table of Contents - one of the super cool functional extensions on this app’s powerful extension library, therefore you can customize your blog page’s heading catalog rapidly and promptly.
To be able to use TOC in EComposer, please follow the steps below. We dare it just takes 3 minutes to have a great in-page Table of Contents.
Step 1: Install EComposer
Click here to add EComposer Visual Page Builder app to your store.

Step 2: Add Extension
Find Table of Contents by
- Click on the Extension icon at the top left corner.
- Under the Extension tab, click Add more.
After opening EComposer’s extension library, search “Table of Content”, then install and drag and drop to any place on your customizing page.

To try this extension, click here to upgrade EComposer Paid Plan.
Step 3: TOC’s configuration:
After adding EComposer’s TOC extension to your editing article page, you can adjust your heading table’s text and the level of each heading.
Not stopping on that, on the tab “design”, you can customize your table of contents outlook. The are several sections of EComposer TOC’s design tab:
- General tabs: change the background color, create box shadow and border for your heading’s box.
- Heading has settings such as Alignment, Typography, Text color, and more.
- Switch button: give options to change the height, width, border, border radius of the Button, and more which is covered here.
- Navigator link and Navigation lever 2 have similar settings way which is explained here.
And this is the result:

We also make a video explaining in detail how to enable this function in a minute, you can watch it and follow the instructions.
To understand how to add and configure the EComposer’s TOC extension in detail, just click here.
[ecom-global-block]ecom-shopify-trial-block[/ecom-global-block]
In the nutshell,
We hope you understand the Table of Contents, its benefits for a blog page, and how to set up and configure this tool on your eCommerce store. Hopefully, with this instruction, you can add the Table of Contents feature to your article page easily.
Share our guide with your social network group if you find it useful.
Also, feel free to contact us if you have any questions. We are always all ears for you.
Don't forget to let us know via live chat from the EComposer app if you need any help.
=================
Install EComposer Here
Follow Us on Facebook
Join Official Community
Join Official Community





0 comments