


EComposer is #1 Drag & Drop Page Builder that helps you create professional Shopify websites without any coding. Provide 100+ design elements and 300+ templates, there’s no limit to what you can build. Install EComposer for free today and start building the store you’ve always wanted.
How To Add Contact Us Button On Shopify
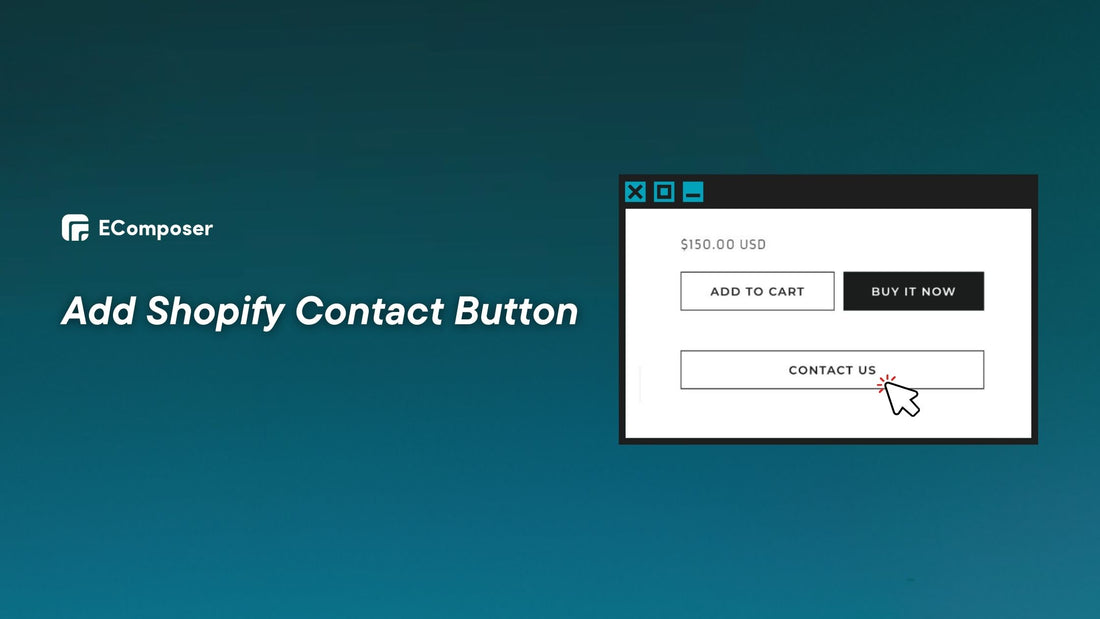
Table Of Contents
Want to add a Contact Us button for Shopify? Better customer service may boost sales by 4%–8%. Although a button may appear minor, it builds trust, connections, and consumer happiness. Besides location and visibility, design, clarity, and shop experience integration are crucial.
This blog is your comprehensive guide with and without coding to crafting the perfect "Contact Us" button for your Shopify store. Keep reading to find out more!
2 Ways To Add A Contact Button And PopUp Form (With Coding)
Coding gives you complete control and flexibility, while drag-and-drop solutions are convenient. This section introduces two fascinating options:
- Building a custom contact button: Go beyond the ordinary and design a button that perfectly reflects your brand and user experience.
- Creating an interactive pop-up form: Offer a seamless way for customers to connect when they need it most.
From beginners to experts, we'll give clear step-by-step guidance and valuable tools to help you succeed:
Option 1: Add A Contact Button With Shopify's Built-In Option
If you want to add a "Contact Us" button to your Shopify shop without a third app, go no further than the built-in alternative by following the steps below:
Step 1: Creating A Contact Page
Developing strong customer connections is crucial for every organization. 78% of consumers communicate with businesses using text messages. That's why your Shopify store's contact page is crucial, giving visitors a simple method to reach you.
This guide will help you through the process of developing a successful contact page step by step:
Begin by logging into your Shopify account and then go to Online Store > Pages > Add page from your Shopify admin.

Next, create a title for your contact page in the Title box. For example, "Contact us" or "Get in touch" would work.
Put any text you want to show up above the contact form in the "Content" box. You don't have to fill this in. However, here are some things you might want to put in the Content box:
- Short, polite text like "We'll get back to you as soon as possible".
- If you have a retail presence, provide your store's address and a photograph of the actual storefront.
- If you want clients to contact you by phone, include your phone number.
Once done, remember to press the “Save” button.

To access your contact page, choose the "View page" option with the eye symbol.

Finally, you should copy the URL to the Contact Page.

Pro tips: Ditch the generic "Contact Us." Opt for warm, inviting titles like "Let's Talk!" or "We're Here to Help!"
Step 2: Adding The Contact Button
Make sure you have completed step 1 before proceeding to the next step.
Return to Online Store > Themes, then choose the theme you wish to change and click "Customize".

Next, go to the product page and select "Add block" in Template > Select "Custom Liquid". Then, drag and drop the custom liquid to the location where you want the contact button to appear on the page.
Read more: Way to use Shopify Sections & Blocks for theme customization

For example, we want the Contact Us button to appear below the Buy button. So we drag-drop the custom liquid block right below the Buy button.Then, in the liquid code section, copy and paste the code below:
<button class="btn btn--add-to-cart btn--secondary-accent">
<a href="YOUR CONTACT PAGE LINK HERE" class="btn__text">Contact Us</a></button>
NOTE:
- YOUR CONTACT PAGE LINK HERE: Where you replace with the contact page link you created and copied in step 1.
- btn btn--add-to-cart btn--secondary-accent: The same type of button as the "add to cart" button. You can be creative with how you style your button.

When you’ve finished, you “Save” and preview your store to ensure you add the correct link.

Now, you've made a contact button and added it to the product page of your Shopify store. If you know coding, read step 3 to customize your contact button.
Step 3: Automatically Inserting Product Names To Contact Form (Optional)
There are various benefits to automatically adding product names when buyers click on a product page and wish to contact you:
- Saves time: Customers don't need to manually type or search for the product name in their inquiry, saving them time and effort.
- Reduced errors: Eliminates product-specific mistakes and miscommunications, speeding up and improving replies.
- Clear context: Starting the conversation by pre-filling the product name in the contact form lets you concentrate on addressing their queries without specifying which product they're talking about.
Also, you can easily monitor which goods consumers contact you about, which may influence product development and marketing tactics.
By pre-filling the product name, you may obtain the necessary information before contacting the consumer, which may improve resolution.
Here's how to automatically add product names when consumers click on a product page and contact you about it:
First, go back to the code in step 2 and add ?product={{product.title}} after your contact page link.
<button class="btn btn--add-to-cart btn--secondary-accent">
<a href="YOUR CONTACT PAGE LINK HERE?product={{product.title}}" class="btn__text">Contact Us</a></button>
As an example, our page would look like this:
<a href="https://cleanshadestyle.myshopify.com/pages/contact?product={{product.title}}" class="btn__text">Contact Us</a></button>
Now, when you click the Contact button on a particular product page, the URL will terminate with the product name, as illustrated in the picture below:

Now go to your contact page template (e.g., page-contact.liquid), and add the following code:
<script>
const queryString = window.location.search;
const urlParams = new URLSearchParams(queryString);
const product = urlParams.get('product');
let textArea = document.getElementById('{{ formId }}-message');
textArea.value = product;
</script>
So from now on, every time your customer clicks the "Contact Us" button on a specific product page, it will automatically fill in that product name in the form.

Option 2: Create A Popup Contact Form
Imagine a buyer browsing your goods with a brief query. Instead of finding a contact page in the menus, a welcoming pop-up form invites fast communication. When clients need it most, pop-up contact forms make it easy and fun to contact them.
In this section, we'll explore the exciting world of pop-up contact forms for your Shopify store:
Step 1: Create A Snippet
Start by going to Online Store > Actions > Edit Code > Snippets.

Next, click Add New Snippet and name it.

For example, we will use “my-popup”
Now, paste the following code into the snippet:
<style>
/* The Modal (background) */
.modal {
display: none;
/* Hidden by default */
position: fixed;
/* Stay in place */
z-index: 1;
/* Sit on top */
padding-top: 100px;
/* Location of the box */
left: 0;
top: 0;
width: 100%;
/* Full width */
height: 100%;
/* Full height */
overflow: auto;
/* Enable scroll if needed */
background-color: rgb(0, 0, 0);
/* Fallback color */
background-color: rgba(0, 0, 0, 0.4);
/* Black w/ opacity */
}
/* Modal Content */
.modal-content {
background-color: #fefefe;
margin: auto;
padding: 20px;
border: 1px solid #888;
width: 80%;
}
/* The Close Button */
.close {
color: #aaaaaa;
float: right;
font-size: 28px;
font-weight: bold;
}
.close:hover,
.close:focus {
color: #000;
text-decoration: none;
cursor: pointer;
}
</style>
<h2>Modal Example</h2>
<!-- Trigger/Open The Modal -->
<button id="myBtn">Open contact us Modal</button>
<!-- The Modal -->
<div id="myModal" class="modal">
<!-- Modal content -->
<div class="modal-content">
<span class="close">×</span>
<div class="contact-form form-vertical"> {% form 'contact' %} {% if form.posted_successfully? %} <p class="note form-success">
{{ 'contact.form.post_success' | t }}
</p> {% endif %} {{ form.errors | default_errors }}
<div class="grid grid--half-gutters">
<div class="grid__item medium-up--one-half">
<label for="ContactFormName">{{ 'contact.form.name' | t }}</label>
<input type="text" id="ContactFormName" name="contact[name]" value="{% if form[name] %}{{ form[name] }}{% elsif customer %}{{ customer.name }}{% endif %}">
</div>
<div class="grid__item medium-up--one-half">
<label for="ContactFormEmail" class="{% if form.errors contains 'email' %}label--error{% endif %}">{{ 'contact.form.email' | t }}</label>
<input type="email" id="ContactFormEmail" name="contact[email]" autocorrect="off" autocapitalize="off" value="{% if form.email %}{{ form.email }}{% elsif customer %}{{ customer.email }}{% endif %}" class="{% if form.errors contains 'email' %}input--error{% endif %}">
</div>
</div>
<label for="ContactFormPhone">{{ 'contact.form.phone' | t }}</label>
<input type="tel" id="ContactFormPhone" name="contact[phone]" pattern="[0-9\-]*" value="{% if form[phone] %}{{ form[phone] }}{% elsif customer %}{{ customer.phone }}{% endif %}">
<label for="ContactFormMessage">{{ 'contact.form.message' | t }}</label>
<textarea rows="10" id="ContactFormMessage" name="contact[body]">{% if form.body %}{{ form.body }}{% endif %}</textarea>
<input type="submit" class="btn" value="{{ 'contact.form.submit' | t }}"> {% endform %}
</div>
</div>
</div>
<script>
When done, click Save.

Step 2: Integrate The Contact Form
After step 1, open your product-template.liquid file.
Then, locate the area where you want the contact button to appear (e.g., below the "Add to Cart" button).
Add the following code snippet:
<a href="#" id="myBtn" class="btn btn--secondary-accent">Contact Us</a>
NOTE: Substituting # with the actual button ID:
Now, put the following code snippet anywhere you want the popup contact form to appear:
{% include 'my-popup' %}
NOTE: Change "my-popup" to the name of the Snippet you made in step 1.
Finally, save the file and preview your store.

Pro tips:
- To style the form components, edit the CSS snippet's contact-form class.
- Modify the Liquid code to add more form fields or change the layout.
- Additionally, if you have difficulty using the code, please refer to some Shopify popup applications.
The Easy Ways To Create A Contact Button (Without Coding)
Have trouble adding a "Contact Us" button to your Shopify business since you're not a coder? Do not worry—EComposer Page Builder makes creating a stylish and practical contact button easy without coding.
Step 1: Install EComposer Builder
With EComposer's user-friendly drag-and-drop interface, you can finally put your frustrations behind you and welcome convenience. This powerful tool enables you to:
- Effortlessly build a contact button: Drag, drag, and personalize it to fit your brand and style exactly.
- Building entire pages and sections: Landing pages, homepages, product pages, blog posts, and more – all at your fingertips.
- Leveraging pre-made designs: Access a library of beautiful layouts and elements to kickstart your creations.
- Boosting sales with built-in features: Take advantage of powerful add-ons like Ajax Cart, Color Swatch, and Image Optimizer.
Start your free trial of EComposer today by going to the Shopify App Store and installing EComposer Page Builder, which has received over 2,900 5-star ratings.

Step 2: Edit Your Contact Form
After installing EComposer in step one, return to your Shopify admin and enter EComposer, then Landing & Pages > Create Page.

Then click "Contact Us" and choose a template for your contact page (premium and free themes are available).

Now, feel free to construct and customize your Contact Us page using over 20 Elements and EComposer's simple drag-and-drop designer.

When you’ve done, you click the “Save & Publish” button.

Finally, go to the contact page you just created and copy the page's link.

Step 3: Create A Contact Button & Publish
After step 2, open your product page in EComposer's editor.
Then, find "Button" in the Elements section on the left. Drag and drop it to where you want to place the "Contact Us" button.

In this example, we'll place the "Contact Us" button below the Buy Now button.
Next, let's edit the content:
- Button Label: Fill in the button name (For example, "Contact Now," "Chat With Us,...)
- Button link: Insert the contact page link you created in step 2.
In addition, you can design the height, width, and color of the button.

The last step is to go to the right side of the screen and click the "Publish" button.
Remember to double-check the link by clicking your contact button first.

Read more: 12+ Amazing Shopify Contact Us Page Templates
Common Error & Solution When Add A Contact Form Shopify
This section discusses the main challenges and solutions for adding a contact form to your Shopify shop. We'll discuss everything from the invisibility of your submit button to the dreaded "form not submitting" problem:
Inconsistent Colors and Fonts
A well-designed contact form is not only practical but also visually beautiful, easily blending into your store's overall appearance.
Here's a deeper look into the typical layout and stylistic difficulties and how to fix them:
Misaligned Form Elements
This issue is primarily related to the inappropriate alignment of form components such as input fields, labels, and buttons inside the form itself. This might be due to incorrect CSS spacing, margins, or padding.
Solutions:
First, you need to inspect CSS. Examine the CSS classes or styles that have been applied to form elements. Use browser developer tools to identify the particular rules causing misalignment.
Also, test responsiveness. Ensure proper form layout and alignment across different screen sizes and devices using responsive design principles.
Besides, resolve conflicts by identifying and addressing any conflicts with other CSS styles on your page that might be interfering with the form's layout.
Button Styling Discrepancies
This problem concerns the look of the submit button. It may have color, font, size, or border differences from other buttons on your shop, suggesting missing styles or theme button incompatibilities.
Solutions:
Initial, determine the button class and discover the CSS class that is particular to the contact form button.
Then, find differences by comparing the button's CSS characteristics to those of other theme buttons.
If required, alter the contact form button's theme styles with more precise CSS selectors or !important declarations.
Pro tips: Explore lightweight CSS frameworks like Bootstrap or Tailwind CSS for easier form styling and responsiveness.

Read more: How to edit Shopify Section CSS?
Invisible Contact Form Submit Button
Have you ever spent hours creating the ideal contact form only to find a hide-and-seek submit button? The irritating "invisible submit button" problem is more common than you realize.
These are CSS issues since the button may be hidden by display: none; or opacity: 0. Check the element using browser developer tools for such classes. Your website's other styles may hide the button. Find and change conflicting rules using developer tools.
No worries—we'll help you find that button:
Start by navigating to Online Store -> Theme -> Edit Code.
Then, open the base.css file and put the following code at the bottom:
.contact__button .button {
border: solid 1px;
color: #fff;
}
.contact__button .button:hover {
color: #fff;
border: solid;
}
NOTE:
- Border: Adds a 1px solid border, making the button outline visible.
- Text Color: Sets text color to white (#fff) for contrast.
- Hover Styles: Maintains border and text color on hover for consistent visibility.
Or, sometimes, the button code is missing; double-check the code to ensure the button element is specified and styled appropriately.
In certain circumstances, JavaScript may dynamically conceal the button. You should track button-related JavaScript code using developer tools.
Form Not Submitting
"Form Not Submitting" Errors may significantly impair consumer engagement. Customers will have a negative experience if they try to contact you and cannot submit the form because of an error. This could be a big problem since 73% of customers will go to a different business after a few bad situations.
But don't worry; here's a full explanation of possible reasons.
First, it might be a JavaScript mistake like disabling JavaScript for invalid syntax or incompatible scripts.
Also, incorrect URLs or permission to access the target URL might interfere with the form submission, especially if using third-party services.
Finally, check for any incompatibilities with the form code or functionality if you're using a custom theme. Even seemingly benign topics might bring problems.
Troubleshooting Steps:
First, open the browser developer console and search for JavaScript issues during the form submission.

Then, test the form on several browsers and devices to rule out any browser-specific bugs.
Remember to examine the code. Check the form code carefully, paying particular attention to the submitted script and any custom validation logic.
Additionally, try the URL in a new browser tab to ensure it is valid and accessible.
If you still can’t fix these errors, please contact the theme or app developer support for help.
FAQs
1. Where Should I Place The Contact Us Button On My Shopify Store?
This question does not have a one-size-fits-all solution since the optimum location for your Contact Us button is determined by the design and layout of your shop.
However, here are some broad recommendations:
Place the button in a prominent area where buyers may quickly see it, such as your store's header or footer.
Use a contrasting color or design to separate the button from the rest of your content.
Ensure the button is mobile-friendly and simple to tap on a touchscreen device.
2. What Should My Contact Us Button Say?
Choosing the right text for your "Contact Us" button can significantly impact its effectiveness.
Examples:
- Classic: "Contact Us"
- Action-oriented: "Get in Touch"
- Specific: "Ask a Question"
- Urgent: "Contact Us Today!"
- Friendly: "Let's Chat"
- Brand-specific: "[Your Brand Name] Support"
However, make it short and clear, with 2-3 words that clearly describe the action consumers may do.
3. How Can I Track Contact Us Button Clicks?
There are a few ways you can track how many people are clicking on your "Contact Us" button in your Shopify store:
- Navigate to Reports > Marketing > Traffic Sources.
- In the "Traffic Sources" table, find the "Events" section and look for an event named "Contact Us Button Click" or something similar.
This shows how often your button was clicked over time. You may also filter the data based on date range, device type, and other parameters.
If your Shopify shop has Google Analytics, you can monitor button clicks, too.
By using one or more of these techniques, you may receive useful insights into how users engage with your "Contact Us" button and make educated choices about enhancing it.
Final Thoughts
So, there you have it. Whether a coding expert or a design fanatic, you now have the resources and skills to construct a fantastic "Contact Us" button for your Shopify business. Remember that the right button is more than simply a click target; it's a bridge that promotes trust, communication, and, ultimately, satisfied consumers.
Embrace the coding power? With your increased knowledge and CSS skills, you can tailor the button to your precise specifications.
Do you prefer a drag-and-drop approach? Explore the ease of applications and theme choices to streamline the process while preserving control.
Start using EComposer for now! This Shopify drag-and-drop Page Builder has simplicity, design flexibility, and strong capabilities that allow you to create the ideal communication channel for your clients.


0 comments