


How To Customize Shopify Payment Icons? (Error & Solution)
Table Of Contents
Shopify's payment icon is significant since buyers want to know how to pay before buying. That's why 13% of US internet shoppers left when payment method constraints. This is especially true for online merchants, as buyers want a visual representation of the payment options available.
This article will help you customize Shopify payment symbols, address error issues, and give solutions to simplify your customers' experience.
What Are Shopify Payment Badges?
Payment icons on Shopify reflect the payment options your online shop accepts. These symbols usually show Visa, Mastercard, Amex, PayPal, Amazon Pay, and Apple Pay.
Showing these indicators makes your shop is a trusted store, which can boost client trust and prevent checkout abandonment. Shoppers will immediately know whether their payment option is allowed, resulting in a smoother and more secure checkout experience.
One example is Gymshark in the image below, a brand of exercise clothes known for making stylish, high-quality clothes. Their website displays the payment methods they accept.

2 Ways To Add Payment Icons On Your Shopify
There are two main approaches to adding custom payment icons on your Shopify store:
You may display icons at the bottom of your store using payment options or a theme editor code. Simple theme code changes may add, remove, or replace payment option icons without impacting payment settings.
We'll explain both methods, highlight their advantages, and weigh their drawbacks to help you choose the best one:
Option 1: Change Your Store's Footer
Notification:
- First, you must allow payment methods in your store to see the payment icon.
- If you do not use a free Shopify theme and your theme does not have the option to allow payment icons in the Shopify footer, this adjustment will not function.
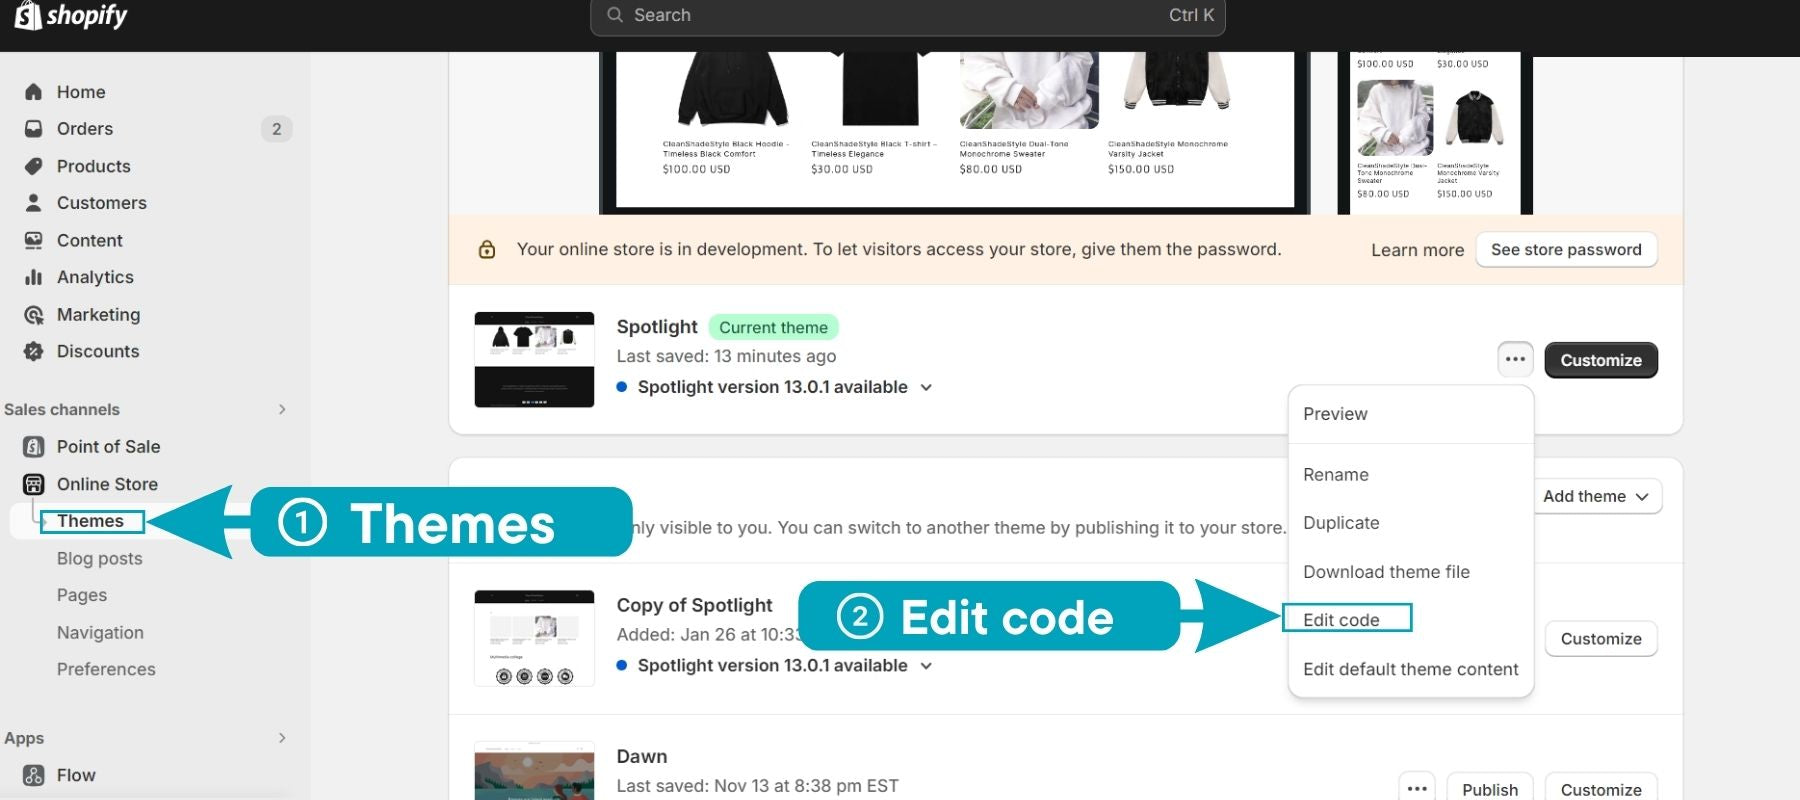
Step 1: First, go to your Shopify shop and log in. On the left-hand screen, find the area called "Online Store." After that, click on “Themes”.
Step 2: Find the theme you want and click the "Customize" button next to its name.
![]()
Step 3: In the theme designer, choose "Footer" from the menu on the left.
![]()
Step 4: On the right side of the page, look for the box that says "Show payment icons."
- To add the icons, check the box.
- To remove the icons: Remove the box.
![]()
Step 5: Save your modifications by clicking "Save."
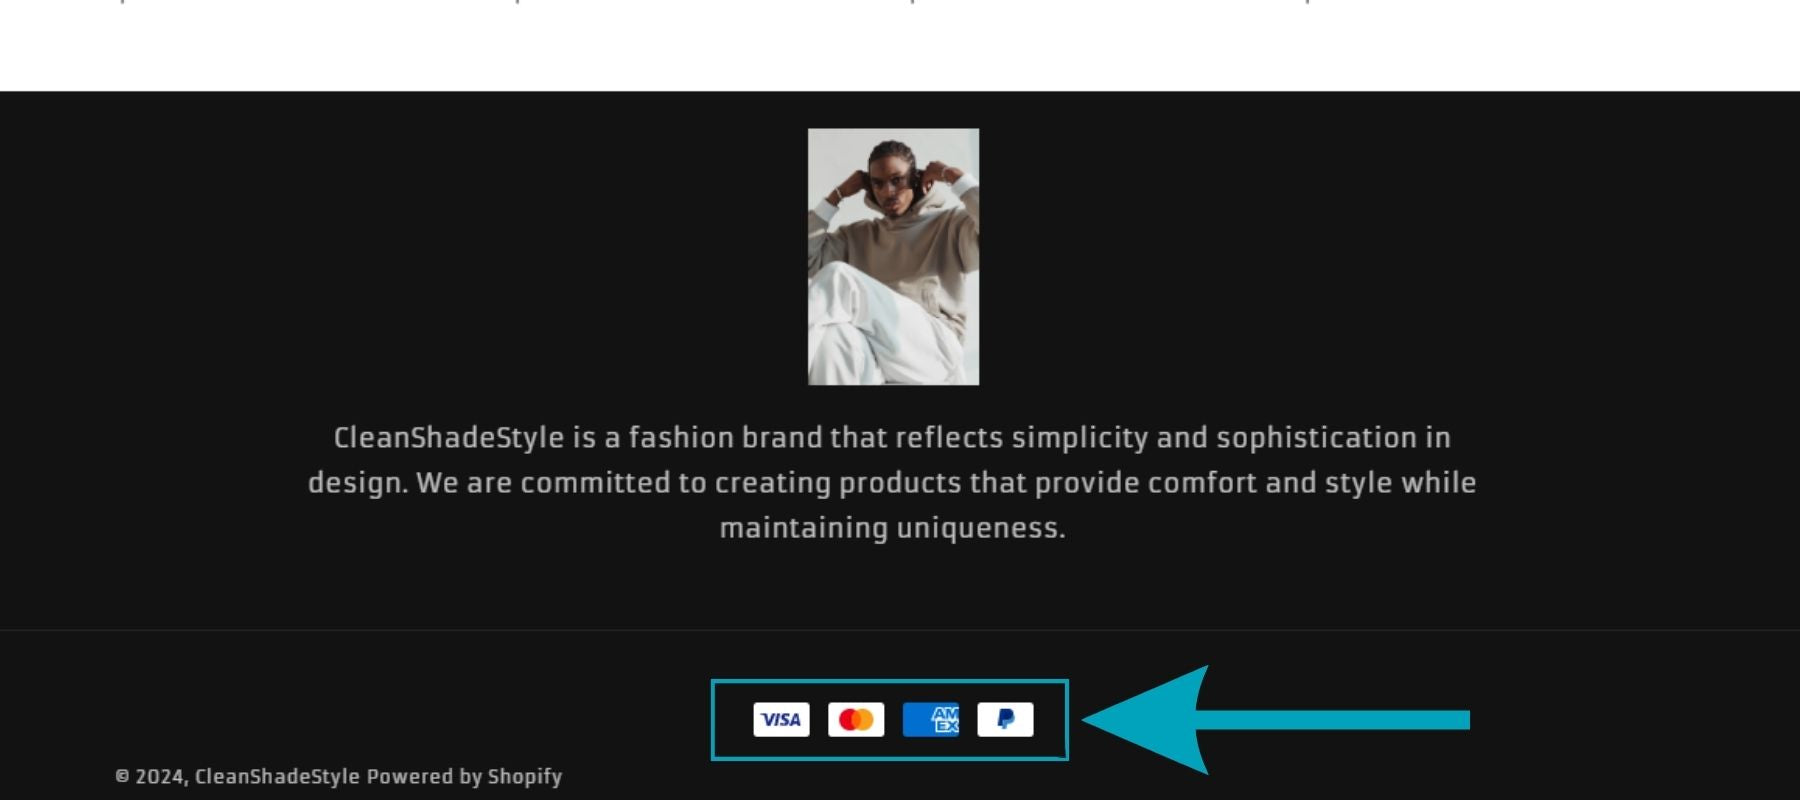
Here is the result:
![]()
Option 2: Edit In Theme Code
Do you want to customize your Shopify footer to display your payment methods? Here's how to change the payment buttons shown:
Before you start, changing your style code is part of this guide. Before you make any changes, you should back up your theme. If you don't know how to change code, you might want help from a Shopify pro.
Read more: Guide to Adding Your Own Custom Liquid Section in Shopify.
Step 1: Find Your Theme Code
To begin, you need to sign in to your Shopify account.
After that, go to Online Store > Themes.
Then, on the theme you want, click "Actions" and then "Edit code."
Step 2: Find Footer File
Once step 1 is done, a list of theme files will appear on the left.
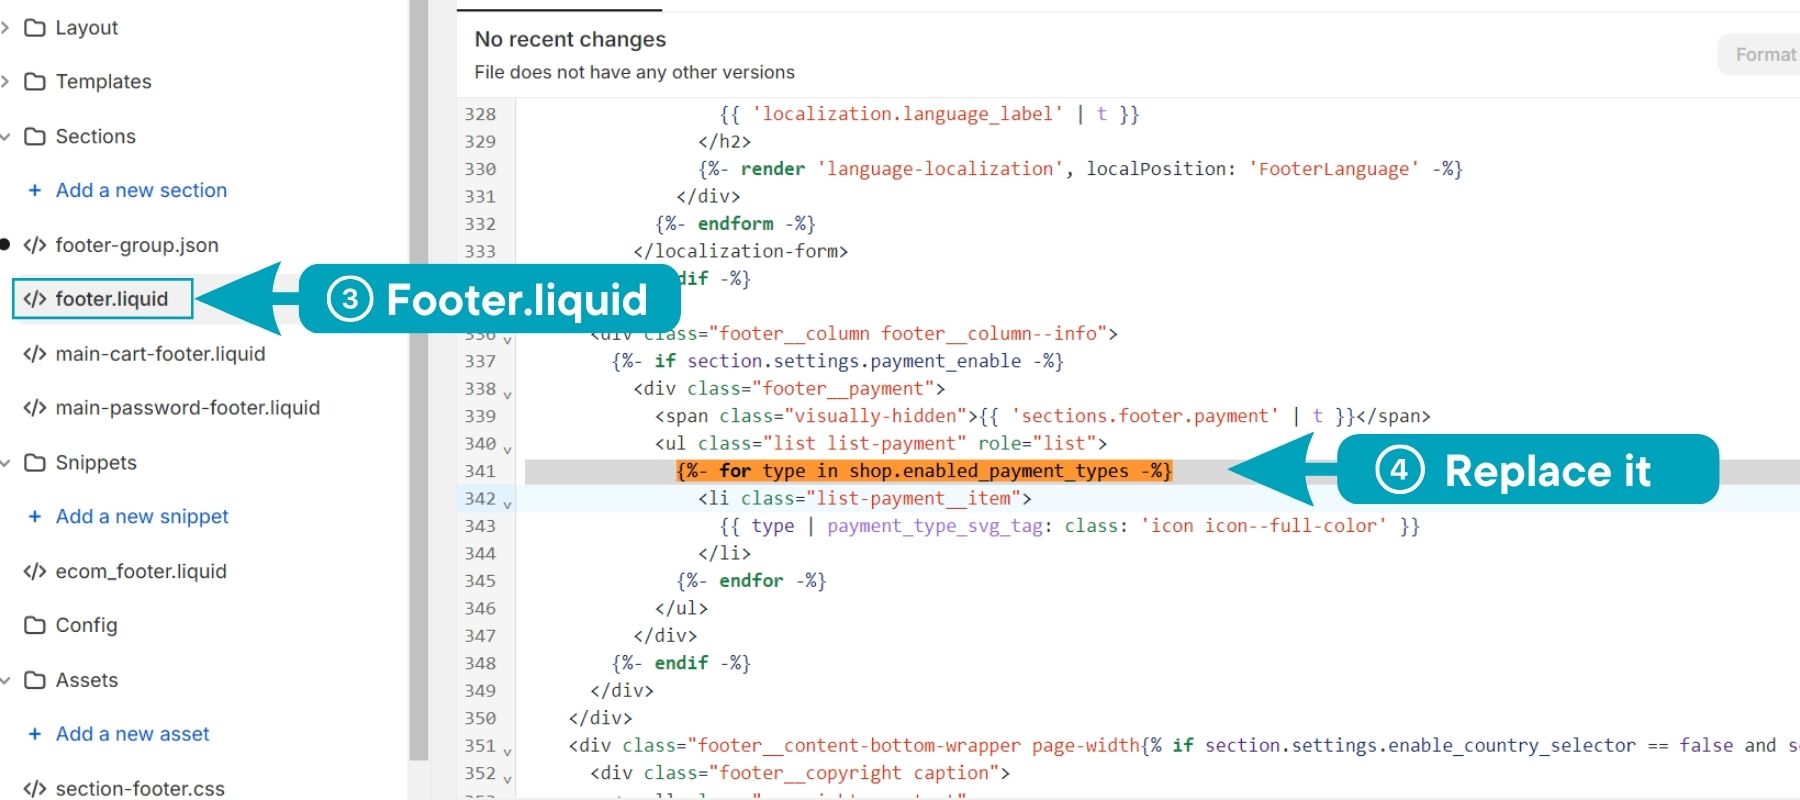
Next, find footer.liquid on Sections by scrolling down or typing its name into the search bar.
Then, open "footer.liquid" in the code editor by clicking on it.
Now, use Ctr + F to look for the next code snippet:
{%- for type in shop.enabled_payment_types -%}
After that, change the code on step 2 to this code:
Step 3: Customize Payment Providers
See the line in the revised code snippet:
visa,mastercard,american_express,paypal
This list (split by commas) shows the payment buttons that are currently shown.
- To add an icon: Add the matching code from the Shopify list to this list, ensuring there are commas between each.
- To remove an icon, Simply remove its code from the list.
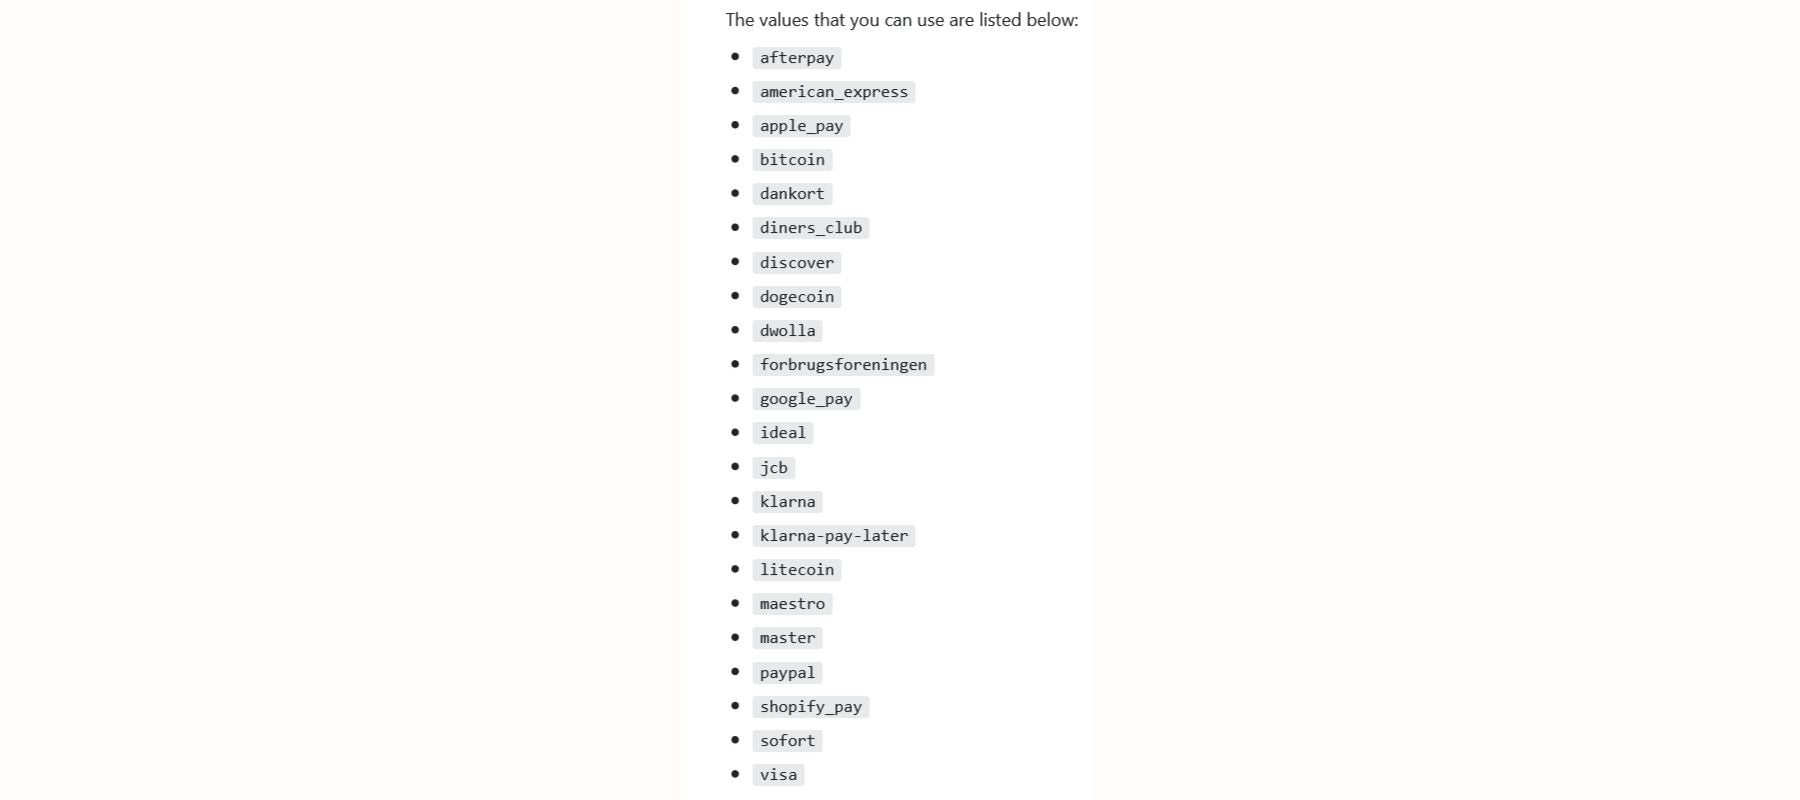
This list shows the payment icon codes that are currently supported:
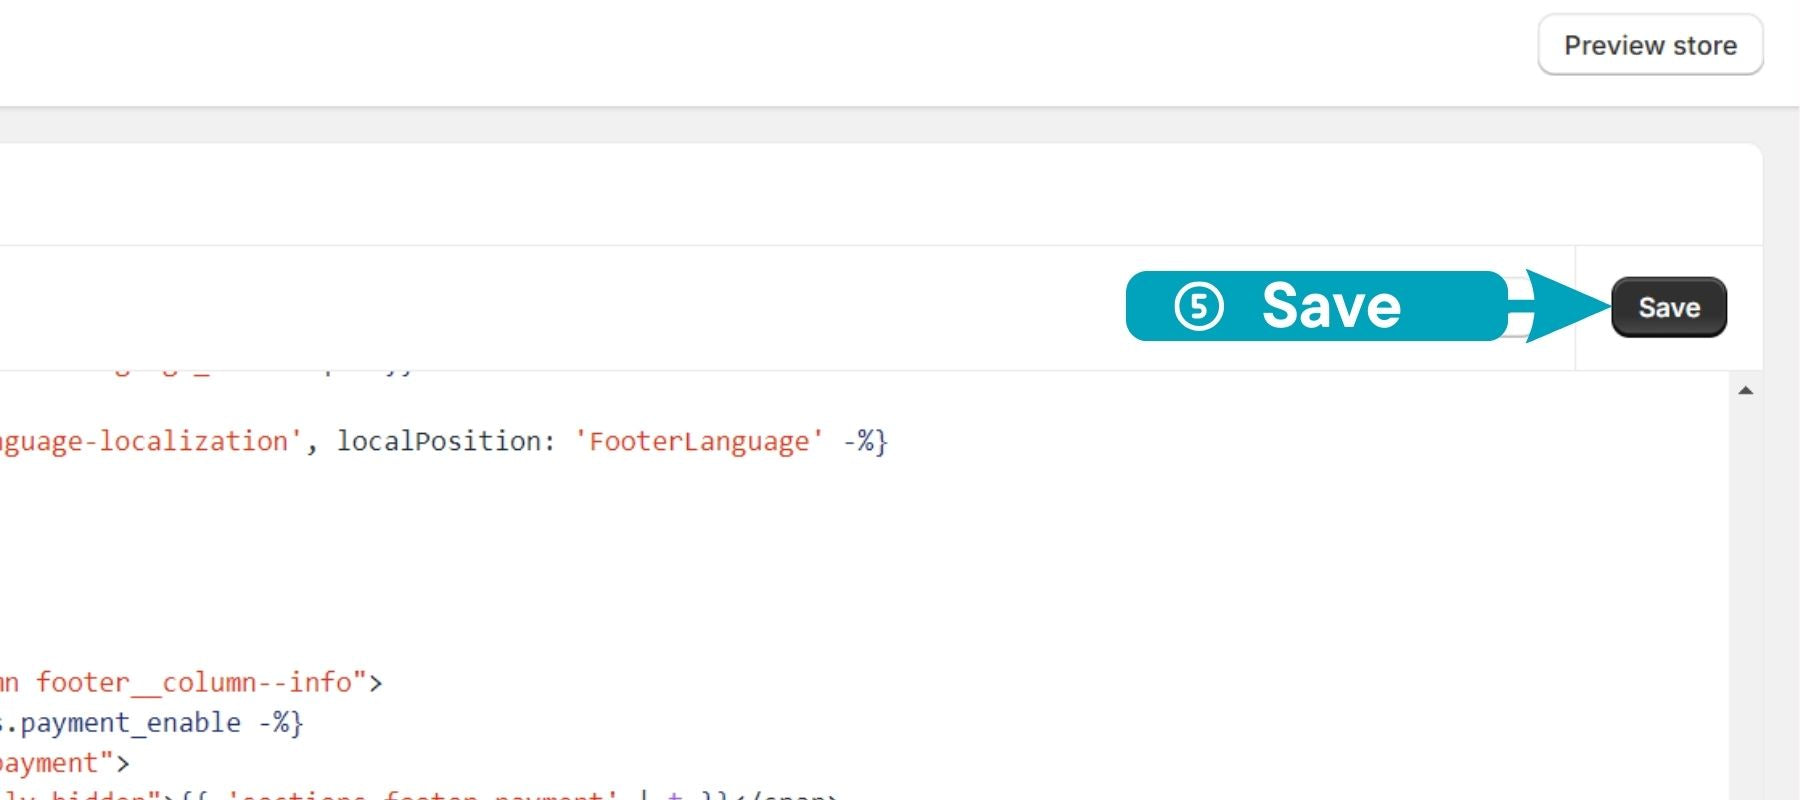
Finally, click "Save" to make the changes take effect.
In the example in the image below, we only show payment methods Visa, Master, American_express, and Paypal:
Important notes: Make sure that the payment options you list at the bottom are turned on in Shopify.
By following these steps, it's easy to change the payment icons at the bottom of your Shopify store, giving your customers a more accurate and useful experience.
How To Remove Shopify Payment Symbols From Theme Codes?
Want to remove all payment symbols from your Shopify footer? While the last guide was mostly about customizing, here's how to get rid of all of them using your theme code:
To remove logos from the bottom using your store's theme code, do steps 1 and 2 again on choice 2: Change the code above the theme.
Search for the following code snippet (used in step 2 of the previous guide):
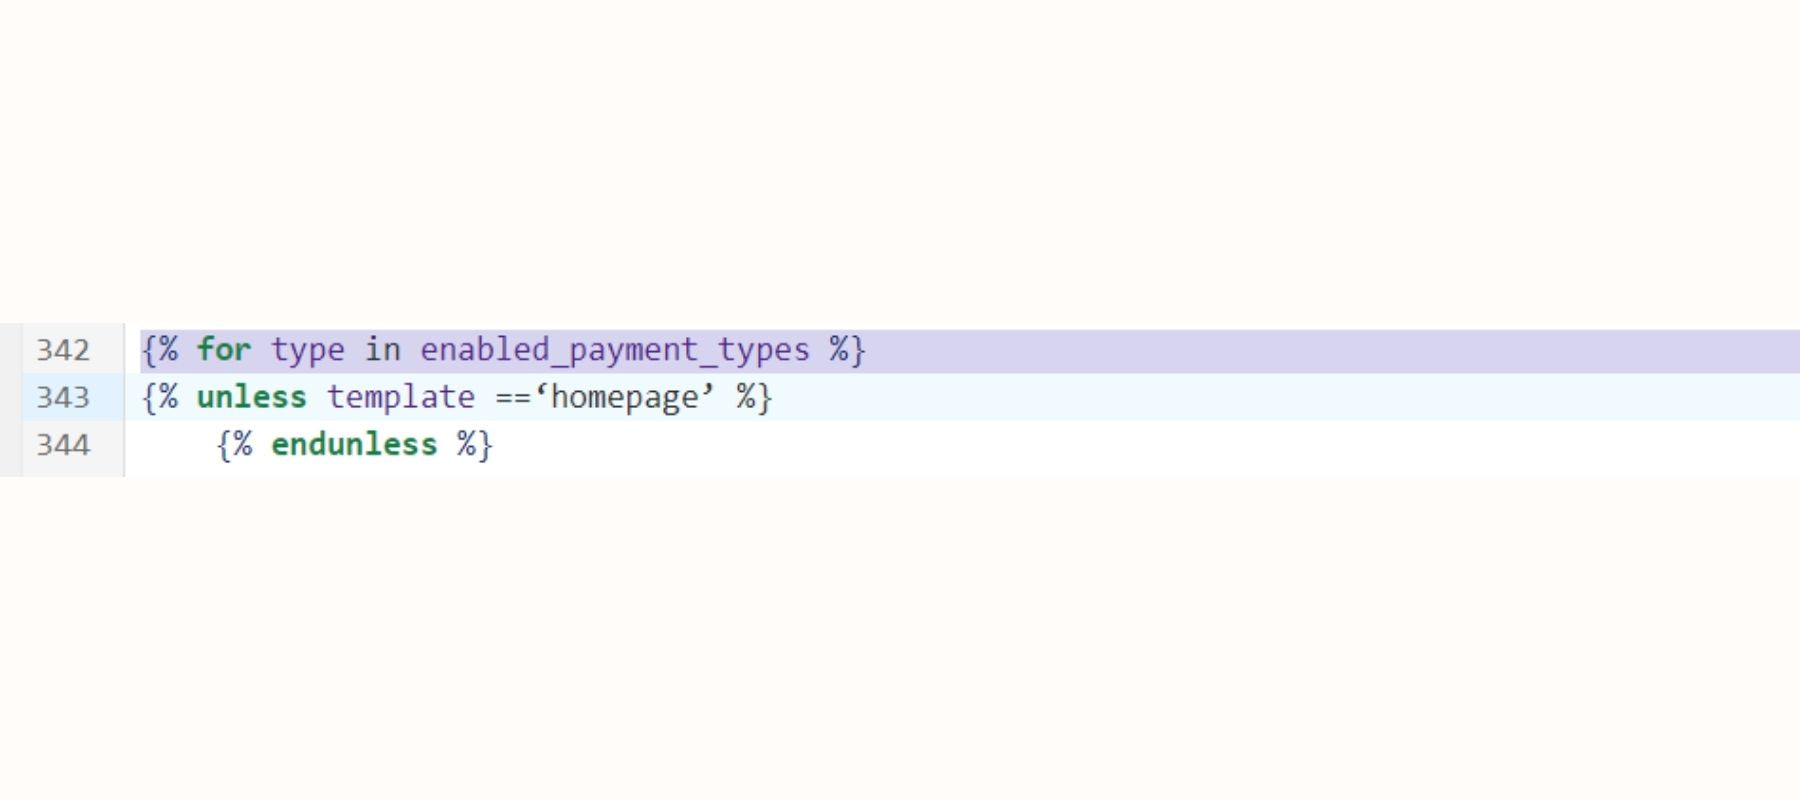
{% for type in enabled_payment_types %}
Next, immediately below this line, paste the following code:
{% unless template ==‘index’ %}
NOTE: This conditional phrase checks whether the present page is the homepage (template name "index"). The code in curly brackets will be run if not the homepage.
At the very end of the code you pasted, add the following closing line:
{% endunless %}
NOTE: This line ends the conditional statement, disabling the payment symbol code only on non-homepage pages.
Lastly, click "Save" to make the changes take place.
These modifications will remove payment symbols from your store's bottom on all pages except the homepage. This lets you keep symbols on your homepage for exposure while eliminating them from less important pages.
Using EComposer Builder To Customize Shopify Payment Icons
Don't you know how to code? Don't worry—Shopify's built-in choices are a good way to manage the payment icons at your bottom, but EComposer Page Builder gives you complete control and lets you make your payment methods even more unique.
This #1 Shopify Page Builder intuitive drag-and-drop editor lets you go beyond pre-defined settings and tailor your footer (or more) to match your brand identity perfectly. Whether you want to rearrange the icons, adjust their size, or swap them entirely, EComposer makes it a breeze.
Follow the straightforward steps below:
Step 1: Installing And Selecting Pages
First, installing the EComposer Landing Page Builder is the first step. This editor is a top pick with over 2,970 ratings and a perfect score.
![]()
Once installed, return to your Shopify admin and find EComposer in the "Apps" section. Then click "Start Building" to begin editing.
![]()
The next step is choosing a page template and the type you want to make. For that stage, we will use the homepage as an example.
![]()
Step 2: Show the Shopify Payments Icon
From now on, you will have two options to display the Shopify payments icon with the EComposer editor.
NOTE: The options below are just suggestions; you can learn from them and create ways that suit your brand.
Option 1: Edit regular Footer.
If you just want to say the payments icon in the Footer as usual, select the "Footer" section in the "Navigator" section of EComposer.
![]()
You can then customize your payments option icon by inserting an image.
![]()
Option 2: Customize Payments Options anywhere on the website.
With EComposer, you can drag and drop your payments icon anywhere on the page.
Select "Payment Methods" in the Elements section and drag-drop it anywhere on the page you want.
![]()
Finally, just hit "Publish" and publish the page you just edited.
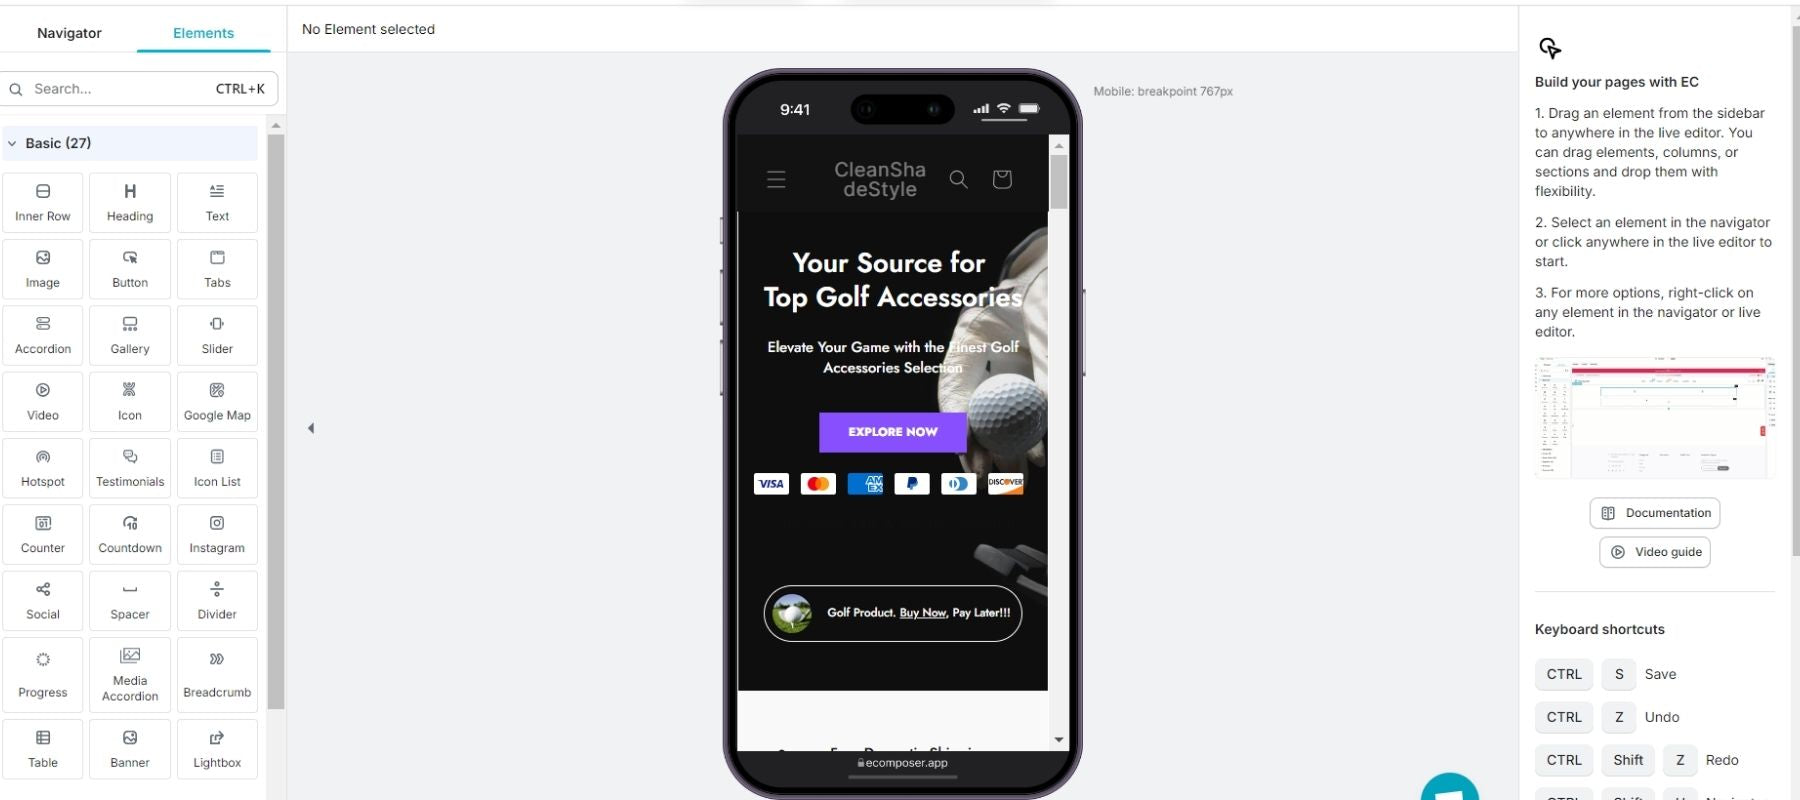
For example, we'll put the payments options icon right below the "EXPLORE NOW" button on the home page.
![]()
Read more:
- How to Make a Shopify Footer and Change It.
- How to Create and Customize a Shopify Shopping Cart Page
Issues & Solutions When Shopify Payment Icons Are Not Displayed
First, ensure you enable your payment icons in the theme editor. But sometimes, your payment icons might not appear on your Shopify store, even though you accept payments. Don't worry; this can be easily fixed in most cases.
Here's the most common culprit:
#1: Set Code Snippet False
The most likely cause of the error is that the code snippet {%- assign show_payment_icons = false -%} is set to false. This code controls whether the payment icons are displayed in the footer template (footer.liquid). When set to false, the icons are hidden.
Here's a breakdown of the code:
- {%- assign ... = ... -%}: This Liquid template tag assigns variable values.
- show_payment_icons: This variable's name controls the visibility of the payment icons.
- False: This value is currently assigned to the variable, indicating that the icons should be hidden.
Here's a quick fix you can try:
- In your Shopify admin, navigate to Online Store > Themes.
- Click Actions on your desired theme and select Edit code.
- You should see the footer.liquid file at the top. Open it.
- Look for the line that says: {%- assign show_payment_icons = false -%}.
- Simply change false to true in this line: {%- assign show_payment_icons = true -%}.
NOTE: If altering this value doesn't work, other things may impact the theme's code or icons.
#2: Conflicting Theme Code
One probable cause of missing icons is the clashing theme code. Imagine your theme to be a complicated dish including several components. Different components might sometimes clash, resulting in unexpected outcomes. Similarly, other code snippets or applications in your theme may interfere with the code that displays the icons.
Here are some things that might be causing this conflict:
Other apps: An app you've recently installed could introduce code that unintentionally hides your payment icons. So, try temporarily disabling your apps individually to see if the icons reappear. This will help identify the culprit.
Custom code snippets: If you've added any custom code to your theme, it might accidentally override the payment icon code. Review any custom code you've added to see if it interacts with the functionality of the footer or payment icon.
Outdated theme: Sometimes, an obsolete theme won't work with newer Shopify versions, altering the payment icon code. Using the newest theme version may fix the problem.
NOTE: Contact a Shopify specialist or theme developer if you're uncomfortable debugging code. Also, try referring to the workarounds in the Shopify community.
Tips For Optimizing Your Shopify Payment Logo
Once you've decided on a way to add unique payment icons, optimize them for the optimal user experience. Here are some crucial points:
Designing Appealing Payment Icons
Payment symbols on your Shopify page reassure and build confidence. They may also improve the appearance and checkout experience.
Here are some ways to make brand-appropriate payment symbols that enhance conversions:
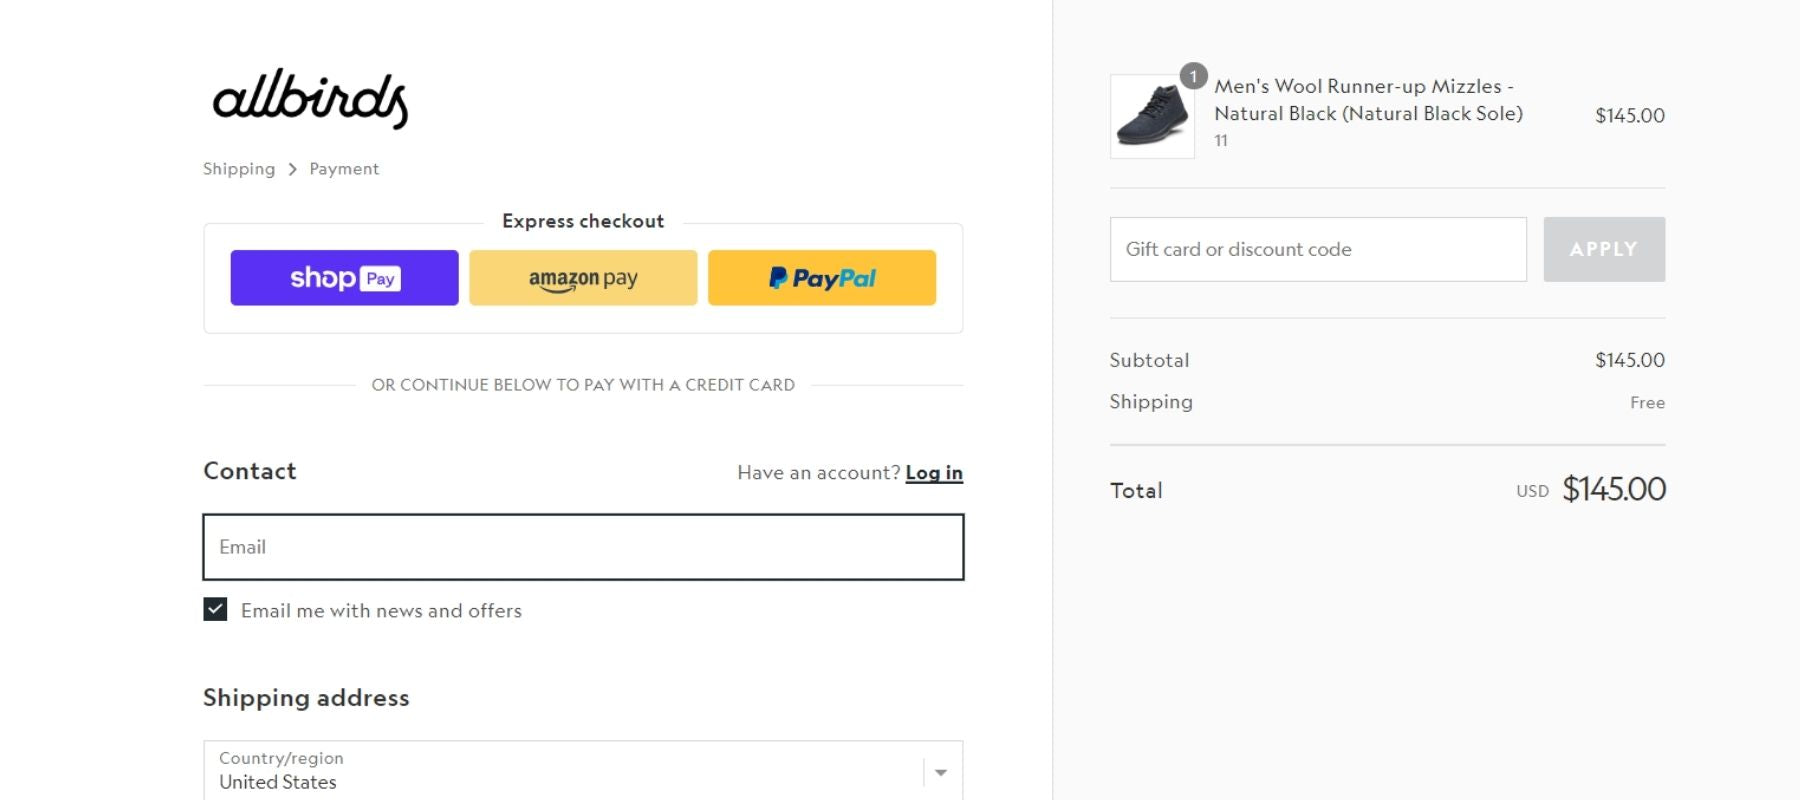
First is consistent sizing and spacing. Maintain uniform sizing and spacing for all icons, as Allbirds does on their checkout page. This creates a clean and organized visual experience.
Second is the high-resolution graphics; make sure you use crisp, high-quality images for the icons.
The third is color coordination; integrate the icons into your brand image using colors matching your palette or checkout page design.
Prioritization: First place popular payment methods like Visa and Mastercard or those you wish to promote.
Optimizing For Mobile
On the internet, 55.4% of people use their phones to buy things. That's why mobile commerce is so popular—you must ensure your phone payment buttons work well.
First, you should use responsive theme design principles to ensure the icons automatically adjust their size based on the screen size. This prevents them from appearing too small or too large on different devices.
We will recommend some of the best Shopify responsive themes:
- Kalles - by the4.co
- Ecomus - by the4.co
- Responsive - by Out of the Sandbox
Pro tips: With its simple drag-and-drop interface, EComposer Page Builder has built-in image optimization technologies to speed up payment logo loading and display on desktop and mobile devices. This speeds up page loading and increases usability.
FAQs
1. Is It Necessary To Have An SSL Certificate To Display Payment Icons?
No, having an SSL certificate is not required to show payment symbols in your Shopify shop.
On the other hand, every online store needs an SSL certificate, especially if they take payments, even if they don't show payment buttons.
2. Do I Need To Use Specific Icons For Certain Payment Methods?
No, you don't have to use certain icons for certain Shopify payment ways. But, it is suggested that you use the proper badges the payment companies give you. There are a few good reasons to use them:
- Improved Recognition: Customers recognize the official logos and immediately know which payment methods they accept. Trust in your checkout procedure increases.
- Clearer Payment choices: Payment choices can't be misinterpreted.
- Professionalism: Using official logos maintains a professional appearance for your store.
While not mandatory, using the official logos is highly recommended due to their benefits. It's the safest route to ensure clarity, trust, and a smooth customer checkout experience.
3. What Are Some Legal Considerations Regarding Payment Icons?
When dealing with payment icons on your Shopify store, there are a few critical legal considerations to keep in mind:
Copyright and Trademark:
- Official Logos: Ensure you have the right to use the official logos of the payment methods you accept. Most payment providers, like Visa and Mastercard, have usage guidelines available on their websites.
- Comply with guidelines: These guidelines typically outline acceptable uses, size limitations, and any modifications allowed to their logos.
- Avoid altering logos that misrepresent the brand or violate their trademark policies.
Third-Party Icons:
- If you're using generic or non-official payment icons downloaded from third-party sources, ensure they are free to use commercially or have the appropriate licensing for your intended purpose.
By following these guidelines, you can ensure that your payment icons on your Shopify store comply with relevant laws and protect your business and customers.
Key Takeaways
This blog post gave you useful tips and solutions that you can use to change your Shopify payment icon in a good way.
Remember, these icons can improve user experience; clear and recognizable icons make the checkout process effortless for customers. This allows them to identify their preferred payment options quickly. Also, utilizing official logos and maintaining a professional presentation reassures customers about the security and legitimacy of your store.
Also, don't forget that EComposer Page Builder is a great solution that helps you add a Shopify payments icon without needing any code, and it's fully optimized for mobile.
Start your free EComposer trial now!
Build your highest-converting page in 15 minutes


Blog Categories


0 comments