


Shopify Snippets vs Sections: What to Know?
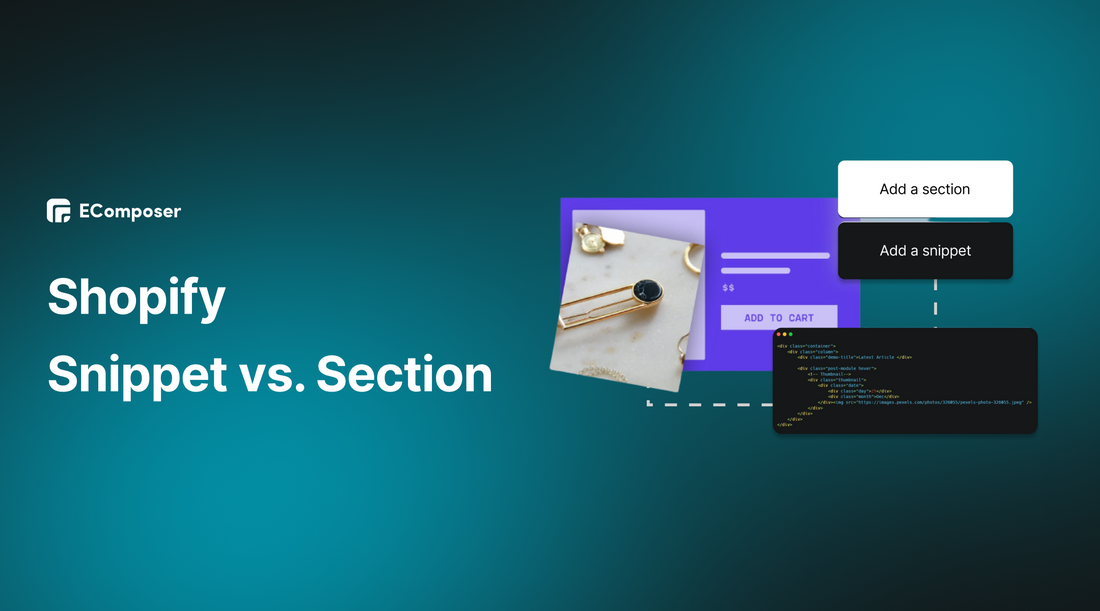
Table Of Contents
The digital world is a complex web of tools and technologies, and for those who dare to navigate its vast expanse, a comprehensive understanding of these mechanisms is not just beneficial—it's essential. Today, we focus on a platform that has revolutionized the e-commerce industry: Shopify.
In this blog, we delve into the specifics of two integral components of Shopify's architecture - Snippets and Sections. These features are crucial in shaping an efficient, user-friendly, and versatile online storefront.
Before going into the details, make sure you have built an eCommerce store on Shopify!
Overview of Shopify Snippets vs Shopify Sections
What is Shopify Snippet?

Gaining a comprehensive understanding of Shopify snippets is integral, particularly for those with prior experience in server-side languages, where similar concepts may be identified as "partials" or "includes". Within the domain of Shopify, these entities are termed "snippets".
Let us proceed with a detailed exploration of Shopify snippets:
- - Snippets are essentially compact units of reusable code stored as separate files, designed for recurrent use.
- - They are conveniently located in the snippets directory of your Shopify platform for easy access.
- - Each snippet file comes with the extension “.liquid”, indicating their association with Shopify's proprietary Liquid language.
- - The value of snippets is most evident when you have sections of code that are needed across various pages, but not universally across the entire theme.
- - Their presence in a template can be detected by the Liquid "include" tag, followed by the snippet name (for instance, {% include 'snippet name' %}).
- - When calling upon a snippet name, it's noteworthy that the “.liquid” extension isn't necessary.
- - Once a snippet is activated within a theme, it can seamlessly interact with all variables from the parent template.
- - Snippets frequently encapsulate elements such as social media connections and pagination blocks, among other components.
What is Shopify Section?

Shopify sections are a revolutionary tool that empowers store owners to create and personalize their online shop with minimal interaction with code. Developed with the aim of providing greater modularity and flexibility to Shopify themes, these sections allow for a customized shopping experience that resonates with the merchant's vision and aesthetic preferences.
This functionality was made possible with the advent of the Theme Editor, a user-friendly interface introduced in late 2016 that provides real-time theme adjustments and previews.
One of the many advantages of Shopify sections is their designed coherence, offering merchants a seamlessly integrated system within their chosen theme. Utilizing the Theme Editor, merchants can construct intricate, responsive page layouts by simply selecting, dragging, and dropping pre-designed components.
Regardless of how these components are arranged, the end product delivers a professional appearance. This is largely due to the existence of two distinct types of sections:
- - Static sections refer to fixed elements of a page that can be customized via the Theme Editor. They are termed "static" due to their immovable position within a page template, offering a constant element within the website's design.
- - Dynamic sections offer a degree of flexibility absent in their static counterparts. They can be freely added to the store's homepage, provided your theme includes the necessary {% schema %} tags.
In essence, dynamic sections could be considered an evolved version of static sections, distinguished by their capacity to be dynamically added, removed, and rearranged via the Theme Editor.
This feature grants merchants unparalleled control over their Shopify store, both in terms of content and layout. Not only does it facilitate easy configuration of sections, but it also allows the same level of control over any blocks contained within those sections.
Differences between Section and Snippet in Shopify
In the ever-evolving ecosystem of Shopify, two fundamental elements that play significant roles are 'Sections' and 'Snippets'. Both of these tools are pivotal for managing and customizing your online store, but they function differently and serve unique purposes.
Understanding their specific applications and potential drawbacks can help you use them more effectively and strategically in your store.
To assist you in this, we've developed a comprehensive comparison table that details the key aspects of Shopify Sections and Snippets. This will include their definitions, benefits, best uses, and limitations. This comparison should equip you with a better understanding and guide you in harnessing these tools for your online store's success.
|
Shopify Sections |
Shopify Snippet |
|
|
Definition |
Modular, drag-and-drop elements that allow merchants to build a customized and unique homepage on their Shopify store. |
Small, reusable pieces of Liquid code that can be included within multiple templates and sections for consistent functionality. |
|
Benefits |
- Enable merchants to construct diverse and personalized homepages with ease. - Remove the need for professional development assistance in simple layout modifications. - Bolster customer engagement by offering an ever-evolving, dynamic homepage. |
- Provides a means to implement changes across multiple parts of a site from a single source file. - Facilitates streamlined and organized theme development, making coding more manageable. - Empowers users to create standardized markup for recurrent use in various scenarios. |
|
Best use for |
Best employed for building customizable and dynamic homepages, featuring an array of user-configurable design elements such as text fields, slideshows, and product feature blocks. |
Highly effective for managing recurring segments of code within theme development, and for generating and maintaining similar pieces of code that are deployed across different pages or sections. |
|
Cons |
While the sections are an excellent tool for homepage customization, their functionality is somewhat limited on other pages, not offering the same freedom in ordering or customization. |
While snippets offer the advantage of centralized updates, they necessitate a basic understanding of Liquid code for the best usage. Further, changes made in the snippet file must be manually applied across all instances of the snippet. |
How to add the snippets to Shopify
Step 1: Open the code editor
- Go to your Shopify Admin, choose Online Store and click Themes.

- Click on the three dots in the theme you need to edit and select Edit code.

Step 2: Copy and paste the snippet
In this tutorial, I will add the Twitter card as an example to show you how to add the snippet tag to the Shopify store.
- Below the Snippets heading, tap the link Add a new snippet. Create a snippet called twitter-card using the singular form.

- Replicate the following snippet.
{% assign template_base = template | split: '.' | first %}

{% assign og_title = page_title  %}

{% assign og_description = page_description | default: shop.description | default: shop.name %}


{% if settings.logo_use_image %}

  {% capture twitter_image_tag %}<meta name="twitter:image" content="http:{{ 'logo.png' | asset_img_url: 'grande' }}">{% endcapture %}

{% endif %}


{% comment %}

  Template specific overides

{% endcomment %}

{% if template_base == 'product' %}

  {% assign og_title = product.title | strip_html %}

  {% capture twitter_image_tag %}<meta name="twitter:image" content="http:{{ product | img_url: '1024x1024' }}">{% endcapture %}


{% elsif template_base == 'article' %}

  {% assign og_title = article.title | strip_html %}

  {% assign og_description = article.excerpt_or_content | strip_html %}

  {% if article.image %}

    {% capture twitter_image_tag %}<meta name="twitter:image" content="http:{{ article | img_url: '1024x1024' }}">{% endcapture %}

  {% endif %}


{% elsif template_base == 'password' %}

  {% assign og_title = shop.name %}

  {% assign og_description = shop.description | default: shop.name %}

{% endif %}


<meta name="twitter:site" content="{{ settings.social_twitter_link | split: 'twitter.com/' | last | prepend: '@' }}">

<meta name="twitter:card" content="summary_large_image">

<meta name="twitter:title" content="{{ og_title }}">

<meta name="twitter:description" content="{{ og_description }}">

<meta name="twitter:image:alt" content="{{ og_title }}">

{{ twitter_image_tag }}
- Add this code in your new twitter-card.liquid snippet.

Step 3: Save and repeat
Once you've inserted the code, make sure to hit Save and then replicate the aforementioned steps for each layout.
How to add Shopify sections to your pages
There are two distinct paths you can take when it comes to adding sections to your Shopify page: leveraging the built-in functionalities that Shopify offers, or utilizing the power of third-party applications. In the following part, I will shed light on both of these methods for your better understanding.
Using Shopify default (code editor):
Step 1: Open Sections in the code editor
- Go to your Shopify Admin, choose Online Store and click Themes.

- Click on the three dots in the theme you need to edit and select Edit code.

- Scroll toward the Sections folder within your theme's code editor. And click on Add a new section.

Step 2: Name your new section
Name the Section you intend to create and click Done when ready.

Step 3: Add in your custom Liquid code
Once you've created a new section file, it will come equipped with a basic layout. This layout includes spaces where you can add your own unique coding elements - like the section schema, the styles from your CSS stylesheet, and any JavaScript you might need.

Step 4: Add your custom section to page templates
If your personalized code carries the right data in the presets, your freshly created section will be ready to use through the Shopify theme editor.
You can choose to restrict its usage to specific pages or, if you prefer, you can make it accessible for any page template.

Using Third-party apps (without coding)
The use of third-party applications to craft sections for Shopify pages has emerged as the preferred choice for numerous businesses, attributed to the unparalleled convenience it offers. Shopify hosts an array of applications designed to support the creation of sections for your Shopify store, but not all apps deliver an exceptional user experience.
That's why we're excited to spotlight EComposer Shopify Page Builder. Positioned as a premier landing page builder on Shopify, EComposer doesn't just offer a service - it offers a solution for your web design needs.
With EComposer at your side, you'll be able to construct a top-notch Shopify store with a lot of sections, page templates, elements, extensions, and other advanced features at your disposal. Plus, maneuvering through these options is a breeze with their potent drag-and-drop editor.

An outstanding feature that truly distinguishes EComposer is an unlimited collection of templates. When employing this application to create a section for your Shopify page, you are granted two distinct yet equally appealing choices.
You can either channel your creativity by devising an entirely new design, or you can save time and effort by utilizing one of the pre-existing, professionally developed templates.
In essence, EComposer arms you with an extensive toolkit of design options, making the construction of your sections both efficient and precise. You have multiple paths to reach a compelling section that satisfies your unique requirements.
Thanks to EComposer's versatile drag-and-drop feature, you are presented with two paths to section creation. You can tap into your creativity to tailor-make a section or choose to elevate your design from a library of over 300 section layouts designed for a range of content types and objectives. Creating a personalized, professional-looking section has never been this straightforward and accessible.

For more details on creating sections for your Shopify pages using EComposer, please refer to the blog: How to add sections on Shopify pages
Related posts:
- How to use Shopify section groups for theme customization
- How to add section to Shopify Product Page
- How to use Shopify Sections & Blocks
- Shopify Section ID: The Importance & How To Find It
- How to add sections in mass Shopify pages
Final thoughts
Snippets and Sections are not mere features of the platform but instrumental building blocks that can significantly transform your store. By integrating Snippets and Sections into your shop's code and pages effectively, you're paving the path for a more dynamic and customized shopping experience.
In the vast realm of e-commerce, equipped with tools like Shopify, the journey of learning never truly ends. There are always more features to explore, understand, and leverage to your advantage.
The insights shared in this blog are a stepping stone, hopefully empowering you to delve further into Shopify's capabilities and optimize your online business.
Build your highest-converting page in 15 minutes


Blog Categories


0 comments