


How to Add Products to Collections on Shopify
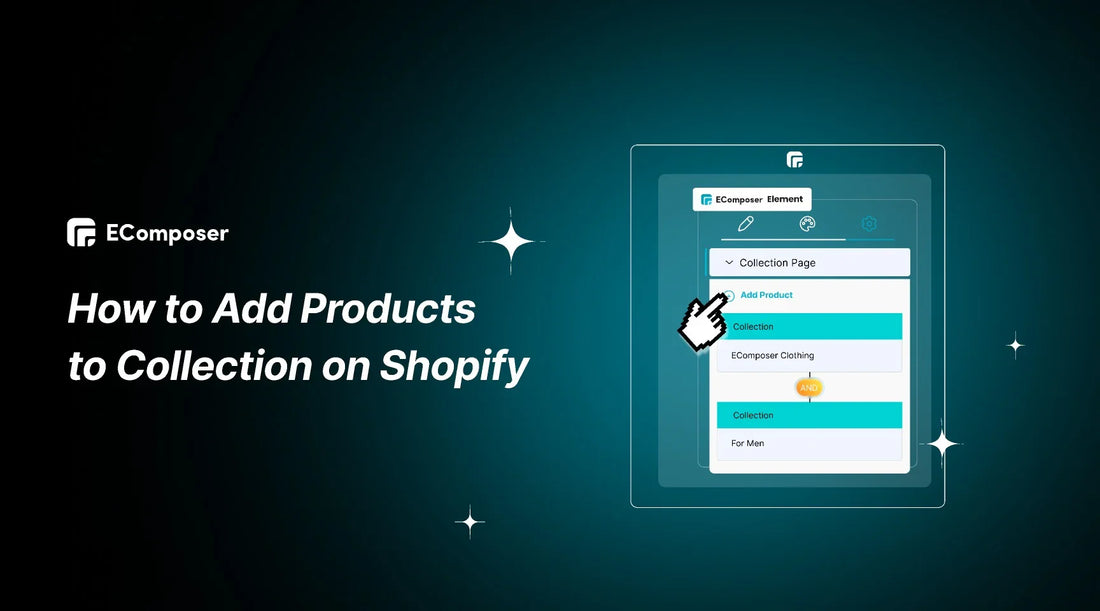
Table Of Contents
In e-commerce, mastering the intricacies of Shopify's product organization is essential for a seamless online shopping experience. This article unravels two distinct and efficient methods for merchants seeking a comprehensive guide on How to add products to collections on Shopify.
A thorough grasp of Shopify's capabilities is essential for navigating the ever-changing world of online retail, and collections are critical for increasing product visibility. Whether you're a Shopify novice or an experienced user, optimizing your store's functionality involves mastering these crucial steps. Join us as we demystify the process, providing step-by-step insights and actionable tips to empower merchants in effortlessly curating and showcasing their product offerings within collections on the Shopify platform.
Understanding Shopify Collections
What are Shopify Collections?
Shopify collections comprise groups of products sharing common characteristics, offering an effective means of categorization. This facilitates the creation of easily navigable lists, simplifying the shopping experience for customers.

Diverse collections cater to distinct purposes and demographics, exemplified by categories such as:
- Vintage Vibes
- Modern Minimalist Finds
- Smart Home Innovations
- Organic Beauty Picks
- Natural Remedies Corner
- …
The versatility of Shopify collections allows merchants to tailor their product presentation, streamlining accessibility for shoppers seeking specific items or themes within the online store.

The importance of incorporating Shopify collections
Before diving into the step-by-step guide on adding products to Shopify collections, understanding their vital role in your business is critical:
- Improved Navigation: Shopify collections organize products into logical groups, enhancing store navigation for customers. This simplifies their shopping experience and boosts overall sales by grouping related items..
- Targeted Marketing: Collections enable targeted marketing campaigns based on customer segments, allowing personalized messages and promotions. Integration with email marketing and advertising further directs traffic to specific product groups, increasing conversions.
- Cross-Sell and Upsell Opportunities: Shopify collections provide a platform for effective cross-selling and upselling. Increase average order value and total sales by encouraging shoppers to add additional things to their basket by presenting similar products, such as accessories with dresses.
How to Set Up a New Collection in Shopify
Embark on the foundational journey of refining your Shopify store with our step-by-step guide on creating a new collection, the critical first step that lays the groundwork for an organized and compelling product display.
Step 1: Navigate to Products > Collections and select "Create collection"

- Navigate to the left-side menu and select Products > Collections, where you'll access all the collections you generate.
- For beginners, an initial 'Home page' collection might be visible; you can either delete it or disregard it permanently.
- Initiate creating your inaugural collection by clicking the Create Collection button in the upper right corner.
Step 2: Input the collection title, description, and image

You can name your newly created product collection on this page, provide a description, upload an image, customize the page's appearance on search engines, and determine the method for adding products to the group.
- In the realm of Shopify's collection creation page, the title assumes a pivotal role as it becomes the headline for your collection page and appears prominently wherever the collection is featured across your store.
- Incorporating a high-quality image enhances the visual appeal of your collection page, appearing behind the title in the header and on other relevant pages.
- While the collection description is optional, it can serve to delineate the category of products housed within your collection.

Example of A Collection page on Shopify Store
Step 3: Select your preferred collection type

- Next, we will delve into the specifics of both automated and manual collections, offering a more comprehensive understanding of each option.
Step 4: Modify the SEO settings for the collection page and save the changes

Regarding SEO, you have the ability to customize how your collection page appears on search engines through the final setting on this page.
- Simply click "Edit website SEO" to modify the title, description, and URL slug, and observe real-time previews at the top of the section as you make adjustments.
- It's important to note that altering the title and description in the SEO settings won't impact the collection's title and description; instead, it influences how the information is presented on Google and other search engines.
- After configuring your collection page SEO, Save your changes and prepare to commence adding products to your collection.
With your new collection established, you're primed to streamline your Shopify store. This strategic organizational framework will undoubtedly enhance the overall aesthetic and navigational ease of your online storefront, ensuring a more engaging and satisfying experience for your customers.
2 Methods for Adding Products to Collections on Shopify
Dive into the world of optimized product presentation on Shopify with two efficient methods for adding products to collections. These strategies transcend mere categorization, promising a dynamic and visually appealing online shopping experience.
1. Incorporating with the Automated Collection Method
Efficient planning can harness the substantial time-saving and organizational benefits of automatic collections on Shopify. We highly endorse this method and will guide you through the process in detail.
Here's a brief tutorial on automatically adding products to Shopify collections:
Step 1: Accessing Collection Creation
Go to Products > Collections and click Create collection.
Step 2: Setting Collection Type
- When initiating a new collection, Shopify defaults to the automatic collection type.
- Proceed to the Conditions section, where you can establish criteria for automatic product selection, allowing Shopify to seamlessly add all products aligning with your chosen conditions.

Step 3: Explore Diverse Automation Options
For those leveraging Shopify Product Taxonomy to delineate product categories, the process of adding products to collections becomes notably streamlined.
Consider a scenario where you manage a jewelry store and aim to introduce an earring collection.
- By establishing a condition that specifies "Product category” is equal to
- Select "Earrings" from the dropdown menu containing all active categories, you effortlessly compile all relevant products categorized as candles.
Alternatively, you can easily craft a cost-effective shopping list for your customers by incorporating products below a specific price threshold. Simply set the condition to "Price is less than" and choose a suitable amount for your product selection.
Step 4: Utilizing Tags for Adding Products
The true potential of automated product administration lies in the utilization of tags. By assigning them to pertinent products, the opportunities become limitless.
Tags can be employed individually or in conjunction with other conditions to include highly specific products, enabling the creation of specialized collections.
For instance, a clothing store intending to unveil a seasonal coat collection can seamlessly integrate product category and product tag conditions, swiftly adding all winter coats to a unified collection in a matter of minutes.

Step 5: Finalize and Create Collection Page
- Click “Save” to Create a Collection Page
2. Using the Manual Collection Approach
Though the optimal method is to automatically include your products in Shopify collections, there are instances where a hands-on approach may be preferred. For instance, when curating a collection with frequent additions and removals, managing tags can become intricate, making manual selection a more suitable option.
Here is a step-by-step guide on manually adding a product to a Shopify collection in five simple steps:
Step 1: Creating Collection Creation
- Access your Shopify admin
- Navigate to Products > Collections, and select Create collection.
Step 2: Selecting Manual Collection Type
- Choose the Manual collection type and save

Step 3: Adding Products Manually
- Proceed to the Products section
- Browse or search for products to build your collection
- Click “...” and choose “Add to collection(s)”

Step 4: Finalizing and Updating Navigation
- Choose a Collection or many if you want
- Click “Save”

Don't overlook updating store navigation for main menu visibility.
*Note: Once set to manual, collection type cannot be changed to automatic.
Armed with these approaches, your Shopify store is ready for streamlined product organization, ensuring an intuitive and engaging shopping experience within thoughtfully curated collections.
Others also read
- How To Add New Page To Shopify Website
- How to design a Shopify store in 10 minutes
- How to Add Products to Shopify?
How to Add a Collection page on your Shopify store
In Shopify, you have two options for incorporating collections onto your homepage: as featured collections or within a collection list.
1. Adding Featured Collections into Your Page
- Create a new product collection as the steps above. Note that the existing "Home page" collection is automatically set as the "Featured collection" on your homepage.
- For an Automated option, set "Product price is greater than $0" to include all priced products. Save your collection.
- Navigate to the theme editor by going to Online Store > Themes. Click the "Customize" button on your current theme.

- In the theme editor, click Add Section
- Select Featured collection

- Customize, and click the "Save" button.

- Save your changes.
2. Adding Collection Lists to your Shopify Store
To integrate collection lists into your Shopify homepage, follow these steps:
- Access the theme customization editor by navigating to Online Store > Themes in your Shopify dashboard and selecting Customize for your current theme.
- In the theme editor, automatically situated on your homepage, go to the bottom of the section menu on the left. Click "Add section" and choose "Collection list."

- A new section with a heading and three blocks will appear. Click on a collection block, choose the desired collection, and click Select collection.
- Repeat the process for the remaining collection blocks, filling them all.
- You've now established a collection list on your homepage, directing visitors to your collection pages and subsequently to your product pages.
- To modify the heading for your collection list section, click on the section on the left, update the heading as needed, save your changes, and you're finished!

However, succeeding with your Shopify store involves more than just adding products to your collection page. For an efficient and budget-friendly approach to shaping an enticing online presence, explore EComposer – a top-tier Shopify App.
EComposer, a highly-rated Shopify Page Builder, enables effortless creation of diverse pages, from captivating landing pages, appealing homepages, to informative blog pages, helpful FAQ pages, and more. By using its drag-and-drop editor, the app eliminates the need for coding while accessing a wide range of splendid templates.

Now, crafting optimized pages is more accessible than ever with various elements and extensions at your disposal. EComposer boasts advanced features like an AJAX cart, AI content generator, and image compressor, enhancing your store's performance. This all-in-one solution saves time, effort, and costs, facilitating rapid development of professional Shopify stores. Elevate your eCommerce endeavors with EComposer. Try it for free!
For those without a Shopify account, sign up now for an exclusive deal: only $1/month for the first 3 months.
Now, let's delve into best practices for constructing a high-converting Shopify Collection Page for more comprehensive transformations.
How to Display Products in a Collection by EComposer easily
You also have the option to incorporate product collections seamlessly throughout your store by utilizing the Collection element within the Page Builder of EComposer.
The Collection Product element allows you to showcase the products within a collection directly on your page, offering customization options for the collection's appearance on the live page. Let's explore the features of the Collection Products Element!
To integrate this element into your page, navigate to Elements > Collection Page > Products.
Simply drag and drop the Products element to your desired location on the page, then search for the collection you wish to include.

You can add vibrancy to your Collection Products page through
- General: Customize basic aspects like Alignment, Background color, Box Shadow, Border, Border Radius, and Hover Animation.
- Product items & Product image
- Title, Price, Compare at price & Sale price
- Add to cart button, Sold out button, Unavailable button, View more button
- Badges, and more.

Refer to the comprehensive guide here to swiftly grasp How to Display the Products in a Collection on your Page. Begin your journey with EComposer's free plan and witness the remarkable transformation firsthand!
Best practices for Building a High-converting Shopify Collection Page
With our tutorial on building a high-converting Shopify Collection Page that is well-planned to attract your audience and increase sales, you can get started on the path to a successful online bookstore.
1. Employ Exact Terminology
When naming your Shopify collections, it's advisable to opt for clear and commonly recognized titles rather than overly creative ones. Consider it like creating a road sign; the idea is to guarantee that there is no misunderstanding and that drivers won't go lost as a result of complex signage.
- Clear and Descriptive Titles: Craft collection titles that precisely convey the contents, making it easier for shoppers to understand and navigate. Opt for clarity over creativity to ensure immediate comprehension.
- Utilize Subtitles and Descriptions: Enhance product understanding by incorporating concise subtitles and descriptions. Provide key details to assist customers in making informed decisions, fostering trust and satisfaction.
- Avoid Ambiguity: Steer clear of ambiguous or overly creative language that may confuse visitors. Prioritize straightforward and precise terminology to streamline the shopping experience.
- Consistent and Relevant Tags: Employ consistent and relevant tags for products within each collection. This not only aids in organization but also enhances the accuracy of product recommendations and search results.
Maintain standard naming conventions for categories (e.g., "Winter sale" instead of "Cold cuts") to prevent customer confusion, reserving creative flair for product descriptions. The key is to prioritize clarity and familiarity in collection names for a straightforward and user-friendly shopping experience.
By embracing precise language throughout your Shopify Collection Page, you create an environment where customers can quickly identify and connect with the products they seek, ultimately contributing to higher conversions and customer satisfaction.
2. Visual Harmony in Collections
Online retailers dedicate extensive hours to perfecting the appearance of individual items on their websites. They invest heavily in top-notch photography equipment, meticulously edit photos, and select creative settings to showcase their apparel, all in pursuit of an enhanced visual experience.
However, the attention often overlooks how a product collection presents itself collectively. While visuals shouldn't unduly influence the choice of products within a collection.
For instance, it's preferable to consolidate all men's shoes, even if color variations exist—consideration should be given to the default display order of products. Allbirds's Men Shoes collection exemplifies this approach by thoughtfully curating products with an appealing color palette.

By prioritizing visual harmony in your Shopify Collection Page, you not only enhance the aesthetics but also create a cohesive and engaging shopping environment that encourages customer exploration and boosts conversion rates.
3. Enhance collection-specific promotions and CTAs
One of the key strategies to boost conversion rates on your Shopify collection page is to implement collection-specific promotions and compelling Call-to-Actions (CTAs). These components are essential in helping site visitors decide what to buy. Here are some best practices to consider:
- Tailor Promotions to Each Collection: Craft personalized discounts and exclusive offers for each collection. Highlight star products with enticing deals, maximizing perceived value for potential customers.
- Create Compelling CTAs: Design CTAs with clear, action-oriented text. Use specific phrases like "Explore Latest Trends" and strategically place them throughout the page for consistent prompts.
- Utilize Urgency and Scarcity: Implement countdown timers and low stock warnings to emphasize limited-time offers, creating urgency and scarcity that drive visitors to make timely purchases.
- Optimize for Mobile Experience: Ensure promotions and CTAs are optimized for mobile users. Design responsive buttons with touch-friendly sizes for a seamless mobile shopping experience.
- A/B Testing and Iteration: Conduct A/B testing on different promotional strategies and CTAs. Regularly analyze performance data, iterate based on insights, and refine your approach for continuous improvement.
Customize your collection pages with unique design elements directly aligned with the browsed category, drawing inspiration from Troubadour's approach. Display a tailored hero image for each collection, maximizing the space for promotions and enticing sales.

Take cues from the Troubadour website where, upon entering the Sale collection, a curated hero image promotes exclusive deals.
Capitalize on conversion opportunities by prominently featuring promotions like a "Buy one, get one at half price" offer on women's jeans. Optimize your 'Women's Clothing' page with a prominent banner to effectively communicate and encourage purchases related to the enticing deal.
4. Emphasize the Significance of Short-Term Collections
A notable advantage of Shopify collections is their flexibility - they don't have to be permanent fixtures.
While maintaining enduring collections for essential categorizations like gender or garment type is wise, you can also create custom collections tailored for seasonal items (such as a holiday collection) or products linked to ongoing events (like donating a portion of sales to disaster relief).
Furthermore, leveraging seasonal collections proves effective in promoting current sale items, facilitating the clearance of surplus stock, and enhancing overall inventory management. In order to do that, you should:
- Highlight Limited-Time Offers: Feature short-term collections prominently to draw attention to limited-time offers. Instill a feeling of urgency in visitors so they will be compelled to investigate and buy before the chance passes.
- Strategic Placement on Homepage: Position short-term collections strategically on your homepage to maximize visibility. Leverage banners or featured sections to ensure that visitors are immediately aware of exclusive and time-sensitive deals.
- Create Seasonal Collections: Capitalize on seasonal trends by curating short-term collections that align with current themes or occasions. This not only keeps your inventory fresh but also taps into the excitement surrounding specific times of the year.
- Utilize Countdown Timers: Enhance the sense of urgency by incorporating countdown timers within short-term collection pages. This visual cue reinforces the limited availability of products, prompting swift customer action.
By underscoring the importance of short-term collections, you create a dynamic shopping experience that encourages customers to stay engaged, explore time-sensitive offerings, and ultimately boost conversion rates.
5. Optimize Shopper Engagement with Filters and Sorting
Enhancing customer engagement and navigation on your website becomes effortless by offering a range of sorting options.
- Streamlined Navigation: Implement filters and sorting options to streamline the navigation experience for shoppers. Allow them to quickly find products based on preferences such as size, color, or price range.
- Improve User Experience: By offering simple filters that address particular needs, you may improve the user experience as a whole. Enable customers to refine their search effortlessly, reducing friction in their journey through your collection pages.
- Multi-Criteria Filtering: Introduce multi-criteria filtering to offer a comprehensive search experience. This empowers shoppers to fine-tune their selections based on multiple attributes, ensuring they discover precisely what they're looking for.
- Default Sorting Considerations: Thoughtfully set default sorting options to align with customer expectations. Consider: Price sorting, Highlighting the biggest discounts, Showcasing best-sellers, Featuring the newest products, Alphabetical arrangement, …
For filters, the possibilities are vast, but prioritize easy access to commonly used filters, particularly those for color and size, to cater to customers' common preferences.

6. Showcase the Best Sellers initially
While providing customers with sorting and filtering options tailored to their preferences is essential, each page defaults to a standard display, presenting a prime opportunity for maximizing conversions. A highly effective strategy is arranging the page to showcase best-sellers initially.
Best-selling items have a track record of converting prospective purchasers into real purchases when they are prominently displayed.
- Capture Immediate Attention: Feature your best-selling products at the forefront of your collection. This not only captures immediate attention but also leverages social proof, signaling to customers that these items are popular choices among their peers.
- Boost Customer Confidence: Placing best sellers at the beginning of the collection enhances customer confidence. It suggests that these items are tried, tested, and favored by a substantial number of satisfied customers, influencing potential buyers positively.
- Encourage Quick Decision-Making: By presenting top-performing products first, you prompt quicker decision-making. Shoppers are more likely to explore and make purchase decisions promptly when they encounter items that others have found highly appealing and valuable.
- Create a Positive First Impression: The initial display of best sellers contributes to a positive first impression. It establishes trust and dependability in the eyes of the customer and sets the tone for the entire purchasing experience.
Consider enhancing these products with customer ratings, utilizing star ratings for a clutter-free display, to introduce valuable social proof into the mix.
By incorporating effective filters and sorting mechanisms, you not only enhance the discoverability of products within your Shopify Collection Page but also significantly contribute to a more satisfying and conversion-driven shopping journey for your customers.
FAQs
1. What is the limit for products in a Shopify collection?
By default, Shopify imposes a 50-product limit per page for collections. However, solutions like Custom Collections Builder, available from $2.99/mo with a 7-day free trial, offer expanded capacity. This app enables you to increase the number of products in your Shopify collections, organize them based on top-rated or best-selling criteria, and filter with advanced conditions.
Note that overwhelming customers with a large number of products in a single collection can be counterproductive. Consider Shopify sub-collections for more effective product grouping, benefiting both user experience and SEO.
2. What are Shopify sub-collections?
Shopify sub-collections are specialized collections that exist within broader collections on a Shopify store. Essentially, they provide a hierarchical structure for organizing and categorizing products. Unlike primary collections, sub-collections allow for more specific product grouping, enabling customers to navigate through a broader category and narrow down their choices based on more defined criteria.
For example, imagine a primary collection labeled "Clothing," and within this collection, there could be sub-collections like "Men's Apparel," "Women's Apparel," and "Accessories."
Each sub-collection would further categorize products, streamlining the customer's shopping experience and making it easier to find specific items within the broader theme. Shopify sub-collections contribute to improved site navigation and enhanced customer satisfaction by offering a more refined product selection process.
3. Can a product exist in multiple Shopify collections simultaneously?
Certainly, a product has the flexibility to belong to multiple Shopify collections concurrently. Shopify places no restrictions on the number of collections a product can join. Feel free to assign a single item to multiple collections on Shopify, allowing for diverse and flexible product categorization.
For instance, a pair of shorts may be featured in both the "Women" and "Summer Sale" collections, demonstrating the versatility of Shopify's organizational capabilities.
Wrap up
In conclusion, mastering the art of adding products to collections on Shopify is pivotal for optimizing your online store's functionality. Whether employing automated or manual methods, the strategic use of collections enhances navigation, boosts marketing campaigns, and opens avenues for cross-selling. With these insights, you can create a smooth and engaging shopping experience for your clients, which will help you succeed in the cutthroat world of online retail.
Moving beyond the mere act of adding products to collections, guaranteeing customer contentment and product accessibility necessitates the enhancement of your website's design. Well-designed Shopify store pages, replete with comprehensive details, compelling visuals, and swift loading speeds, play a pivotal role in customer satisfaction and are imperative for the overall triumph of your store.
EComposer provides the flexibility to craft an array of alluring pages, spanning from conventional layouts to entirely personalized designs. Delve into the remarkable templates offered by EComposer for a complimentary trial – embark on your exploration today!
=================
Add EComposer Next generation page builder Here
Follow Us on Facebook
Join Official Community
Build your highest-converting page in 15 minutes


Blog Categories


0 comments