


How To Create Shopify Cart Attributes? (Common Issues & Solutions)
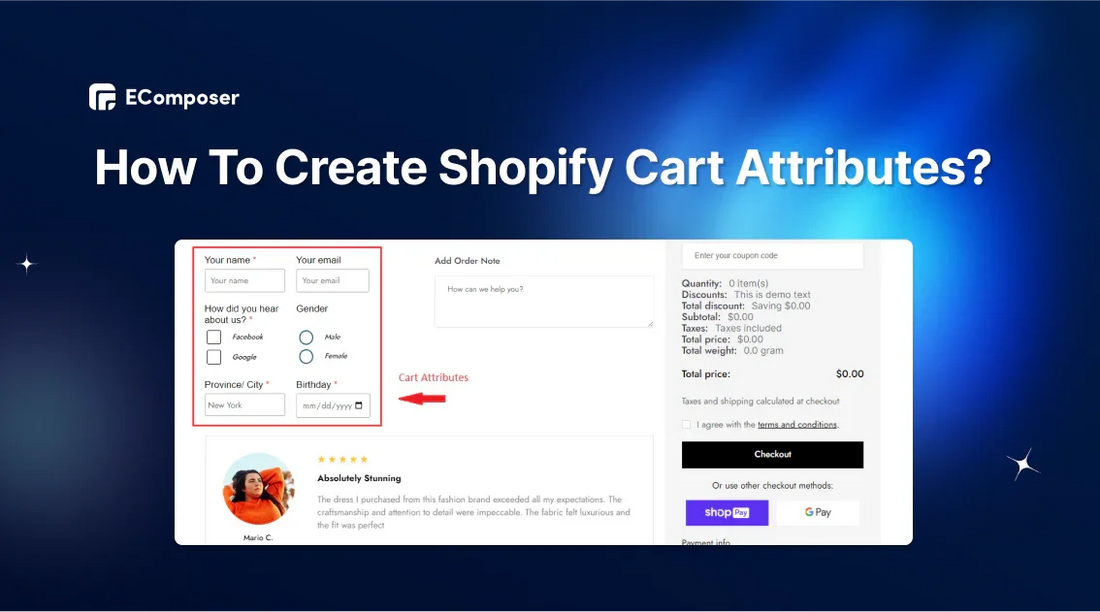
Table Of Contents
Add Shopify cart attributes to your store to get more customer information and improve checkout. Adding useful characteristics can make the shopping experience more personal, get helpful information, and make customers happier.
This guide will give you the guide and tools to make useful cart attributes that meet your business needs, no matter how experienced you are as a seasoned developer or a newbie.
What Are Shopify Cart Attributes And How Do They Work?
Shopify's "cart attributes" are lines of keys and values that let sellers access extra information on the "cart" page. These include personalized messages or specific requests, such as gift wrapping.

Shopify stores a lot of data about each order in its database, such as when the order was made, the amount, and the address where it will be sent. Then, Shopify cart attributes let you add more custom data to an order to make it unique. You might not know this, but cart attributes can still be helpful before ordering.
They are a type of server-side cookie because they are kept on Shopify's server until the customer or their account is closed. This also means you can change how a customer experiences your liquid template based on the items in their cart.
Related posts:
How To Create Shopify Cart Attributes?
This part will walk you through the steps of creating custom cart attributes, both with and without code:
Option 1: Use Third-App To Custom Shopify Cart Attributes
You can use a third-party app like Pify Cart & Customer Attribute to develop and manage custom Shopify cart attributes.
Step 1: Search the Shopify App Store for "Pify Cart & Customer Attribute."

Step 2: After installing, you will be redirected to the Pify Cart dashboard. Then, customize the "Cart Attribute" option by selecting the "Add new" button.

Step 3: After installing the Pify Cart app, open the Shopify admin dashboard and select "Online Store" > "Customize".

Step 4: Select the "App embeds" icon on the left vertical menu bar in the Shopify theme. Then, enable the Pify Cart app's "Cart Attribute" and save.

Step 5: Next, switch the page template to Cart.

Step 6: Click "Add block" in the cart page template section. Then, change to the "App" option and select the Pify Cart app's Cart Attribute.

Step 7: Save the theme.
This block will show the tags set up in the Pify Cart Attribute App for the cart. To work, you need to turn on the Cart Attribute tool in the App embeds area.

An example of adding the Shopify cart attributes is using the Pify Cart app.
Option 2: Create Shopify Cart Attributes Manually
If you don't know how to code, don't worry; scroll up to our one option above.
Shopify does not support this advanced instruction. If you know how to use HTML, CSS, JavaScript, and Liquid, you can use the Shopify UI Elements Generator tool. This handy tool simplifies creating custom user interaction elements like form fields and icons for your Shopify theme.
Here's a quick tutorial:
1.1. Using Shopify UI Elements Generator To Create A Cart Attribute Field
Step 1: Head to the Shopify UI Elements Generator and find the "Cart attribute" section.
Step 2: From the "Type of form field" dropdown, select the desired type of form element for your attribute (e.g., text, select, checkbox).
Step 3: In the "Your form field label" field, enter a clear and concise label for your custom attribute.
Step 4: Make it required (Optional). If you want customers to fill in this field before checkout, check the "Required" box.
Step 5: The "Preview" section will show you a live preview of how your form field will appear on your cart page.

Step 6: Once you are satisfied with the design, copy the generated code from the "Grab your code" section.

1.2. Add A Form Field To Your Theme Code
Step 7: Navigate to your Shopify admin, then go to Online Store > Themes.
Step 8: Locate the theme you want to edit and click Actions > Edit code.

Step 9: In the Sections directory, find cart-template.liquid. If it doesn't exist, look for cart.liquid in the Templates directory.

Step 10: Find the closing </form> tag and paste the code you copied from the Shopify UI Elements Generator above it.
Step 11: To see where the form field appears on your cart page, you can place the code in different sections within the cart.liquid file.
Step 12: Remove novalidate (if necessary). If you've set your form field to be required, remove the novalidate attribute from the opening <form> tag. This attribute prevents form validation, which is essential for required fields.
|
<form action="/cart" method="post" novalidate class="cart"> |
After deleting novalidate:
|
<form action="/cart" method="post" class="cart"> |
The form area is in the "Additional Details" part of the order page in your admin.

An example of the "Additional Details" section on the Order page.
NOTE: You can only add cart characteristics to a cart page. They won't work with cart drawers or popups. To change your cart style, you need to custom CSS by going to the theme editor.
Common Issues & Solutions When You Add Attributes To A Cart On Shopify?
Adding attributes to your Shopify cart can sometimes lead to unexpected issues. This section'll discuss common problems you may encounter and provide effective solutions.
Issue 1: Custom Cart Attribute Not Showing Up In Shopify Order
Shopify recently changed how it handles checkout, removing custom cart features like delivery dates or messages from order pages. But there is a way to fix this!
You can change the attributes of the cart before you go to checkout by adding just a few lines of JavaScript code to your theme's cart.liquid file. This code uses jQuery, which is believed to have already been loaded, to get data from your custom fields and send it to Shopify's cart update API.
|
<input id="pick_del_date" type="text" name="attributes[delivery-date]" value="{{ cart.attributes.delivery-date }}" /> <input id="order_message" type="text" name="attributes[message]" value="{{ cart.attributes.message }}" /> |
|
<script> $(document).ready(function() { $('button.checkout-button').click(function(event) { event.preventDefault(); // Prevent default checkout action // New cart attributes to add var delivery_date = $('input#pick_del_date').val(); var order_message = $('input#order_message').val(); var newAttributes = { 'delivery-date': delivery_date, 'message': order_message }; // AJAX request to update cart attributes $.ajax({ type: 'POST', url: '/cart/update.js', data: { attributes: newAttributes }, dataType: 'json', success: function(response) { console.log('Cart updated successfully', response); // Redirect to checkout after successful update window.location.href = '/checkout'; }, error: function(error) { console.log('Error updating cart', error); // Optionally, handle the error (e.g., display a message to the user) } }); }); }); </script> |
Once the update is successful, the script redirects the user to the checkout page. Make sure you test this method with a fake order to see if your unique traits appear how you want them to.
After you've saved, make an unreal sale. Your custom fields should show up the same way they did before:

Example of custom cart attribute showing up in Shopify Order.
Issue 2: Cart Attributes Function In Development But Not Live
You've encountered a familiar problem when working with Shopify's custom cart attributes: the feature works great in the testing environment but not in the live store. This difference can be annoying, but it's usually caused by things that can be fixed.
Here are some potential causes:
- Theme differences.
- Theme customization error.
- JavaScript errors that might prevent data submission.
- App conflicts installed on your live store are interfering with cart attribute functionality.
- Server-side restrictions or limitations that might affect data processing.
Troubleshooting steps:
- Theme version check. For example, verify that your development and live stores use the same version of the "Dawn" theme.
- Review theme customizations. Carefully review any custom code or modifications you've made to the theme to identify potential conflicts.
- Inspect for errors using your browser's developer tools. Examine the console and network tabs for any JavaScript errors during form submission.
- Check for app interference. Temporarily disable any third-party apps affecting cart attributes and test again.
If you cannot resolve the issue, contact Shopify Support for specialized help.
Issue 3: Cart Attributes Not Showing In Admin Order Backend
If your custom cart attributes are working correctly on the front end (on the cart page) but are not appearing on the admin order backend. Here are some possible causes and solutions:
Theme customization:
- Double-check the Liquid code in your theme's order.liquid file to ensure the cart attributes are rendered and displayed correctly.
- If you're using a custom theme, ensure no conflicts or customizations prevent the cart attributes from being displayed.
Data storage:
- If you use custom meta fields to store cart attribute data, ensure they are properly accessed and displayed in the order details.
- Verify that the Shopify database structure is set up correctly to store and retrieve custom cart attributes.
Order processing issues:
- If you're using webhooks to process orders, ensure they are configured correctly and do not interfere with displaying cart attributes.
- Some order statuses might have specific display settings if the order status affects cart attribute visibility.
Finally, temporarily switch to a different Shopify theme to see if the issue persists.
Tips To Choose Relevant Attributes Shopify Cart Attributes For High Conversion
Here are some ideas for helpful cart features that can help increase sales:
Product-specific attributes:
- Size for clothing, shoes, or other products with varying sizes.
- Color for products with multiple color options.
- Material for products made from different materials.
- Quantity allows customers to specify the desired quantity of each product.
Customer information:
- Gift wrapping offers customers the option to add gift wrapping and a personalized message.
- Delivery instructions allow customers to leave special instructions, such as "Leave at the front door" or "Deliver on weekends."
- Contact information collects customer contact information for future marketing or customer service purposes.
By carefully choosing the right attributes, you can improve the customer experience, obtain useful data for your business, and eventually increase sales.
FAQs
Are There Any Limitations Related To Shopify Cart Attributes?
Yes, adding too many custom cart attributes can impact your store's performance, especially if they are complex or require extensive calculations. Also, some third-party apps or themes might not be fully compatible with custom cart attributes. This could cause mistakes or actions that you wouldn't expect.
Are There Any Limitations To The Number Of Cart Attributes I Can Add?
Yes, there are limitations to the number of cart attributes you can add to your Shopify store. While Shopify doesn't have a strict limit on the number of attributes you can create, excessive use can have some potential drawbacks:
- Performance impact. Adding too many custom cart attributes can slow down your store's performance, especially if they are complex or require extensive calculations.
- Checkout page complexity. Overloading your cart page with numerous attributes can make it cluttered and difficult for customers to navigate.
- Data Storage. Storing a large amount of custom cart attribute data can increase your store's storage requirements.
Limiting the number of custom cart attributes to those essential for your business and providing value to your customers is generally recommended. Focus on attributes directly impacting the customer experience, such as product options, delivery information, or gift messages.
What If Cart Attributes Are Causing Performance Issues?
If you suspect that your custom cart attributes are causing performance issues, here are some steps you can take to address them:
- Simplify complex attributes or remove unnecessary ones to reduce processing time.
- Review your Liquid code and ensure it's efficient and optimized for performance.
- Limit the number of options available for each attribute to reduce processing time.
If cart attributes significantly impact performance, explore alternative methods of collecting customer data, such as custom fields or separate forms.
Read more:
- How to Build Shopify Shopping Cart Page
- How to add Shopify Ajax Cart on your store
- Guide to Shopify "Add to Cart" Links
Key Takeaway
Custom cart attributes are a great way to make your Shopify store more useful and improve customer experience. By following the instructions and solving tips in this blog, you should be able to create and use custom features that work well for your business.
For more in-depth information and tutorials on Shopify development, visit our blog.
Build your highest-converting page in 15 minutes


Blog Categories


0 comments