


Edit Checkout Page Shopify: Proven Tactics to Boost Your Sales
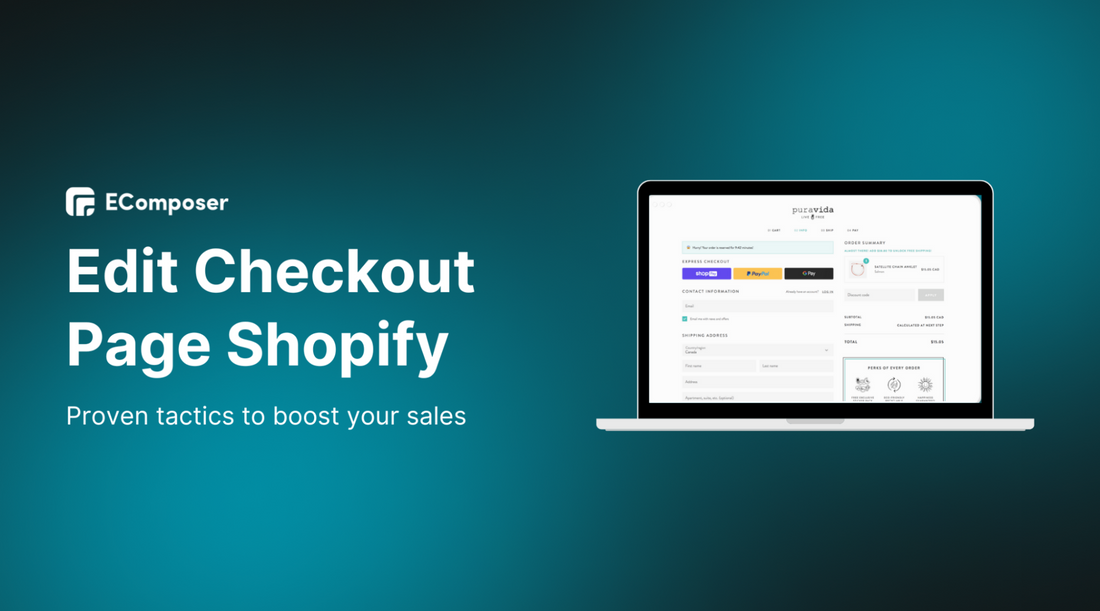
Table Of Contents
One of the quickest methods of increasing your sales is to edit your Shopify checkout page. Custom-designed to match your brand with a consistent design, fewer steps, trust signals, and upsells or custom features built in, you can decrease cart abandonment and increase conversion rates.
Editing the Checkout Page on Shopify to boost sales is a game-changer for trust, conversions, and your bottom line. The last point on the customer journey is your checkout, and the slightest detail can turn a sale and a cart abandonment.
This isn’t about learning to code or wrestling with complex settings. We’ll walk you through beginner-friendly, code-free ways to customize your checkout branding, layout, and functionality, plus powerful app integrations and advanced tricks for Shopify Plus users. You’ll also discover 15+ proven optimization strategies (and gorgeous real-world examples) to transform your checkout into a high-converting, customer-approved finish line.
Why edit your Shopify Checkout Page?
A well-branded checkout is essential for building trust and reducing drop-offs. Consistency in design reassures shoppers that they’re still in your store—not on a random payment portal. Even small UX changes can make a measurable difference to conversion rates and revenue.
-
Consistency builds trust: Matching fonts, colors, and logos helps customers feel secure.
-
Small UX tweaks drive results: Adjusting button colors, adding trust badges, or making the order summary more visible can lift checkout conversions by 1–2%, translating to thousands in extra revenue annually.
-
No-code improvements available: Many optimizations can be done directly in Shopify admin or with trusted apps—no developer needed.
-
Platform limitations:
- Basic & Standard Shopify → Branding customization (colors, fonts, logos) only.
- Shopify Plus → Full access to checkout.liquid, enabling advanced edits like rearranging fields and adding upsells.
- Practical takeaway: To build a reliable, conversion-optimized checkout, you’ll either need third-party apps or upgrade to Shopify Plus.
Basic Checkout Page Customizations Right in Your Shopify Admin
Shopify’s built-in admin tools let you easily adjust form fields, branding, colors, fonts, and logo on your checkout page without coding to improve user experience and align with your brand.
1. Step-by-Step Guide to Accessing the Checkout Editor

Before making any changes, you’ll need to know where to find Shopify’s checkout customization tools:
- From your Shopify admin, go to Settings → Checkout.
- In the Configurations section, click Customize next to the setup you want to work on.
- You’ll be taken to the checkout and accounts editor, where all your customization options live.
That’s it, you’re now in the right place to start editing.
2. Customize Branding

Branding your checkout is about creating a seamless experience from homepage to payment confirmation. When your checkout reflects your store’s style, customers feel more confident completing their order.
Add a Logo and Adjust Its Position and Size
- In the Configurations section, click Customize next to the setup you want to edit.
- In the checkout editor, click the gear icon to open the Settings sidebar.
- Under Logo, click Add image.
- Either upload a new file via Add images or select one from your media library.
- Adjust the position and size to fit your layout.
- Click Save.
Change Button, Link, and Background Colors
- In the Settings sidebar, go to Colors.
- Click the color box next to Accents (includes links), Buttons, or Errors to open the color picker.
- Pick a color or a hex code.
- In the Background 2 section, click Background color to set a background tone for specific areas.
- Click Save.
Add a Background Image to the Main Area or Order Summary
- In Background 1, click Background image → Add image to customize the main area.
- In Background 2, repeat the process for the order summary area.
- You can choose an existing file or upload one from your PC.
- Click Save.
Choose Fonts for Titles and Body Text
- In Typography, use the drop-down menus under Headings and Body to pick your preferred fonts.
- Click Save.
3. Customize Layout

Your checkout layout has a direct impact on speed, usability, and overall conversion rates. Shopify gives you two main options: One-Page Checkout and Three-Page (Multi-Page) Checkout.
One-Page Checkout
This layout displays all steps—contact, shipping, payment, and order review—on a single scrolling page.
Pros:
- Reduced Friction & Faster Checkout: Fewer clicks and no extra page loads create a smoother experience, especially for mobile users.
- Higher Conversion Rates: Studies and merchant data show fewer abandoned carts when the process is simplified.
- Encourages Express Checkout: Makes one-click options like Shop Pay even more prominent.
- Visual Transparency: All costs are visible upfront, preventing last-minute surprises.
Cons:
- Information Overload: Can feel overwhelming for large or complex orders.
- Less Detailed Analytics: Harder to track exactly where users drop off.
- Potentially Slower Initial Load: Heavier content on a single page may load slower than split steps.
- Limited Space for Extras: Adding policies or badges without clutter can be tricky.
Three-Page (Multi-Page) Checkout
This layout breaks checkout into Information → Shipping → Payment pages.
Pros:
- Structured and Less Overwhelming: Smaller steps feel easier to process.
- Better for Complex Orders: Works well for high-value or highly customized purchases.
- More Granular Analytics: See exactly where customers abandon the process.
- Focused Experience: Each page has one primary task.
Cons:
- More Friction: Each extra page load is a chance to lose a customer.
- Higher Abandonment Risk: Sequential steps may feel slow or drawn out.
- More Clicks: Adds steps for customers who want to check out quickly.
Conclusion: Which should you choose?
For most stores, especially on Basic, Shopify, or Advanced plans, the One-Page Checkout is the default and Shopify’s recommended choice. It’s mobile-optimized, lightning fast, and designed using Shopify’s vast checkout performance data.
How to Switch Layouts
- Go to Settings → Checkout in your Shopify admin.
- In Configurations, click Customize next to the one you want to edit.
- In the checkout editor, click the gear icon to open the Settings sidebar.
- Under the Checkout layout, choose One-page or Three-page checkout.
- Click Save.
4. Customize Other Settings
Small setting changes can significantly improve customer convenience and checkout clarity.
Customer Contact Options:
- Go to Settings → Checkout.
- In Customer contact method, choose Phone number or email, or Email only.
- Click Save.
Customer Information Form Settings:
- From Settings → Checkout, go to Customer information.
- Decide whether to hide or require optional fields like Full name, Company name, Address line 2, or Shipping address phone number.
- Click Save.
Tip Options:
- From Settings → Checkout, go to Tipping.
- Turn on or off tipping at checkout.
- Click Save.
Thank You Page & Order Status Page Customization:
- Open the checkout editor via Settings → Checkout → Customize.
- Use the page selector to switch between Thank you and Order status.
- Adjust branding and layout—logo, typography, colors, and general styling—via the Settings sidebar.
- For the Order Status page, optionally toggle the Buy Again button on or off.
- Click Save.
Edit Checkout Page with Shopify Apps
Using Shopify apps allows you to add advanced customization options, like upsells, trust badges, discounts,... without coding. Tools like Checkout Blocks, UpsellPlus,... make it easier to enhance customer experience and boost conversions when you edit the Shopify Checkout Page.
Today, Shopify has been moving away from the old checkout.liquid customization method (available only to Plus users) toward a more modern, secure, and Checkout Extensibility framework. Instead of editing raw code, store owners can now enhance checkout using apps and extensions. This system is easier to upgrade, more stable, and ensures your checkout remains compatible with Shopify’s latest security and performance updates.
Why Use Apps?
Although Shopify has an integrated checkout editor that allows you to customize your branding, layout, and some settings, it can not unlock all of the features you may require. Apps fill that void, enabling you to introduce new functionality, streamline the workflow to meet the needs of a certain customer category, and eventually boost average order value (AOV) and conversion rates.
Popular Types of Checkout Apps and What They Can Do
1. Add Custom Fields
Want to collect special delivery instructions, gift messages, or customer preferences? Checkout apps can insert extra form fields directly into your checkout—without coding—so you get the information you need to fulfill orders accurately.
2. Upsell & Cross-Sell at Checkout
Recommend complementary products, bundles, or add-ons strategically immediately before payment. This makes the checkout one more chance to generate revenue rather than a fixed form. Example: When a person is buying dog food, recommend a chew toy or treat.
3. Payment & Shipping Rules
Control which payment or shipping methods appear based on specific conditions, like:
- Cart value (offer free express shipping above $100)
- Customer location (hide certain methods for specific regions)
- Product tags (restrict shipping for hazardous goods)
4. Add Trust Badges & Social Proof
Create confidence by using security SSL icons, money-back guarantees, customer reviews, or the number of transactions made within the immediate past. Even a few elements of trust within the system will alleviate last-minute hesitation to a considerable extent.
5. Create Discount Codes and Gifts
Encourage order completion with checkout-triggered incentives like automatic discounts, free samples, or bonus items when customers meet a purchase threshold.
Some outstanding apps may be helpful for you.
|
App name |
Highligt features |
Free version |
Pricing |
|
Yes |
Free plan Build your plan: $25/month Platform One: $584/month |
|
|
Yes |
Free |
|
|
Yes |
Checkout Premium: $99/month |
|
|
Free trial |
Basic - Advanced: $49/month Shopify Plus: $119/month Shopify Plus Scale: $199/month |
|
|
Yes |
Business plan: $50/month |
Advanced Checkout Page Customization for Shopify Plus
Shopify Plus provides more powerful customization features, such as Shopify Scripts and Checkout Branding API, to provide a unique checkout experience. These allow businesses to maximize conversions through customized fields, upsells, and exclusive design features that are not part of regular Shopify plans.
If you’re running on Shopify Plus, congratulations, you’re basically holding the “golden key” to Shopify’s checkout. While regular plans give you plenty of customization options, Plus merchants get access to tools that allow for deeper, more powerful tweaks designed for large-scale, high-volume businesses.
Shopify Scripts (soon to be replaced by Shopify Functions)
Scripts are like tiny pieces of code that run inside your checkout, quietly working their magic without requiring your customer to lift a finger. With them, you can:
- Automatically apply discounts for VIPs or specific customer tags — no more “Hey, you forgot to enter the code!” emails.
- Customize shipping methods and rates based on cart contents, customer location, or order value.
- Change names and hide payment gateways to streamline checkout and guide customers toward preferred payment methods.
Heads-up: Shopify Scripts are transitioning to Shopify Functions - a faster, more secure system that keeps the flexibility while future-proofing your store.
Checkout Branding API
If the standard checkout editor is a coloring book, the Checkout Branding API is a full art studio. This tool unlocks customization capabilities beyond what most merchants can do in the admin, such as:
- Using custom fonts to match your brand identity.
- Changing favicons so customers see your brand logo in their browser tab instead of Shopify’s default.
- Adjusting visual elements that make your checkout truly one-of-a-kind.
A Note on Technical Skills
These features are powerful, but with great power comes great… likelihood of accidentally breaking something if you’re not careful. Many Plus merchants hire a Shopify developer or agency to handle these customizations, ensuring everything works flawlessly without slowing down checkout.
15+ Checkout Page Optimization Strategies to "Explode" Sales
You must utilize strategies like being transparent about all costs, simplifying the checkout form, showcasing trust signals,... to reduce friction, boost conversions at checkout, encourage faster purchase decisions, and higher order values.
A beautiful checkout page isn’t enough; it needs to convert. Below are 15+ proven strategies to reduce abandonment, boost average order value, and make your customers feel confident about hitting that “Place Order” button.
Offer Guest Checkout

- Why it matters: Forcing account creation is one of the fastest ways to drive a shopper away. Many are just testing the waters, and adding a barrier increases friction.
- Pro tip: Allow them to check out as guests, then offer to create an account after purchase (auto-filling their details) so you still get them into your database without killing the conversion.
Be Transparent About All Costs
- Why it matters: Sticker shock, especially from hidden shipping or tax fees, is a top cause of abandonment.
- How to apply: Show all costs upfront in the cart or checkout summary. If shipping varies, offer a quick estimator before they commit. Transparency builds trust.
Simplify the Checkout Form

- Why it matters: Every extra field is another chance for a customer to rethink the purchase.
- How to apply: Request only basic information such as full name, address, email, and payment details. Make optional fields optional (and think about not displaying them at all).
Provide a Checkout Progress Indicator
- Why it matters: A progress bar turns the checkout into a predictable journey, reducing uncertainty.
- How to apply: Even a subtle “Step 2 of 3” can reassure shoppers that they’re almost done and keep them moving forward.
Optimize for Mobile
- Why it matters: Mobile users account for the majority of e-commerce traffic.
- How to apply: Large, tappable buttons, responsive forms, and very little scrolling. Experiment on a variety of devices so that nothing breaks.
Showcase Trust Signals

- Why it matters: Shoppers are cautious about sharing payment info.
- How to apply: Display SSL certificates, secure payment icons (Visa, PayPal, Shop Pay), and positive reviews or testimonials near the payment button for reassurance.
Offer Multiple Payment Options
- Why it matters: Payment flexibility removes friction and accommodates customer preferences.
- How to apply: Include credit cards, popular digital wallets (Apple Pay, Google Pay), and “buy now, pay later” services like Klarna or Affirm.
Use Smart Form Filling
- Why it matters: Speed is key; the faster a customer can complete checkout, the lower the dropout rate.
- How to apply: Enable address autocomplete, pre-fill fields for returning customers, and validate entries in real time to prevent errors.
Offer Live Chat Support

- Why it matters: Unanswered questions lead to abandoned carts.
- How to apply: Provide live chat (or even AI chat) right on the checkout page so shoppers never need to leave to get help.
Include a Clear and Transparent Return Policy
- Why it matters: Customers fear buyer’s remorse.
- How to apply: Summarize your return/refund policy on the checkout page — concise, friendly, and easy to read.
Create a Sense of Urgency
- Why it matters: Scarcity and time limits tap into FOMO (fear of missing out).
- How to apply: Use subtle urgency, e.g., “Just 5 left in stock” or “Offer ends in 30 minutes”, without overdoing it.
Implement Upsells or Cross-sells
- Why it matters: Checkout is prime time to boost average order value.
- How to apply: Suggest relevant add-ons that complement the cart items, but keep it subtle so you don’t distract from completing the purchase. For example, EcomRise offers a cart upsell feature. When customers click checkout from the cart page, an upsell pop-up appears with tailored product suggestions, helping you maximize revenue without interrupting the shopping flow.
Offer Free Shipping

- Why it matters: Shipping fees are the #1 conversion killer.
- How to apply: Offer free shipping outright, or set a minimum order threshold and clearly display the remaining amount needed to qualify.
Use Exit-Intent Popups
- Why it matters: Some customers will always hover over the close button, but you can still win them back.
- How to apply: Trigger a pop-up with a small discount or freebie offer just as they’re about to leave.
Optimize Page Speed
- Why it matters: Every second of load time increases abandonment rates.
- How to apply: Compress images, use a CDN, and eliminate unnecessary scripts. Test your checkout speed with tools like Google PageSpeed Insights.
Some beautiful and high-converting Shopify checkout page templates
1. Tilly Pig
The design of Tilly Pig is created to appeal to both parents and children and provides a friendly and accessible online experience. It provides a clear, usable, and simplified purchasing experience in a bright, usable, and relaxing Languid Lavender palette on custom illustrations.

2. Sprokt
A one-page checkout, this one is dark and minimalistic with heavy typography. The page will be split into two categories: the left side contact and delivery details, and the right side product summary and payment status. It is a prototype or a very personalized template since it does not follow the normal Shopify checkout design.

3. Bellroy
It is a 3-page Bellroy checkout, which is a multi-page checkout with a clean and minimalistic design. The page is also properly organized into three distinct steps: order review, delivery address, and method of payment, with its own panel. A clear order summary and orange Complete Order button give a transparent experience on the right side of the page.

4. Novea Shop
This is a one-page modern checkout form for Novea Shop. It takes three steps to get the contact information, the method of delivery, and the method of payment, which is more visually represented on the left-hand side, and a graphical representation of a credit card and a complete overview of the order are clearly presented on the right-hand side. The simplicity of the icons utilized, the bright blue color that symbolizes the buttons, and the availability of a clear total price provide the user with a powerful and focused experience.

Frequently Asked Questions
1. Can I edit the Shopify checkout page without any apps?
Yes, it is possible to directly make changes in your Shopify administration, i.e., changing colors, fonts, and the position of the logo. Shopify Plus or custom code is, however, necessary to do more advanced customization, such as adding new fields.
2. Why can’t I rearrange fields or add new ones?
Shopify restricts checkout field changes for security and payment compliance reasons. Only Shopify Plus merchants can fully customize checkout fields through Checkout Extensibility.
3. Does this work on all Shopify themes?
Basic style and branding updates apply across all themes. However, some theme-specific design elements might display differently during checkout.
4. Will these changes affect mobile checkout?
Any design and branding changes you do will be reflected on the desktop and mobile checkout experience, yes. Shopify converts layouts automatically into a mobile format.
5. Can I remove the “Powered by Shopify” text?
Yes. You can remove or replace the “Powered by Shopify” text from your theme language settings without needing an app.
Final Thought
The idea behind Edit Checkout Page Shopify is to create a smooth, trust-building customer experience that transforms the wavering consumer into a paying customer. You can minimize cart abandonment and maximize conversions by using layout customization, persuasive content, enhanced clarity, and by using apps. It should always be about speed, security, and transparency to assure buyers at the final stage. Use established UX strategies and in-the-field testing to improve your checkout process over time.
Build your highest-converting page in 15 minutes


Blog Categories


0 comments