Shopify Website Builder Tutorial: How to Create a Website?

Table Of Contents
Shopify is a self-made e-commerce website tool that is not too strange for businesses. However, not everyone can easily use it for the first time.
In this blog, we give you a complete step-by-step guide on creating a website on Shopify and show you how to customize your website simply and beautifully.
Before going into the details, make sure you have built an eCommerce store on Shopify!
What is Shopify?
Shopify is an e-commerce platform that allows you to create an online sales website in the Cloud SaaS model where you can create your own online sales website with full features such as product posting, shopping cart, checkout accounting, inventory management, or social networking.
In particular, Shopify helps you do all the above tasks quickly even if you are a person who does not know about websites or programming. All you need is simply a computer with an internet connection.
Pros and Cons of Shopify

Pros
- Intuitive interface, easy to use
Shopify is widely known as a very user-friendly platform. Most businesses, when deciding to enter the e-commerce market, have for themselves a goal of making their website up and running as soon as possible. You won't need to go through a rigorous process to customize and launch your business online as Shopify lets you customize your website live and publish it anytime.
- Variety of Themes
Theme plays a very important role in whether the store has a chance to retain many customers or not. The more visitors you have, the higher your potential customer conversion rate. Shopify provides you with functional themes that fit the needs of the majority of businesses.
- Optimizing for marketing activities
You need to promote your online stores aggressively to attract more customers. Creating landing pages and synchronizing marketing efforts with your store is simple with Shopify. To attract more consumers, you can also create limited-time deals, shopping credits, and coupons. In addition, the site gives you access to all the resources you need to succeed.
- Hosting and Security
Shopify is a serverless auto-hosting platform. You will not need to incur any additional costs for data storage and avoid data loss. Shopify guarantees that all third-party apps are free of bugs and have a fast sync time with your shop.
- Professional support team
In the process of building a Shopify website, businesses cannot avoid difficulties. With that in mind, Shopify has created a 24/7 support team that can assist you at any time of the day. You can reach them via email, live chat, or their hotline. There are four hotlines with each assigned to a different area. Additionally, Shopify has a community where users interact with each other and get answers to their challenges and a FAQ database that you can consult at any time.
Cons
- Relatively high transaction costs
Shopify offers three premium options with monthly costs of $29, $79, and $299 for each. Shopify free trial period is 33 days long. You can select any paid plan after the free sample time has ended. The base plan's features are so minimal that they hardly satisfy your requirements as a beginner. This implies that to obtain the features you require, you must purchase the more expensive package ($79 per month). This is a lot for a company that hasn't yet achieved a financial balance.
- Limited Customization
Unlike other platforms that use PHP for theme customization, Shopify uses a Liquid setup. Not many web designers are familiar with this software. As a result, many users may have difficulty in customizing their theme and they have to spend hours learning how to use the Liquid setup.
- No Email Hosting
Email storage is not supported by Shopify. As a result, you can simply start your online store using the web hosting choice. However, you can use a third-party email archiving extension to forward customer messages straight to your email account. You can rapidly contact your customers in this manner.
- Difficulty in wanting to change the platform
Shopify is not a perfect fit outside of its platform because it has a lock feature that prevents you from taking your store elsewhere. If you decide to leave Shopify, you can just take the CSV report with you. Therefore, you must think carefully before launching your store.
Which website should use Shopify?
If you don't know what to sell, feel free to choose any product you like as Shopify is an extremely flexible platform that helps you create countless types of websites for all different industries. The majority of stores on Shopify come from the following industries:
- - Fashion and accessories
- - Cosmetics and jewelry
- - Houseware
- - Electronic device
- - Food and drink
We reiterate that Shopify is a platform that is not limited to any industry. The above are just the most popular industries, so you are free to choose your business as long as it aligns with Shopify's terms.
How to Create a Website on Shopify
Step 1: Create a Shopify account
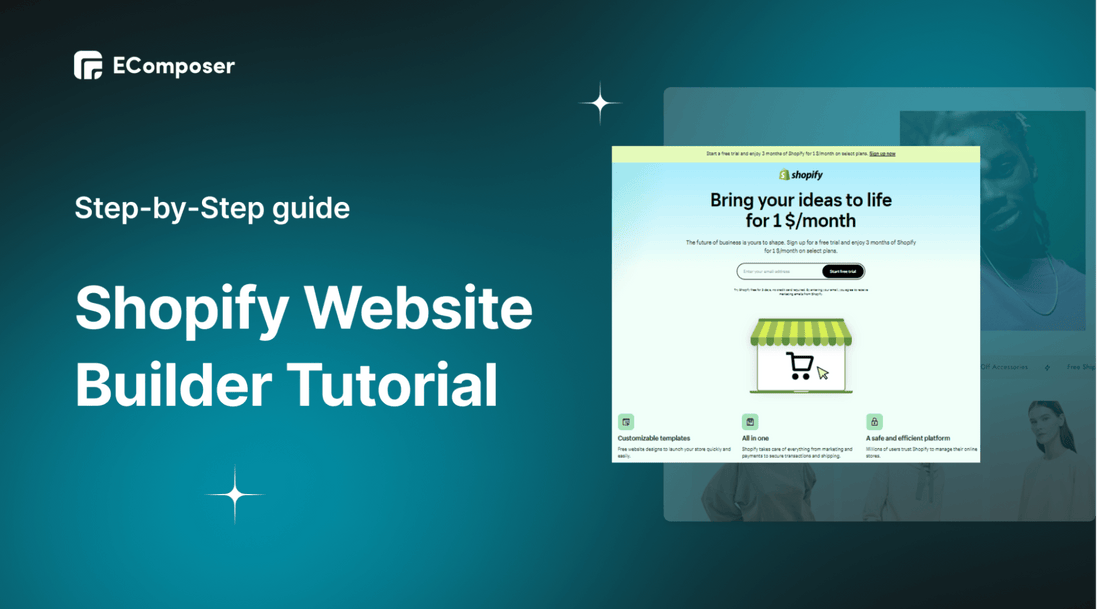
In the first step, you need to sign up for Shopify now!
You will get a free Shopify trial for $1. When you sign up, you will be asked to fill in some details about yourself. You'll need to provide your store name, address, and zip code.

Step 2: Learn how to use the Shopify admin screen
On the admin screen, you'll be able to add products, set up payments, shipping and analytics, choose a theme and customize your store. Most of the action in this Shopify tutorial takes place on this screen. Although it's a bit of a choice and action, once you get it right, your store will run smoothly in the long run.

Step 3: Choose and customize your theme
Shopify themes allow you to give your shop a unique appearance and a sense of wonder that not all Shopify businesses have. You'll notice that the default theme on your dashboard Themes tab can be changed by selecting a different free or purchased theme.
However, Shopify only offers a few simple themes by default so you can create pages with basic functionality. For greater customization and more advanced functionalities, we recommend using drag & drop page builder app like EComposer - Shopify Page Builder. You can see detailed guide on the next section: Customize your website functionality with EComposer.

Step 4: Add the product
Once you know how to use the Shopify admin screen, you can start adding the first products you plan to sell to your Shopify online store.
Go to Product and click Add product
This makes it easy for customers to find your product. You should remember the website SEO tips and edits carefully.
Read more about the product page at How to Create a High-Converting Shopify Product Page

Step 5: Configure nitty-gritty settings (shipping, payments, etc.)
Before your store can go live, there are a few other steps you need to take to get your store ready.

There are a few key parts you need to keep in mind:
- Store details: You can adjust all the general information about your business here
- Billings: You can make a variety of payment methods available to your clients using Shopify.
- Checkout: Your customers accept orders through the secure Shopify checkout page. The appearance and layout of the checkout page can be modified in the theme settings including One-page Checkout
- Shipping and delivery: On the Shipping and delivery tab of your Shopify Admin, the shipping zone and prices applicable to the areas and nations you send to will be displayed.
- Taxes and duties: Most nations' rules mandate that you gather tax from product purchases and send it to the government. By managing the majority of typical tax calculations across numerous tax countries, Shopify makes this simple for you.
- Locations: Locations help in inventory management, request fulfillment, and product sales. Retail stores, storage facilities, drop shippers, and other locations with anything to do with inventory, including inventory management applications, can serve as locations for your shop.
Find out more information here
Step 6: Check out your store
After completing the designs for your store, you need to check all the parts before you go live your Shopify online store. Make sure the checkout process and settings for order processing, inventory, shipping, notifications, and taxes are working properly by clicking the preview button and visiting your store as a customer.

Step 7: Customize a domain name
Now you're just one step away from getting your store up and running – adding your domain to Shopify. Like with any website, you will need a domain name (your website address) so that visitors and search engines can find you. Here too, you will find the solution available from Shopify.
Shopify offers a reservation domain, www.your-store-name.myshopify.com, to help you set up your business. However, if you want your business to be easier to remember for consumers or perform better in searches, you can choose a more personalized URL like www.your-store-name.com with how to buy a domain from Shopify or use a third-party app.
Go to Settings, select Domain, and start editing the domain to your liking

Step 8: Pick a Plan and Make Your Store Public
Once you're ready to go live your store, you need to choose a Shopify plan that's right for you.
- Basic Shopify – $39/month. Start here if you're creating a new business or are just finding your feet.
- Shopify – $105/month. Choose this plan if you're looking for more advanced features suited to an established business.
- Shopify Advanced – $399/month. This plan is ideal for fast-growing businesses with at least a few employees.
Then click Themes under Online Store and click Disable Passwords.

Now, customers can see your Shopify online store.
Customize your website functionality with EComposer
Your website is in active state, customers can already access your sales page. At this point, what you need to do is upgrade your store so that it looks professional and convenient. Shopify can help you create a website quickly, but it still has some limitations in terms of features and themes.
The ultimate solution for building professional and high-conversion online stores that we would like to recommend to you is EComposer - Page Builder. Whether you're looking to create a homepage, product page, about us page or any other type of page, EComposer can help.
With 200+ sections, 100+ page templates, 90+ customizable components, and 50+ extensions, EComposer is one of the best page builder apps available on Shopify. Now you can easily build your store without worrying about coding or design skills.
Let's install EComposer - Shopify Page Builder and go into details to see what this app can do for you!

Create pages
As mentioned above, EComposer helps you create any page you need.
Shopify landing pages are frequently made using specialty landing page builders to turn users into leads for a specific marketing or lead-nurturing endeavor. These sites will have distinct navigational features and components than the other pages of your website. They serve a singular conversion-related function instead.
- Home Page:
Shopify homepage is the first page when users visit your website. When a user visits a website, the homepage's function is to direct them to other sites by way of links, categories, or the site's search box. Visitors will then be directed to the landing sites from there.
- Product page:
Shopify Product Page is a page where the product is displayed with detailed information. Customers can learn about the special features and competitive benefits of the company's products on this website. You can discover all the information you need about the company's products on the product website.
- Collection page:
Shopify collection page is a page of an eCommerce website, where the products are categories within a common point. These products are browsed according to customers’ needs.
- Blog list:
Shopify blog page is a blog collection where all the articles on many topics related to your products and business are gathered together. When you go to the Blog page, you will see the latest article at the top with detailed information such as the title of the article, the date of writing, and the author's name.
- Blog posts:
Shopify blog posts are considered a marketing tactic designed to inform your readers and increase your organization's visibility; thereby motivating readers to buy your products or services.
- FAQ page:
Shopify FAQ stands for Frequently asked Questions. It refers to a page on your website where customers can find quick answers to frequently asked issues. The goal is to make the responses succinct and clear so that visitors can locate information fast.
- Other Standard pages:
EComposer also provides you with custom pages in addition to the page list. The typical sites include those for coming soon, about us, contact us, refund, privacy, FAQ, store locator, and any custom pages you can think of. , searches, refund policies, about us, and others. EComposer's page designs make it simple to create and modify Shopify pages for your Shopify store.
Read more:
- How to create a unique Shopify Coming Soon Page
- How to create and customize Shopify Footer
- 15 Inspirational Shopify About Us Page Templates
- 12 Amazing Shopify Contact Us Page Templates
In addition to the above pages, eComposer supports creating custom pages according to your needs. See details at How To Create A Custom Page Template In Shopify
Enable powerful extensions
When using one of EComposer's three paid plans, you will own a unique "treasure" of extensions. As a result, your Shopify online store will become more professional, attract more customers and increase the number of orders.
Let's take a look at some outstanding extensions that are used by many businesses below!
Cross-selling products often appears as a recommendation under the product which the customer wants to buy and it is one of the effective sales methods, attracting many potential customers.
Product Quickview is not a strange feature for both sellers and buyers. It is a landing page that allows your customers to have an overview of the products without going to the details page. This feature makes it possible for customers to view product summaries in a cascading or pop-up window.
Table of Contents (TOC) is a fairly popular and commonly used feature in blog posts. It allows readers to browse through the main headings of the blog post, so they can skip over the unimportant points and focus on the parts they care about. The TOC is really useful and saves customers time by reading unnecessary content.
Announcement bar is a bar that usually appears at the top of the website. Some people call it a header bar or notification bar. You can easily adjust the content for different campaigns. Usually, it provides information on sale of programs, vouchers, and important news for customers.
- Back in Stock Notifications:
Back In Stock Notification is used as restock messages to customers who recently expressed interest in an item that was out-of-stock, they are informed when it becomes available again. Customers are encouraged to return and complete the transaction as a result.
In addition, EComposer also has many more extensions to help you increase sales, decorate your store beautifully, and so on. Explore all extensions here.
Bottom line
Learning how to use Shopify can feel overwhelming at first, so take it one step at a time. We hope you had a good experience and understanding of how to build a Shopify website through the Shopify Website Builder Tutorial: Step-by-Step guide for beginners.
If you want more information or want to learn more about EComposer, follow us at ecomposer.io or click on the message icon located in the right corner of the screen.
=================


0 comments